Aeropods
3d printed aerodynamic pods for Krieger and Mixuko.
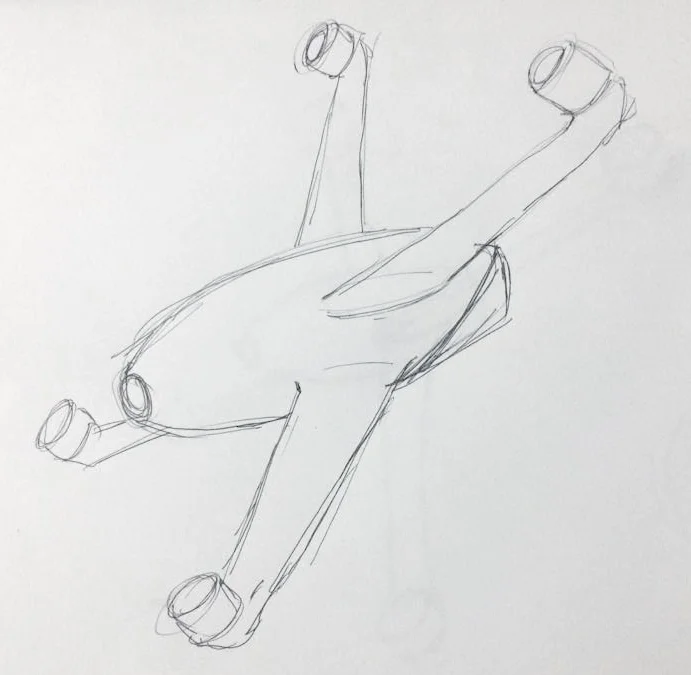
Last July a fellow quad designer asked me if I wanted to collaborate on something. This is a guy who has created quads with manufacturing techniques beyond your typical CNC'd flat carbon sheets, so I sent a drawing of my pipe dream, a fully aero quad. Sadly the collaboration went nowhere and the pipe dream stayed that, a pipe dream.
At the same time, Ryan Gury of DRL fame was getting after me to learn Solidworks. I knew my Sketchup to Illustrator workflow was totally lame but it did everything I wanted and I’m really fast at it, so I kept resisting. However, Sketchup and Illustrator can’t create flowing 3d shapes, so I finally relented and buckled down for three weeks of self imposed SW camp. (Thanks to Randy Slavin of NYCDFF fame for suggesting lynda.com tutorials, highly recommended.)
After a long and frustrating three weeks I started to get the hang of SW, and was able to complete project #1, which will hopefully be coming soon. Then while attending the WRAM show, Frank Costello of Safety Third Racing gave me a little 3d printed prop wrench, which was much stronger than any 3d printed part I’d ever seen (obviously I haven’t followed the development of 3d printing very closely). I found out that Assembyl, a Staten Island shop that had made some Tweaker accessories printed the wrench, and this got the juices flowing.

See, the aero quad was a pipe dream because: a, I didn’t know how to render it, and b, we normally don’t produce things in the miniquad world in quantities that justify an expensive mold. Well, now I could render it, and perhaps 3d printing could produce a pod strong enough.
The first pod I tried was a Mixuko pod. It turned out half decent and the boys got some printed up right away. However, there was one big problem: I was repurposing the standoff holes on the Mixuko plate, and they’re really close to the FC stack. I had to draw the shell to incorporate the mounting flanges, and that complicated the shape enough to make SW refuse to shell it any thicker than 1.9mm. If it wasn’t strong enough there was no way I could increase its thickness.

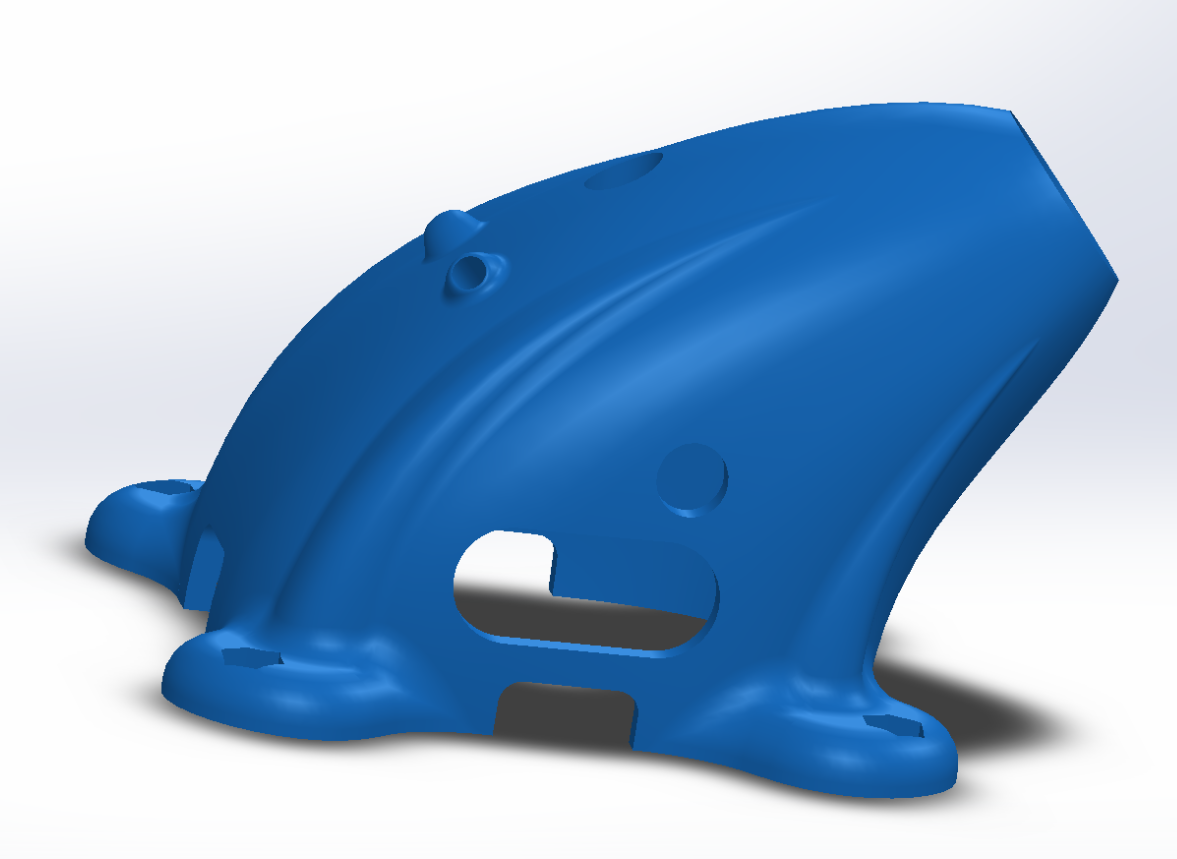
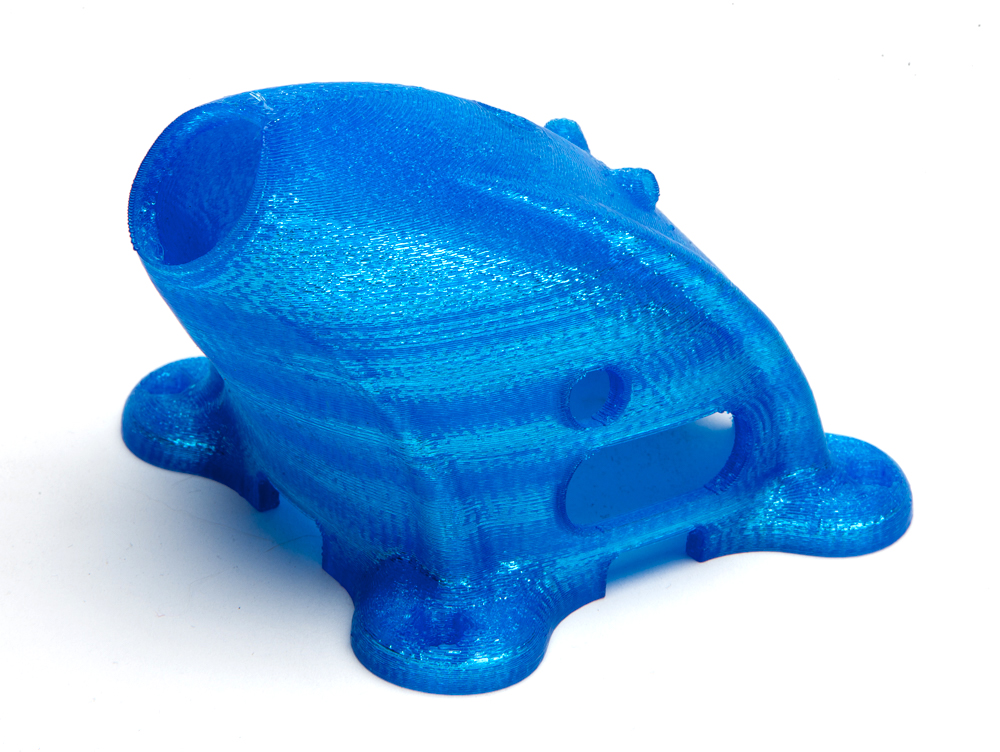
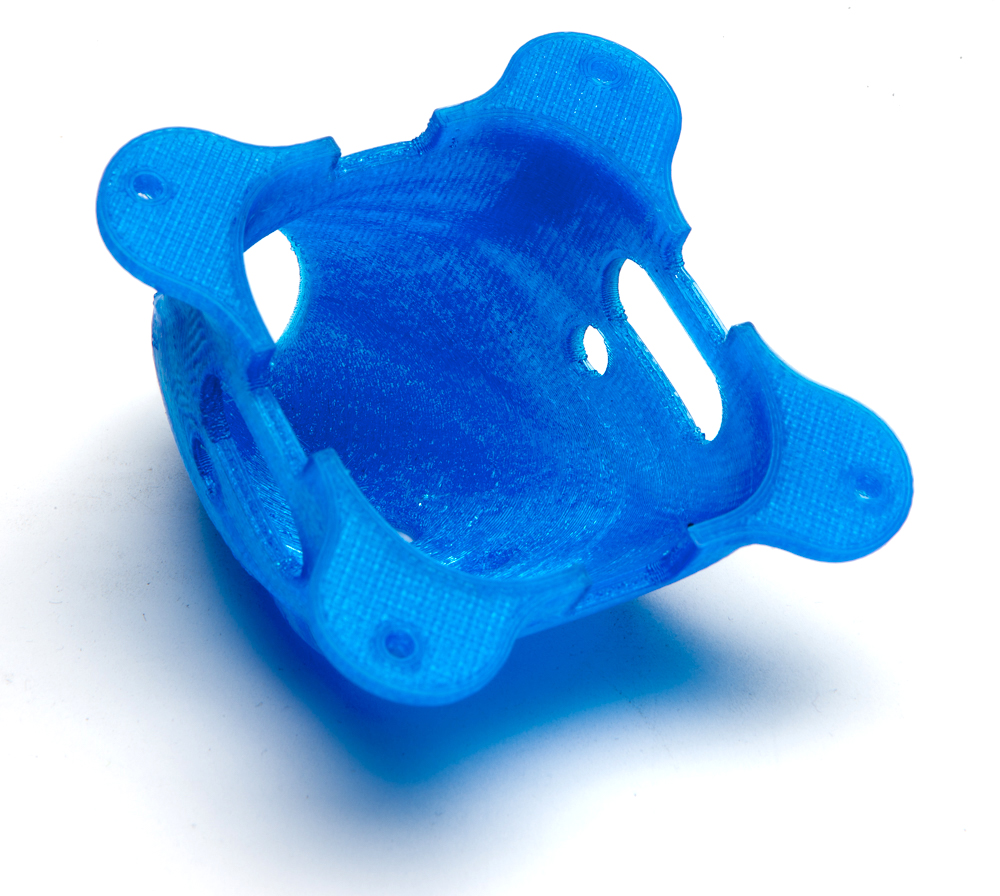
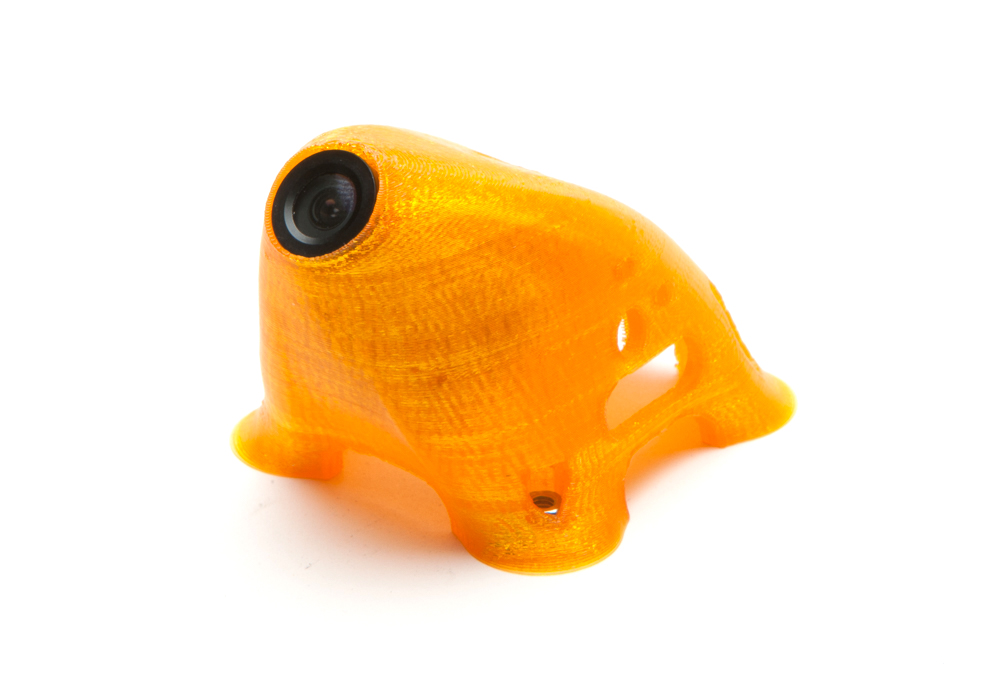
Next I tried Krieger, which turned out to be a whole lot easier. The mounting points on Krieger are farther from the central pod, so that the mounting tabs could be simple extruded shapes that intersected with the pod. That let me create a very simple pod shape that could be shelled at any thickness I needed. Several tests were printed of the Krieger pod in TPU, and it was looking like a real winner.

I took the bike and ferry ride out to Staten Island to visit Assembyl and learn more about 3d printing. They had a 2mm thick pod ready for me in TPU, and it was cool to repeatedly spike it on the floor and see it laugh it off. I used what I learned for V2 of the Kriegerpod: I increased the wall thickness to 2.4mm just to be safe, and added ribs on the outside to further increase its strength.
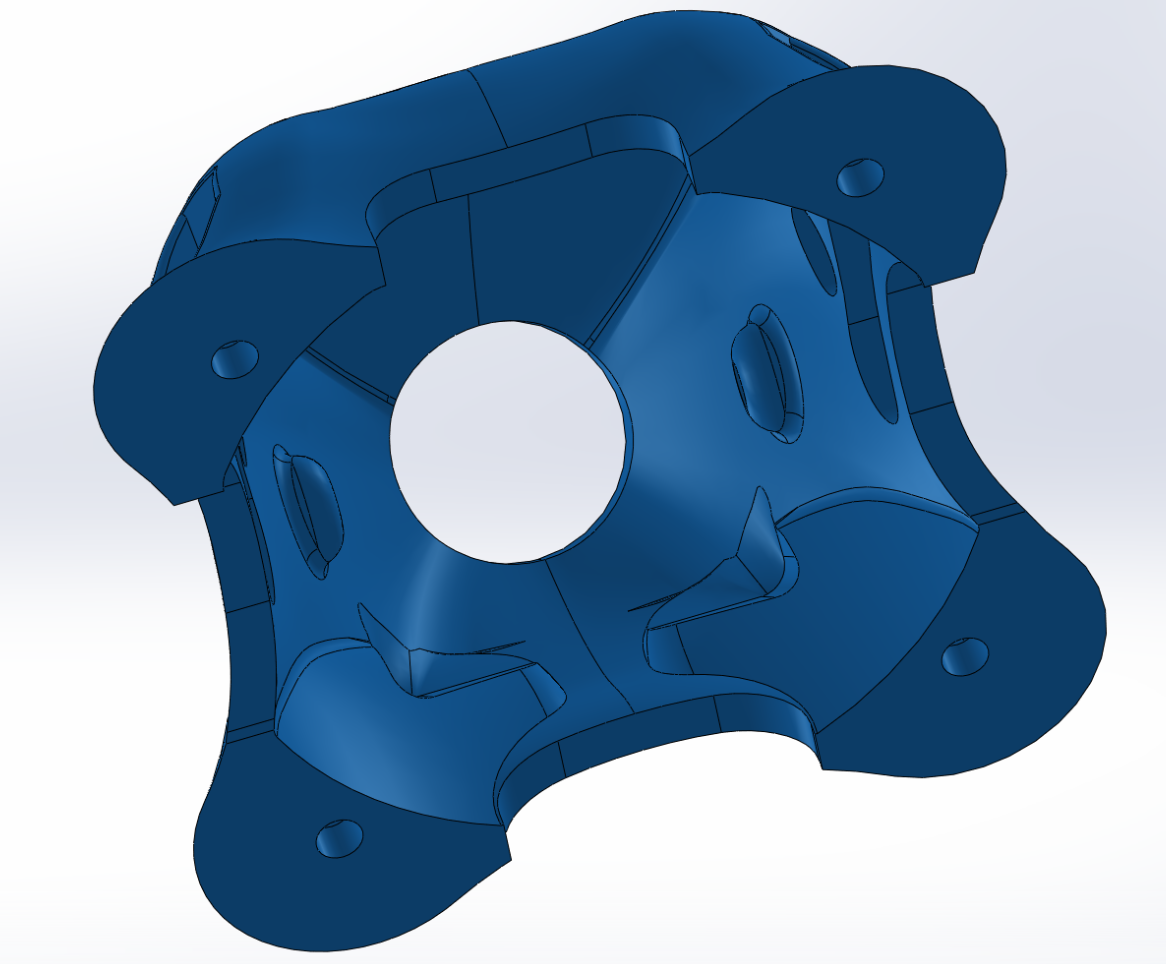
Since I’m still new to SW, I’m literally improving with every part I design. So I went back to Mixuko with a clean slate and started over. I eased the pod’s curves so that it would create thicker shells, and continued the stiffening ribs idea but this time with the ribs added to the inside of the shell.

Now, I've posted some 3d parts to Thingiverse for people to print themselves, but now that this is my day job I can't afford to share everything. I decided to license the stl's to a select few printers to sell, and take a royalty off each sale. For the US I chose 3 printers that have supported me – Patrick Bishop, Chris Griffin, and of course Assembyl. We started chatting and refining the designs together.
Chris noticed that the Kriegerpod printed much better than the Mixupod, and he put them side to side and it revealed that the Kriegerpod had a steeper angle to the cam hole. So I started from scratch AGAIN and drew up the Mixupod with a steeper back.

In my haste I neglected to give clearance on the sides for the FC, and even though you can usually go back in time and make changes in SW, this particular change destroyed a lot of the geometry that followed, so I started from scratch AGAIN and drew this.

Please oh please be right.
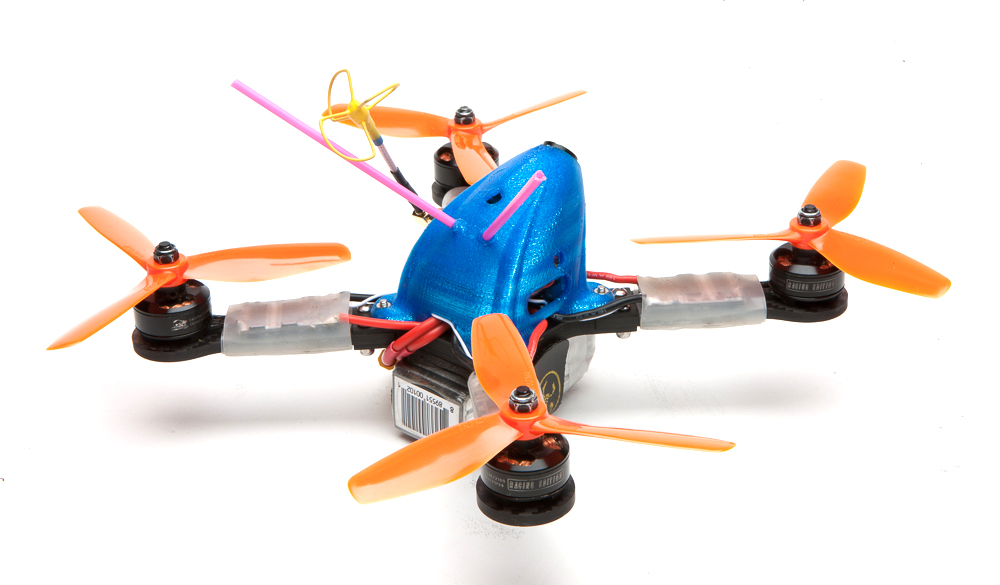
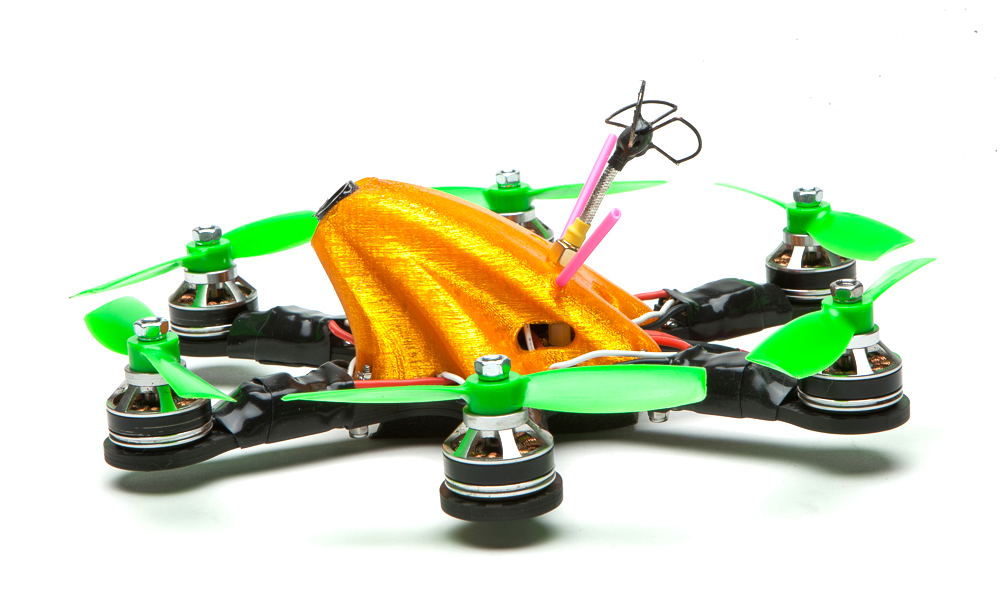
Meanwhile, I built up a Krieger with that first 2mm pod from Assembyl. The build turned out to be surprisingly unremarkable, the only special thing you have to do is keep the FC stack down around 15-20mm. It's amazing how little space we need for a miniquad's guts these days.

The maiden was terrific. I'd say it was faster, but we all know that's placebo BS. I just know that I felt great knowing I was flying my familiar Krieger but with a sexy sexy aero pod.

When you look good you fly good.
We then worked on the pods some more, tweaking angles, thicknesses and settings 'til we got some really beautiful prints using no internal supports. Chris mailed out this pod and I almost cried. Then I carried it around in my pocket all day so I could pet it Lenny-style.
I will love him and pet him and call him George.


Now, 3d printing might be seen as a compromise for a final product, but in this case I can't imagine a better way to make this pod. Its shape, with its overhangs, defies molding – you can't pull it out of a mold, at least not easily. You can sinter a smoother product, but I don't think you can pound on nylon the way you can pound on TPU. This started as a fun distraction, an exercise in design, but now I'm thinking this is one way forward for X quads. What frame out there is faster than this?
Kriegerpod is the first to be ready, and you can get it from:
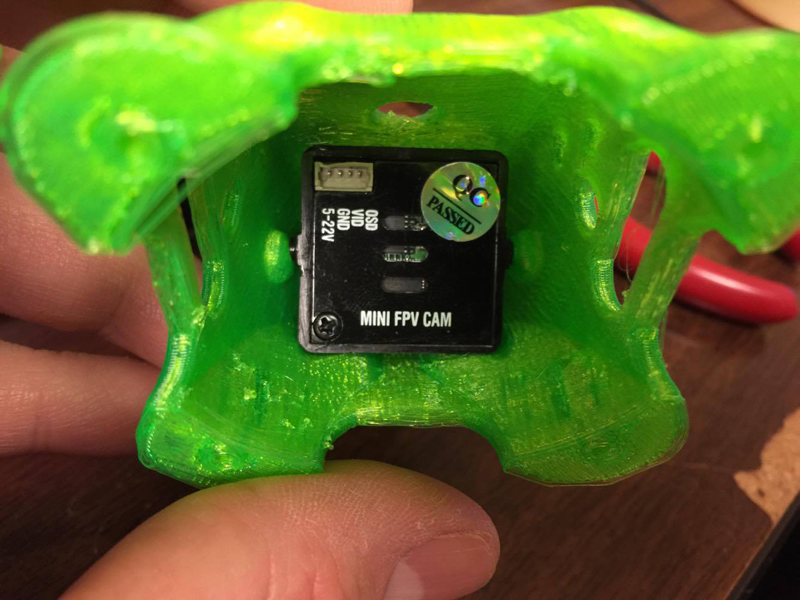
Mixupod, meanwhile, is turning out to be quite a bear. The mounting points are really close to the FC, which creates all sorts of problems – even the hex holes have to be aligned to not pierce the inner wall. Getting clearance between the internal ribs and the fpv cam was tricky as well. I think I finally have it after two more complete redraws.
I had to cut a channel through the ribbing for the cam, and I added two buttons for the cased cam to snap into.

Mount points are really tricky with steep sides. You'll have to push a nut in the slot, then thread a long M3 screw into it to pull it down into position.
Chris (Patient 0) printed one up that night and confirmed that the fit was slop free.
And now that the Mixu pod is snap-in and glue(ten) free, the Krieger pod had to be updated as well.
And now that the angle is fixed at 40 degrees with no play, I had to create a 50 degree version.

Then I built up a Mixuko with a pod Chris Griffin sent me, though by the time I got it I'd already sent him another iteration of the design. But it was just too pretty for me to be patient and wait for the next version, so here it is:

And a couple days later I got the version with nubs.

And I got my own 3d printer up and running (finally!) and made myself some booties for Mixuko.

She's so pretty, I'm getting emotional again.
Mitsuko Pod
I'd been test flying the Corgi for a while now, but these pods made me go back and revisit Krieger and Mixuko, and I just love the way they fly. The Krieger 225 is a little heavier and more stable, super smooth and relaxing, while the lighter and smaller Mixuko is just super fast and frenetic. I knew Mitsuko needed its pod too, but it was proving to be very difficult.
Mitsuko was an exercise in making a quad as small and tight as possible, just millimeters away from a perfect 4" square. That means the props come very close to the FC stack, so much so that the pod has to arc inward to clear them. Things are also too tight to use captive hex nuts, the screwheads will have to drop down through the pod with locknuts underneath.

The first 28mm or so of the pod would have to be a purely vertical extrusion, a square with concave sides to clear the props. Then after 28mm the pod transitions to an aero fairing ending in the fpv cam. This, along with the general lack of space, made things very difficult for me. I finally buckled down and focused, and got a pod designed and printed, only to find I left no room for the fpv cam's plug.
A re-draw and here it is, omg it's a milk carton.

Since these pods are retrofits, they all have a mind of their own, design-wise. They start on the base plate and end in the fpv cam, and the shape just logically follows from there. The same principle that forces the Mitsuko pod to be a milk carton would probably make Kriegerpus pod super cool...right?
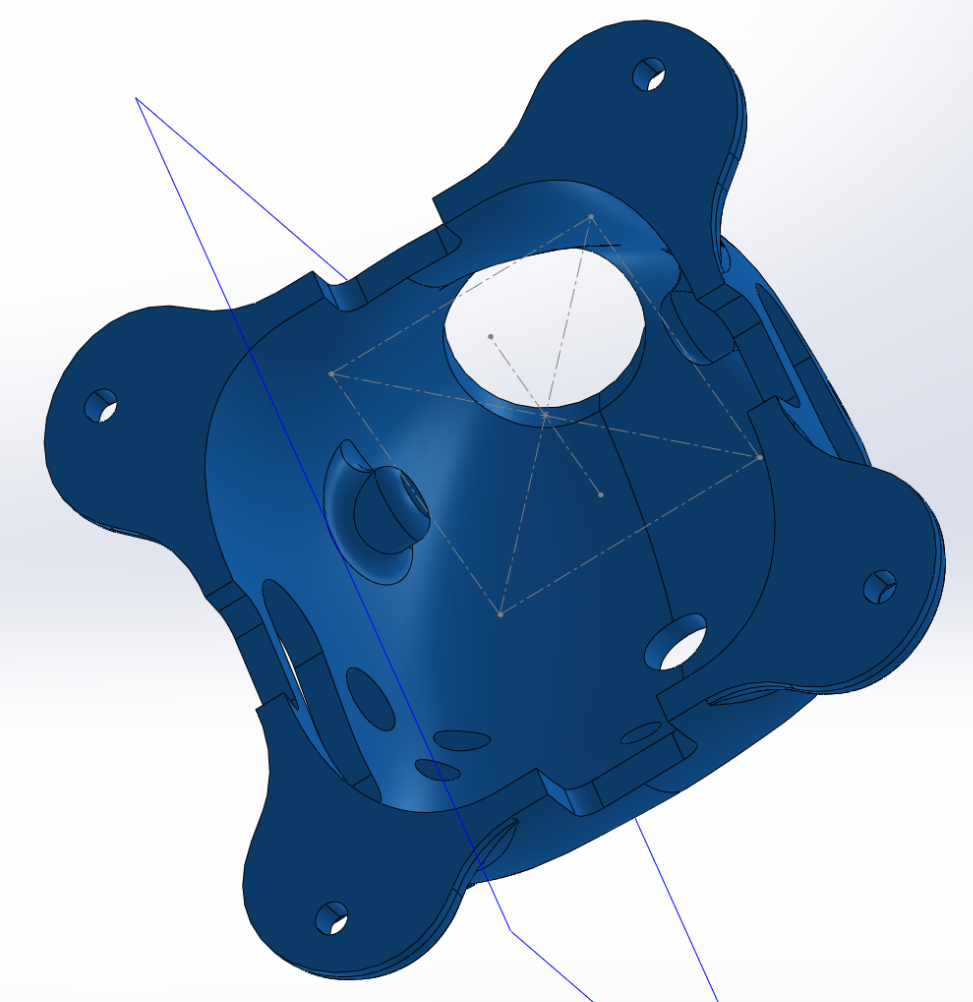
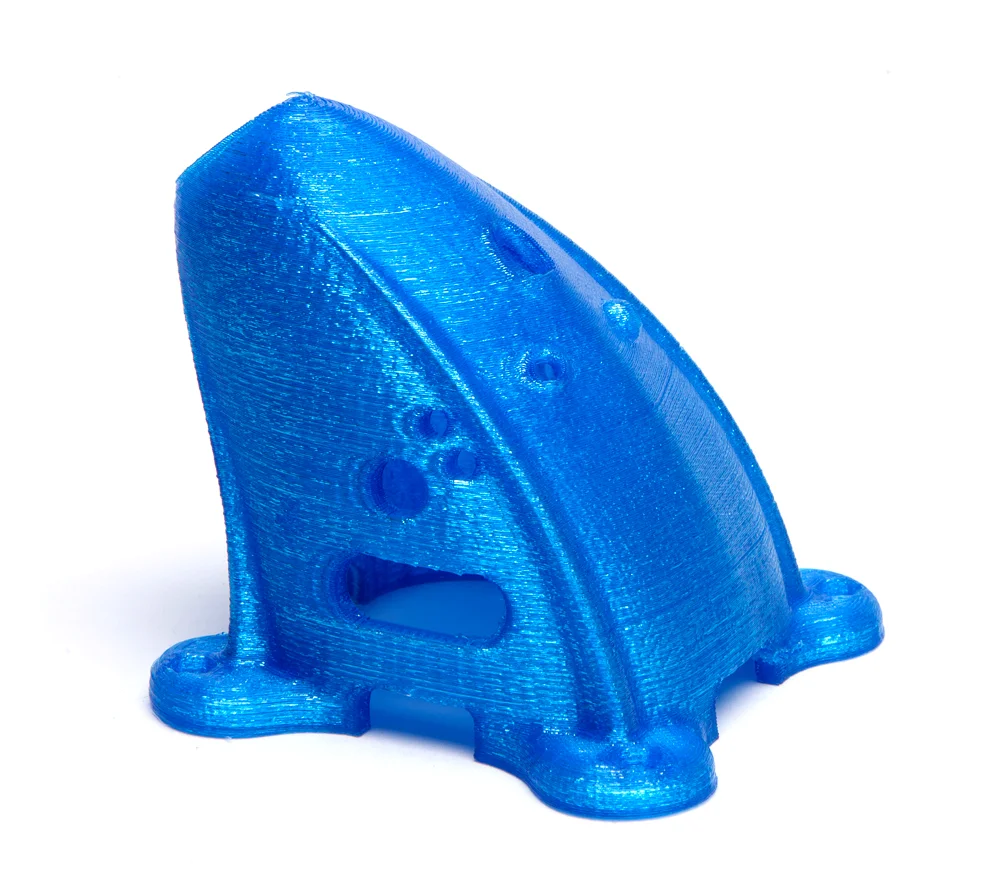
The Krieger pod started from a simple rectangle with the mounting tabs added on afterwards. For Kriegerpus I chose to include the mounting tabs in the lofted shape instead, knowing it could make a cool organic form. I also used a tilting fpv cam mount up top, something I'd already worked out for a 5" quad that's in the works. With the two ends nailed down it's just a matter of doing the work to connect the dots. After a day's work I got to this point.


There are notches in the cam slot for 30, 40, 50, and 60 degrees. A dedicated slot on the back holds a 90 degree sma vtx, complete with a hole for the push button channel changer. Six hours later:

I overestimated how much material I had around the captive nuts, so I steepened the slope at the ends. I also didn't like how the two recesses in the sides approach the cam slot differently, so I eased the curve on the first recess. Finally, I upgraded my slicing software to Simplify 3d so I could add a custom support structure, which should clean up the nastiness on my overhangs.
This is what I woke up to next morning.


As you can see it's a much cleaner print, with more material around the nuts, and more consistently curved recesses. You can also gauge my excitement level with the number of photos.
And here it is built up:

Pods Bite Me in the Butt
At this point I thought I was sitting pretty, I had all my models covered. Then my friend Henry started telling us how he loves 2.1 lenses, and then Zoomas got on that train. I had tried a 2.1 before and it made me nauseous, it disoriented me so much I had to hand off my transmitter to Alex to land it LOS. But the chorus of 2.1 lovers was steadily growing so when Josh offered to let me try his Krieger with a 2.1 I gave it a shot, and loved it. I have no idea what changed in the interim but somehow 2.1's went from unflyable to uneventful for me.
So it as back to the drawing board, with new versions in every permutation anyone could imagine. I started with Krieger 'cause it's the easiest pod to draw.
It looks about the same but with more Solidworks hours under my belt it's better executed. I was dreading these re-draws but this was pretty painless. So let's move on to Mixuko. Then I remembered that I wanted to try varaible camera angles with these, so I added that feature.

This pod had given me fits in the past, namely with finding a way to get the nuts into their slots. Out of the blue it occurred to me that if they inserted from the inside almost all my problems would be solved, and the exterior would be super clean as well. DERP.
I also countersunk two holes for the cam's screws. The nubs work pretty well but if you crash hard enough you can drive the cam into your FC stack. Hopefully the screws will put an end to that.

That's how the nuts slide in.
Having done that, I now had to go BACK to Krieger and give it a pod with adjustable angle as well.

And, continuing the mantra of every permutation of every pod, here's Mixuko pod with adjustable cam angle for 2.8 lenses, with all the new features. It never ends.
