
Fast Forward Redux
Making the Fast Forward Beautiful and Aero
When I conceived the Fast Forward a year and a half ago everyone was flying H frames, and aligning that big flat fuselage to the direction of flight seemed like a good way to reduce drag and increase speed. Then minimal X frames came along, and camera tilt and speeds went way up, leaving the FF behind. Though I loved its unique flight characteristics, it just couldn't compete with four props at max tilt instead of two. And since I'm always working on four or five prototypes at a time, there was never any time to fly it.
In the interim I acquired the skills to draw up a proper aero shell, as well as the means to produce them. I really wanted to recreate the FF properly, even if it was just for me, since it was a design that never caught on. I also wanted to see how it flew with the latest components – my last FF build had a Naze, Kiss 18's, and Tiger 2204 2300's!
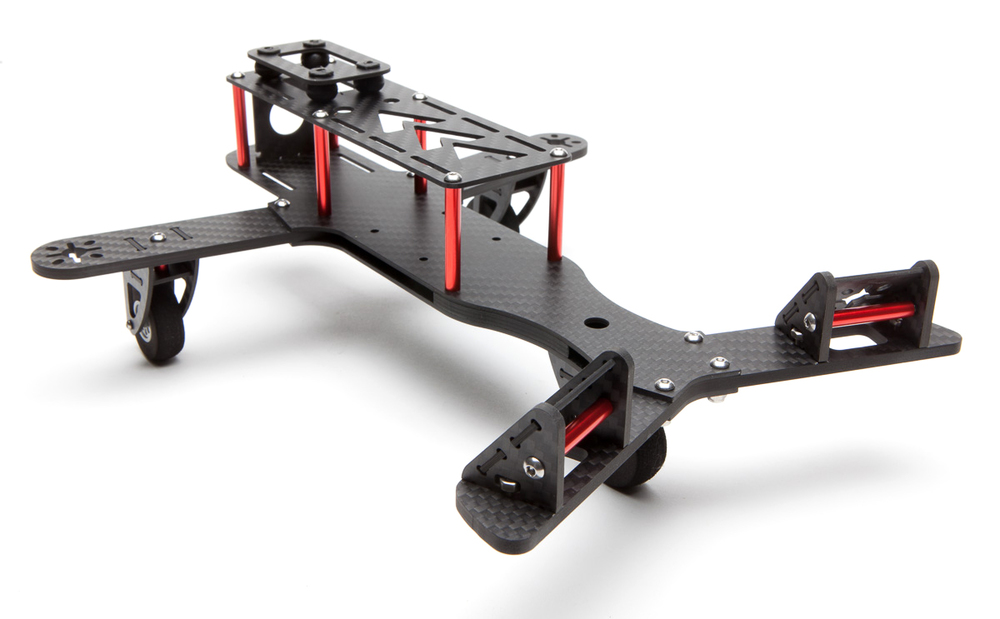
So there's the original FF. The new pod will replace the upper plate, of course, and have 0 and 15 degrees of camera tilt. I'm planning on using the Kombini, so I allowed for just 15mm of stack height. The middle plate juts out too far for a pod, so I'll use two bottom plates instead. I'll ditch the landing gear as well, since we lost access to that nice astroturf field in lower Manhattan. A simple rear peg will keep the rear props off the ground. I'm guessing that hovering and landing will be much easier now that I'm flying with 2.1 instead of 2.8 lenses. Now off to Solidworks.

Here's the original loft of the pod, drawn over the sketch of the top plate. The pod extends down past the plate so it'll be flush with the bottom of the frame, in order to give the whole thing a more integrated look.

Extruded cuts are then made for the frame and the battery.

Then it's shelled.

After that it's mostly just housekeeping, cutting holes and making mounting points.

Mounting points added, with slots for M3 nuts. I did have one new idea, a sleeve for the vtx. There's a hole in the 'bulkhead' for changing channels.


Guess who forgot cutouts for front esc wires?
And that's about it...or not quite. I actually had several false starts over a few months, and even when I settled on the final version I still ended up redrawing from scratch several times to get it just right. It's painful to start over but the execution improves each time so it's worth it.

Now, as far as printing it... The shape doesn't have much of a flat surface (just that little blue triangle!) so the print was just a mass of support material. Supports took about a half hour to remove, and the process was like a workout unto itself. Amazingly enough it printed really well, thanks to some settings I got from Chris Griffin when he helped me with the Nerdcam print (I'm using Sainsmart TPU on a Wanhao i3 with a Flexion Extruder).
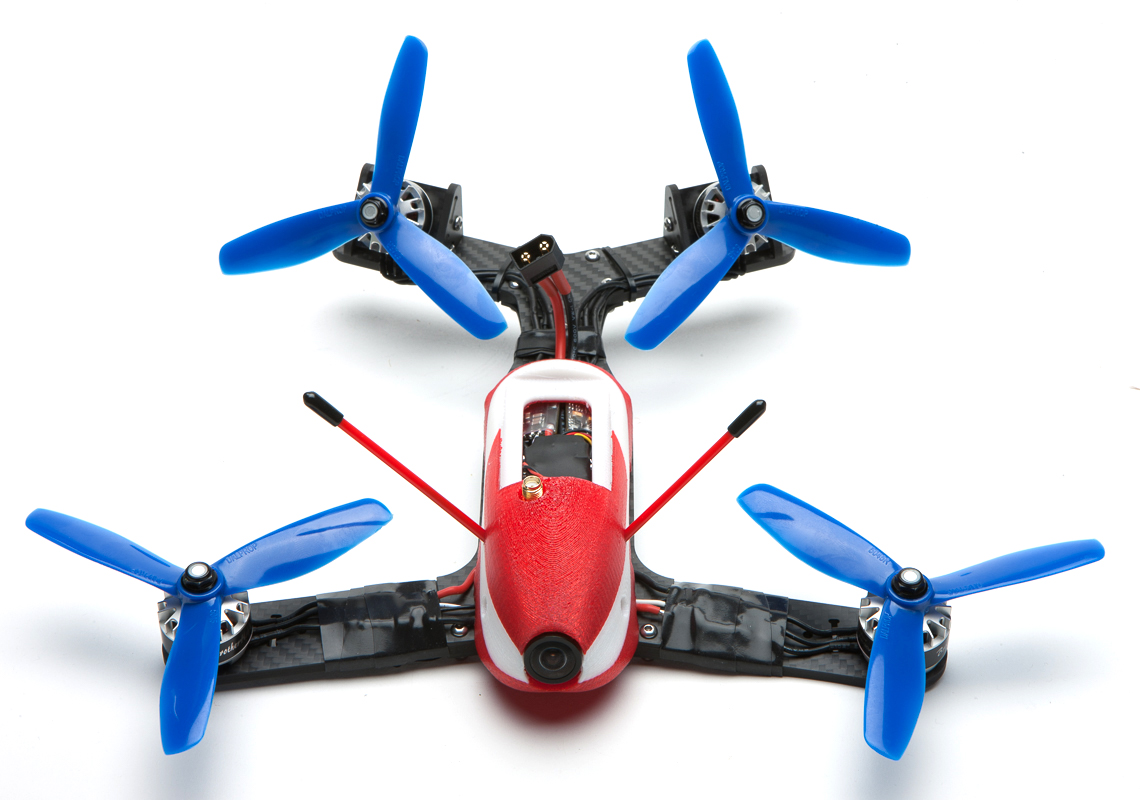
I built it up with the Kombini, Aikon 30's, Brother Hobby motors from a Safety Third group buy (2300kv in front, 2600 in back, a Chris Thomas suggestion). Everything went pretty much to plan, except for the fact that I cleverly tucked the rear esc's inside the pod, only to realize that they're now directly under the battery. So they'll have no ventilation AND get baked. Hmmm.


Just enough ground clearance to take off. It'll land with the nose way up, so no clearance issues then.

Even those antennas!!!
Build/Setup
I stayed up 'til 4 building it up, and eagerly tried a hover test the next day. It shot up like a pinwheel with the slightest touch of yaw, a sure sign that the motors were improperly mapped. But everything checked out – props on right, motors spinning correctly, wired to the right positions (it's pretty hard to screw up a Kombini, the signal pads are in each corner). A few hours later I remembered that A and V tail mixes sometimes have motors numbered differently. I took a look in Betaflight and sure enough, motors 1 and 3 are reversed for A tails. Why do they do that???
So I had a few options. Switch the signal wires for 1 and 3, switch the motors, or write my own custom motor mix. The rear esc's are just a few mm from the board and nicely soldered, so I didn't want to cut open the heatshrink and start over. I tried switching the motors, but the wires didn't reach. So it was time to go into the CLI and write a mix. There isn't a whole lot of information out there on this so I had to guess the commands 'til something took. With some dumb luck I got it right first try, sparing myself another indoor rocket launch.
mmix 0 1.000 0.200 1.000 -1.000
mmix 1 1.000 -1.000 -1.000 0.100
mmix 2 1.000 0.200 1.000 1.000
mmix 3 1.000 1.000 -1.000 0.100
Note that motor 1 is 0 in Betaflight. Once again, why? The columns are throttle, roll, pitch, and yaw. As you can see, both rear motors spool up 20% on roll, to keep it from nosing up on rolls. There's also 10% for the front motors on yaw. To be honest I'm not sure why that is, but there's 20% in the standard A tail mix so I figured 10% couldn't hurt.
Flying/Tuning
My first shot at tuning it was a total disaster. With this motor layout, roll has a bit of yaw and yaw has a bit of roll, so when it oscillates it's really hard to tell which axis is doing it. After five batteries with no improvement I gave up and flew the Mifune. Flight time has been scarce lately so it's hard for me to spend an entire session tuning and not having fun.
The next day I decided to put a little thought into it. Roll is executed here with two motors instead of four, so stock pids must be too low. Yaw is executed with thrust instead of torque, so stock pids must be too high. After progressively raising roll P and lower yaw P I finally started to see some improvement. My DVR wasn't working so here's some LOS footage instead.
And here it is coming in for a landing, to give you an idea of how nose up it is in a hover. As I hoped you can still see the ground with a 2.1 lens, so it's possible to do a slow controlled landing. This one was actually one of the worst landings.