Legato
People have been asking me for a 7” long range rig for ages, but I held off because I couldn’t think of a different enough spin on the idea to justify doing something. So in the meantime I compiled a wish list.
Waterproofing is a real nice feature. Even if you’re not flying over water or in rain, it’s still nice to keep out dust, mud splatter, or snow. Unlike the Hydrophobe, however, I wanted it to be an option that you could easily add so that you could still make a lightweight non-waterproof version if you wanted to.
Having no props in view over a wide range of cam angles, even negative tilt, is a must. Hydrophobe and Ichabod do this by mounting the Hero way up front. This extends the mass over the pitch axis, and some people justifiably dislike the flight characteristics. So I wanted a cam mount system that would extend the camera forward for low and negative tilt angles, and move it back for traditional up tilt angles.
I started using one M4 screw per arm for Thicc 3.0 as well as Akira, and I really like how they stiffen up the frame. 8mm arms with one M3 and one M4 would make for a nice stiff frame.
Gab was in town for the sports Emmys and we met up for some sushi. He talked about how he wanted a filming rig that could stay airborne longer to make shoots move along as quickly as possible. He wanted to use his Cinelifter batteries so he wouldn’t have to buy more batteries. He’s also fully on board with the Medlin headtracking system and wanted it on all his rigs moving forward. He’s working on his own frame but I noted his wish list for myself.
Designing Begins
Waterproofing would be similar to Hydrophobe, but instead of a skirt I opted for a skirt with a top. This would eliminate one edge that needed sealing, and it would also let me put cutouts on the top plate to save weight. Instead of a fully aluminum mid plate, I opted for a carbon plate and a heat sink below the esc. The air unit would be exposed above and below for cooling. Leave out the skirt and the heat sink and you’d have a conventional non-waterproof frame.

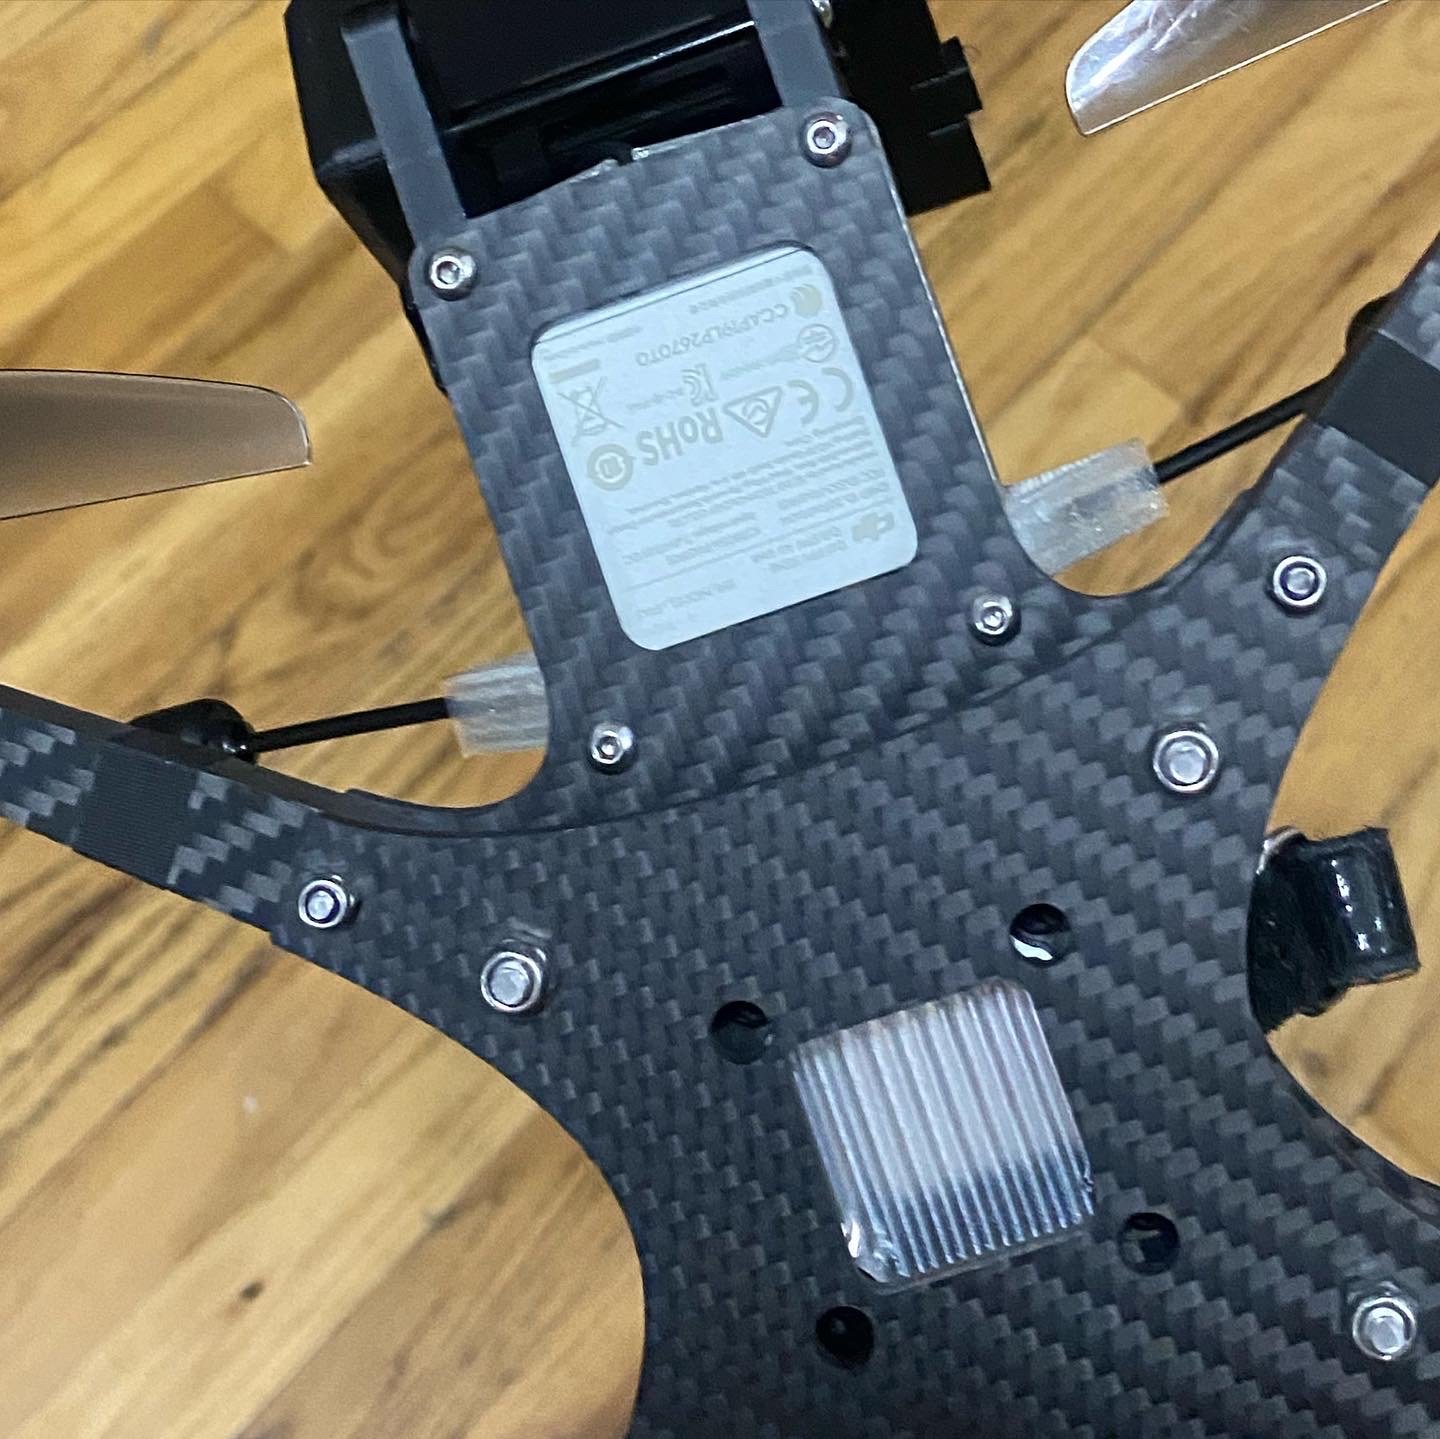
Here’s the bottom of the heat sink. The air unit would sit above the hole above.
As for the cam mount, I came up with a linkage that would bring the camera down and forward, then up and back. Camera angle is adjustable at both positions and all positions in between. I made the linkages aluminum with threaded m3 holes so adjustments could be made with just an allen wrench, no nut driver needed.


Checking for props free cam angles at both positions.

All four holes in the bottom H-link are threaded. The three top links are identical, with one threaded hole and one through hole.
A headtracker version of this will eventually be developed. Josh Medlin’s been designing some really elegant servo mech’s, so I expect I’ll defer to him for that.
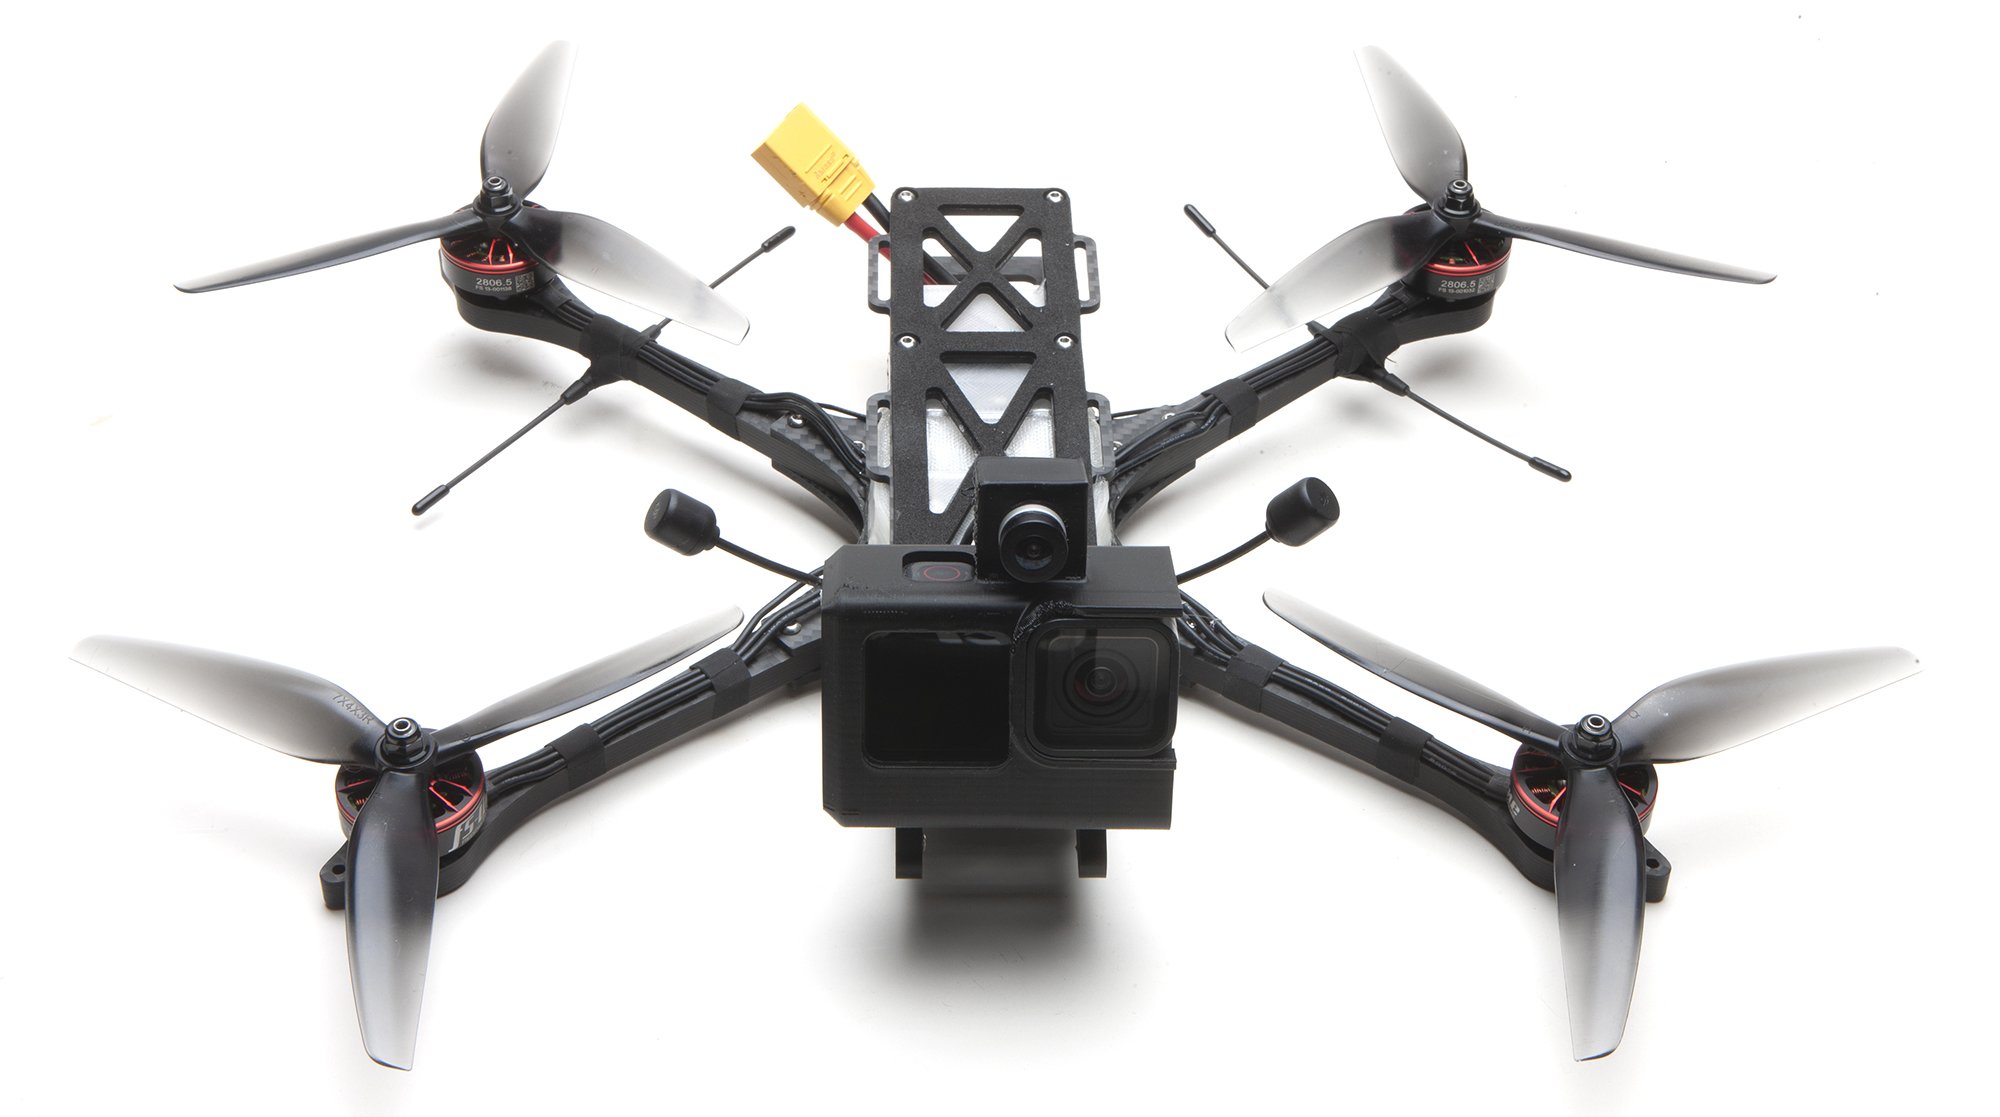
Once the camera was located in space I worked out where a 4000 or 4500 mAh 6s would have to be for balance, and worked out the frame from there. This yielded a fairly long frame, so I went ahead and made it a true X.
From there the frame came together pretty quickly. I added a screw hole to the ends of the arms for…floats, wheels, armguards, braces…who knows?


The tan part is the skirt with a lid. There’s a groove on top for a strap to pass through.
I initially made that teal piece above in TPU, but it proved to be too flexy, so I had it CNC’d out of aluminum. That stiffened up the entire assembly a ton.

I also noticed that I was getting props in view with the camera at 0 degrees and fully extended. Turns out I neglected to account for the left offset of the GoPro lens. Doh. So I extended the nose a bit.
I rebuilt it with the extended nose, and THEN I noticed that one prop was still dangerously close to being in frame, and the camera needed to be perfectly placed at 0 degrees. So I abandoned the pure X layout and swept the arms back a touch for more clearance.

HQ had donated a set of 2208 1500kv motors to maximize efficiency, but they proved to be too small and ran super hot. Jin was kind enough to send a set of 2806.5 1300kv’s, and they were much better. However, the bigger motors generated a resonant vibration when the camera mount was fully extended. I printed a nose that cradled the mount, and that fixed the issue.
That little bit of TPU extended up the sides of the mount killed the vibes.
Just to be safe I shortened the lower H link. I did a rudimentary PID Toolbox indoor wobble tune and got it flying reasonably well. It’s not the full Brian White experience but it was a decent start. Here’s some quick unstabilized footage of me trying (and kinda failing) to go easy on the sticks to show how smooth it can be.
The shortened links came in and I popped it on…and the vibes returned. Only this time they were flyaway vibes, not just disturbing sounding vibes. What the hell. I switched back to the longer link, which had worked with the cradled mount, but now it had vibes as well. I was now experiencing Wile E. Coyote/Roadrunner level frustration.
I decided to try a pair of side walls with two mounting points. The linkage is cool, but if I’m only using the two extreme points of its motion then there’s no reason that it has to be a pivot. I printed it up in PLA as a tester.

Two mounting points for the Hero. A 35mm standoff in the middle to stiffen things up.
What a relief when this thing flew again.
Thankfully this finally fixed the resonance. One thing still bothered me, though. Changing the angle on this configuration requires tightening a lot of screws, and the motors make the screw heads hard to reach. The whole thing is a bit of a pain, and we know you can’t be slow on set.
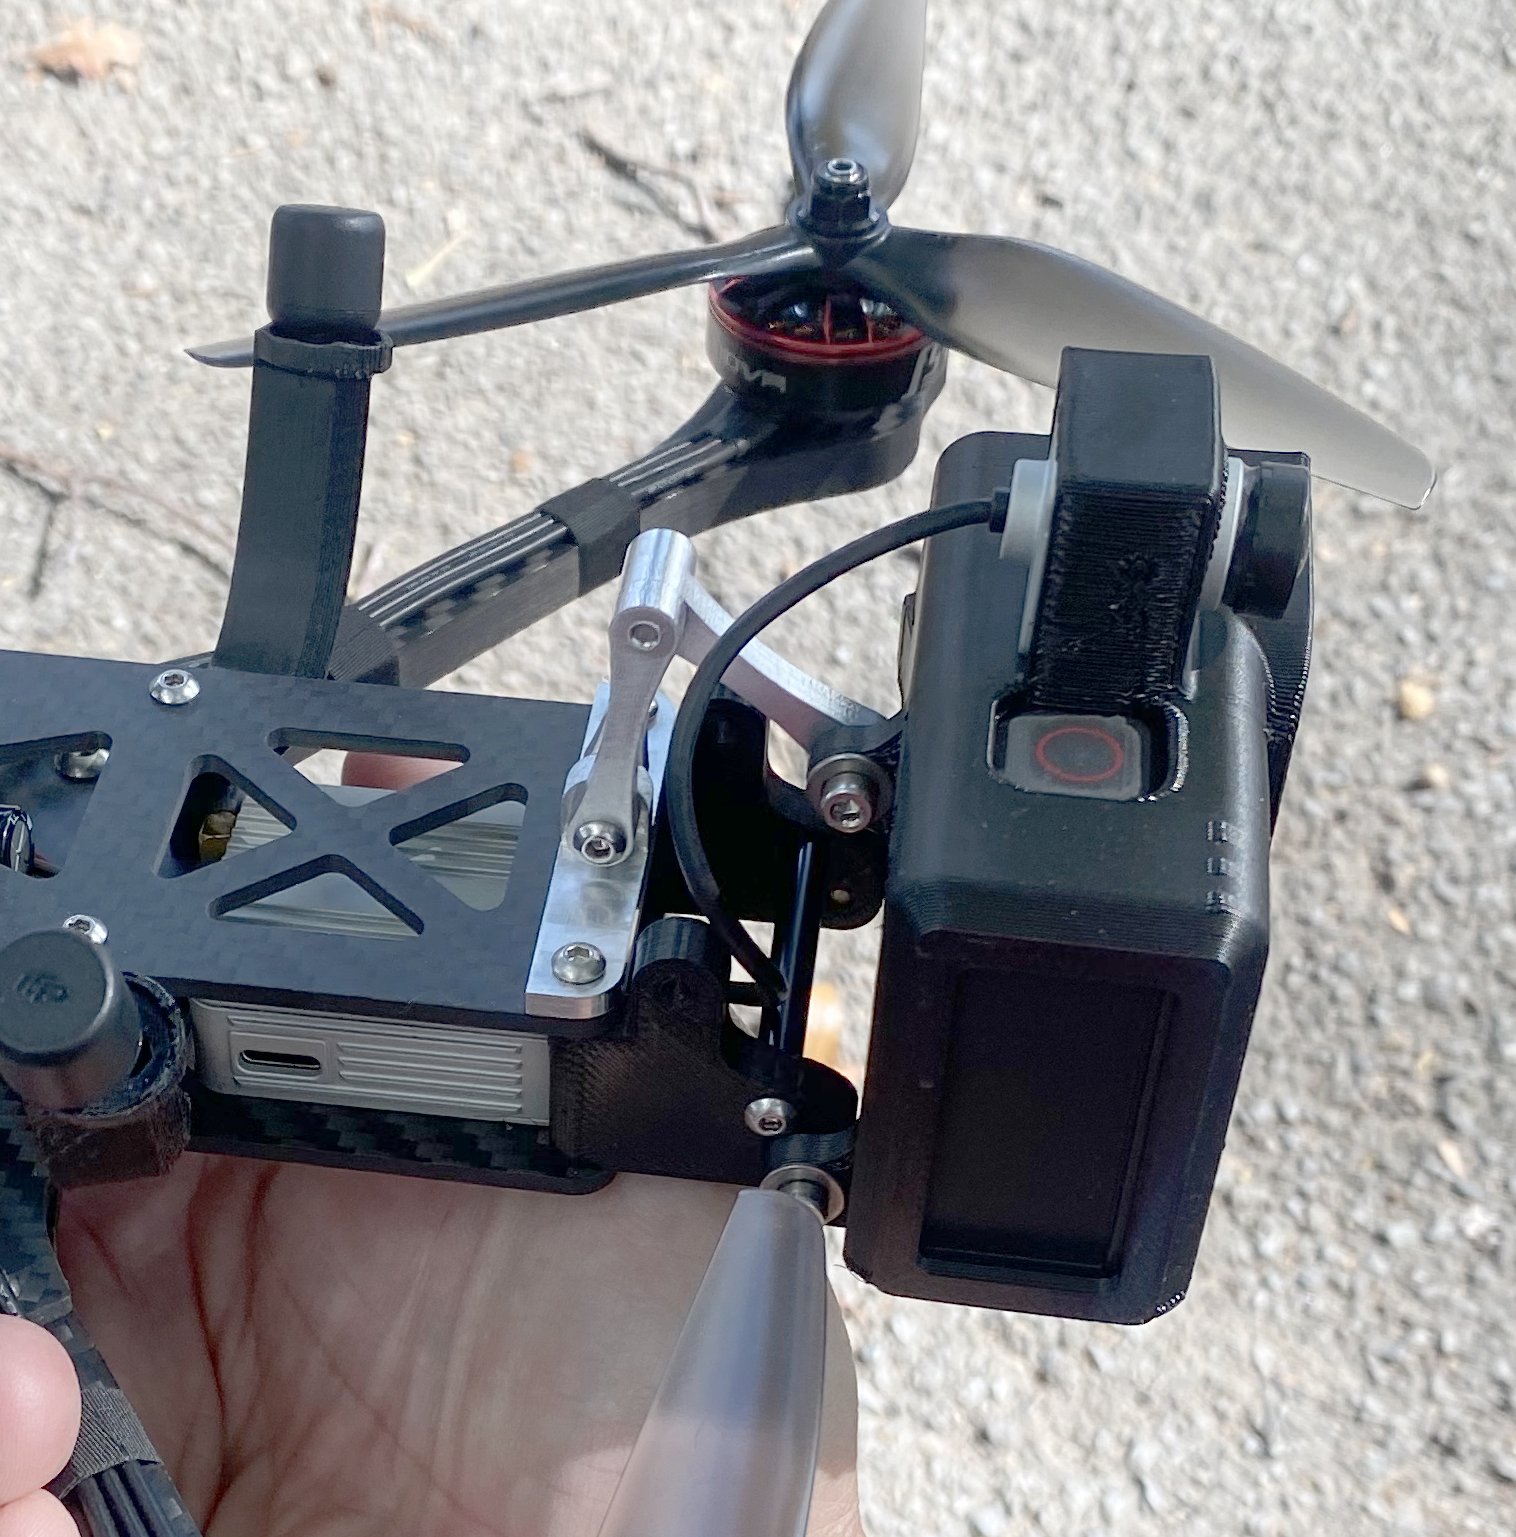
After a good while of thinking I came up with this. First, replace the top mounting bracket to a Hero tabs mount. The linkage can connect to that just as easily, and it automatically doubles as another mounting option for your Hero. Additional bonus, you can use the GoPro thumb screw to make angle changes. Next, instead of screwing on the Hero mount from either side, simply slide a 50mm standoff through the mount to act as a pivot.


The last tab of the three Hero tabs is threaded, which is why it’s also a little thicker. If you tighten the other two pivot points just tight enough so that they can still rotate freely, then cam angle adjustments would require just loosening and tightening the GoPro thumbscrew.

Finally, with that alternate top mounting position for the Hero, I drew up an fpv cam mount, where the aluminum side plates now act as guards to protect the fpv cam. This would be a good setup for those times when the fpv cam tilt doesn’t match the Hero tilt, as well as pilots who prefer the fpv cam more in line with the frame.

Hero on top, fpv down below, independent angle adjustment.
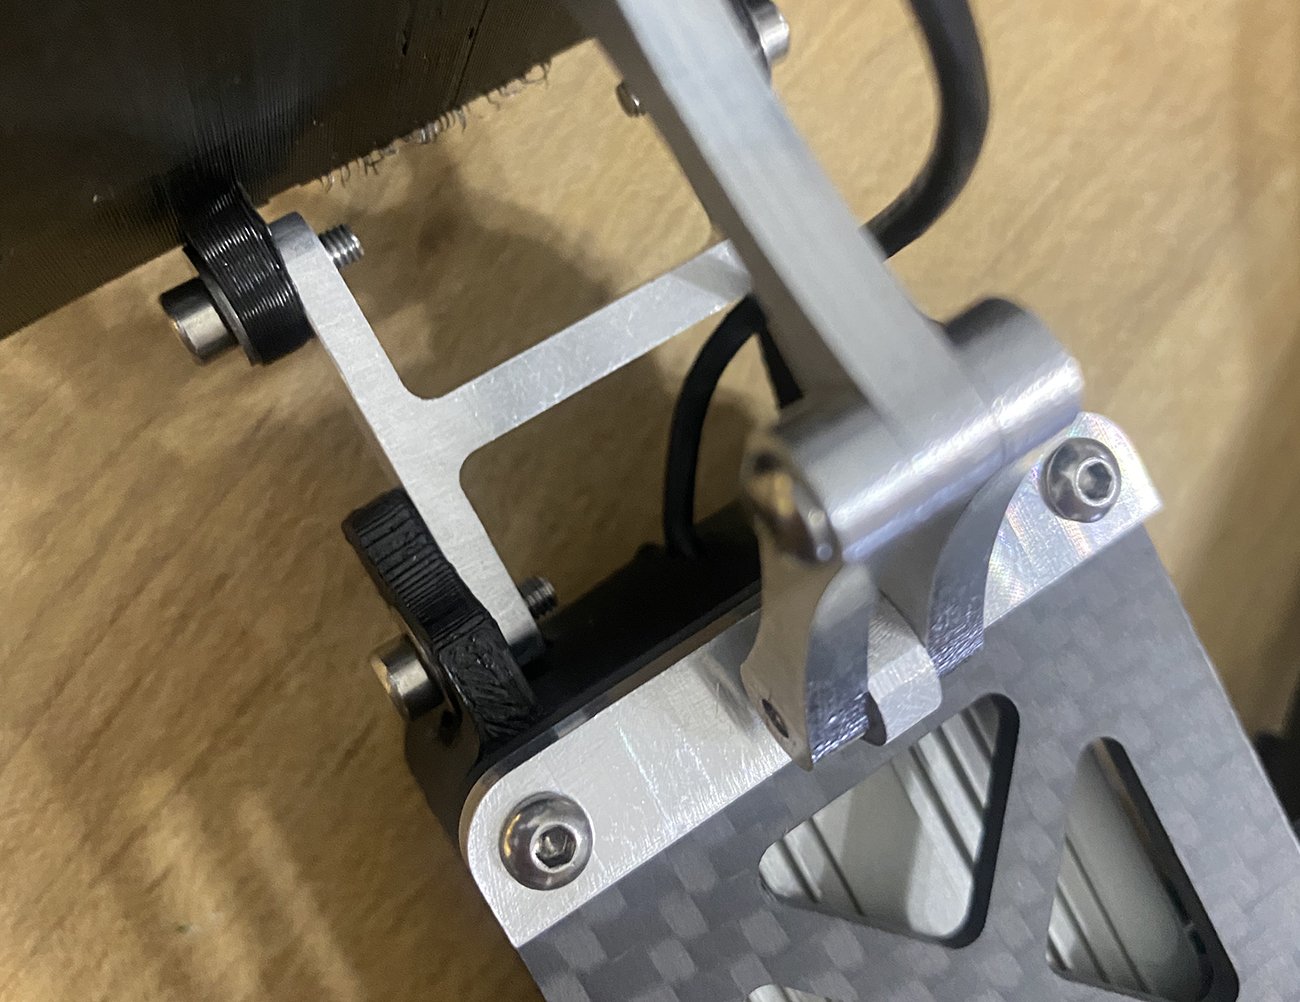
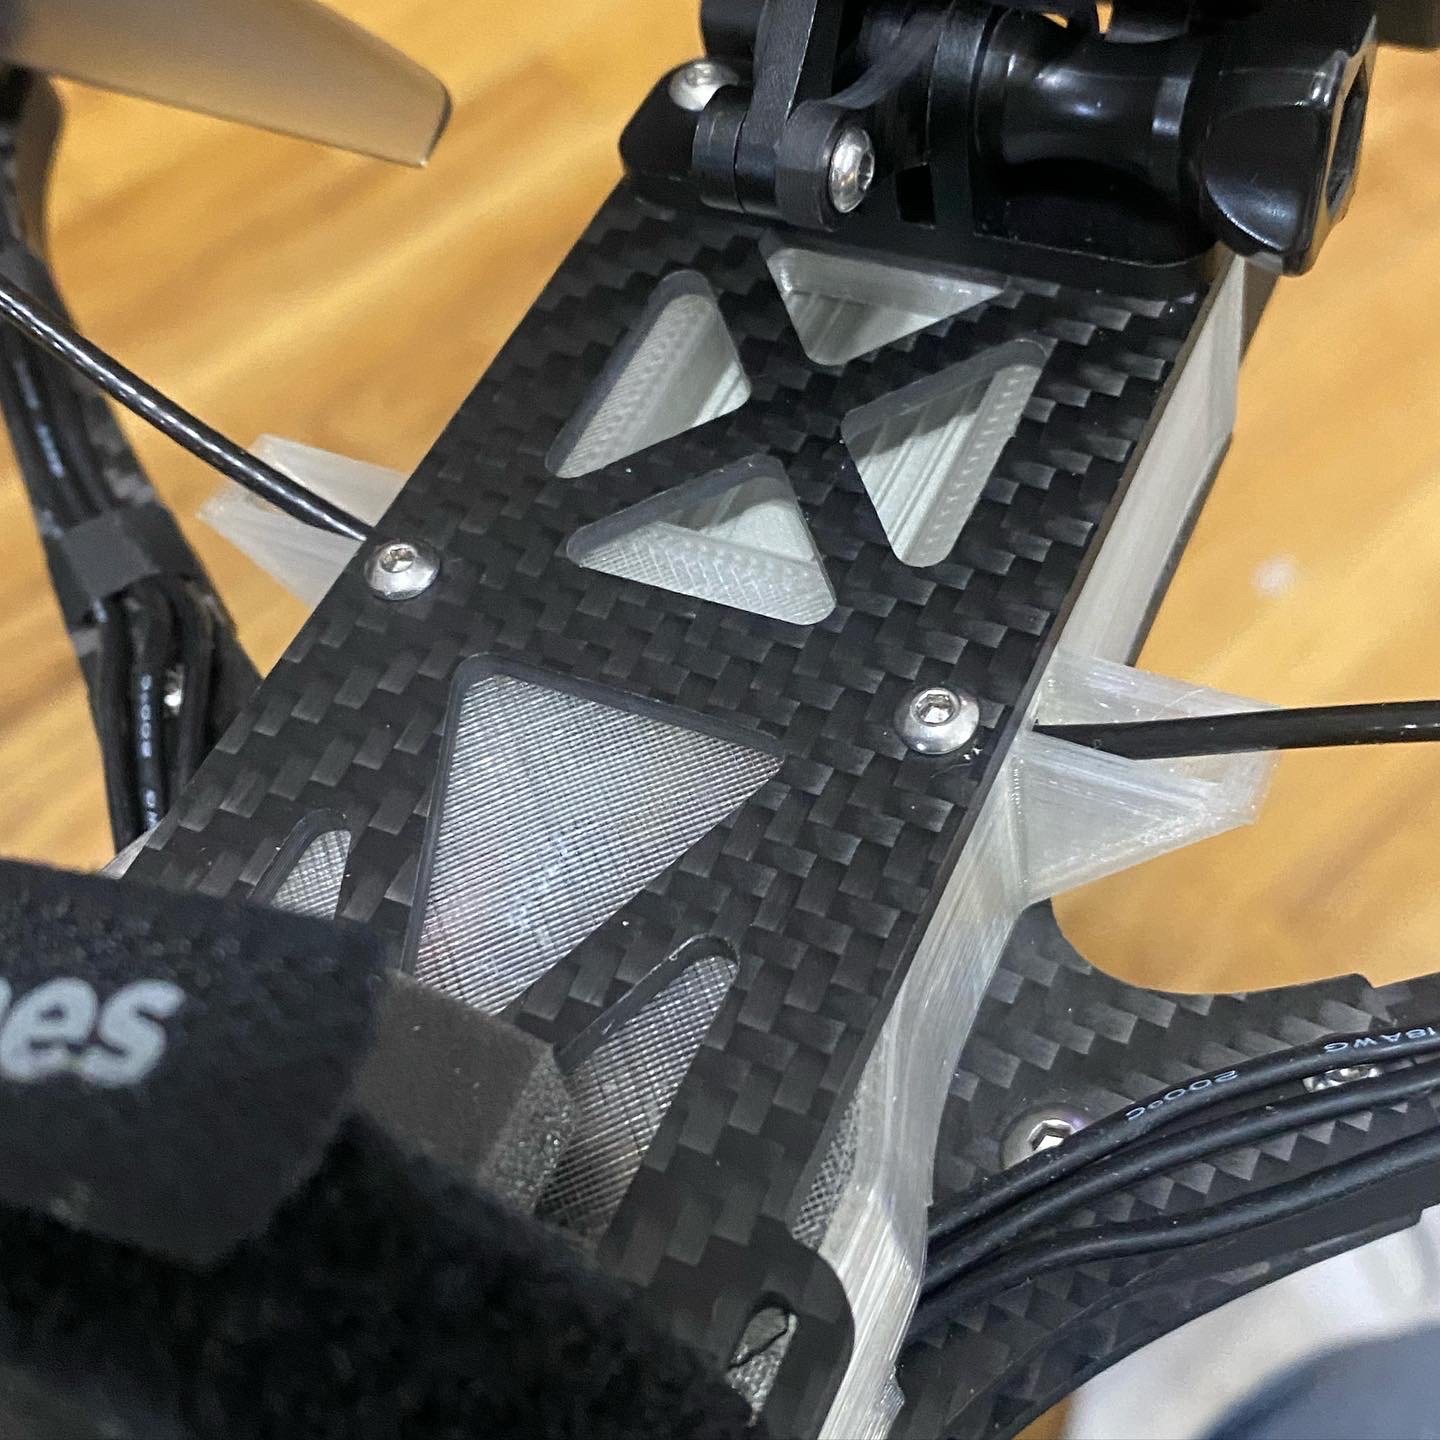
The cnc’d aluminum parts came in and they were just a tad off. The 5mm holes for the standoff were just a tad too small, and the link that goes between the Hero tabs mount was just a tad too thin for it to be gripped by the M5 screw. A couple tweaks, another run, and they were good to go. Since only one of the lower links was threaded, I went ahead and changed one of them to carbon.

Camera in the upper position. You can see how one of the lower links is carbon, and the second one, which is threaded, is aluminum.

There’s a 35mm standoff screwed in between the two side pieces to keep things firmed up. A 50mm standoff slides in and acts as the pivot for the cam mount.

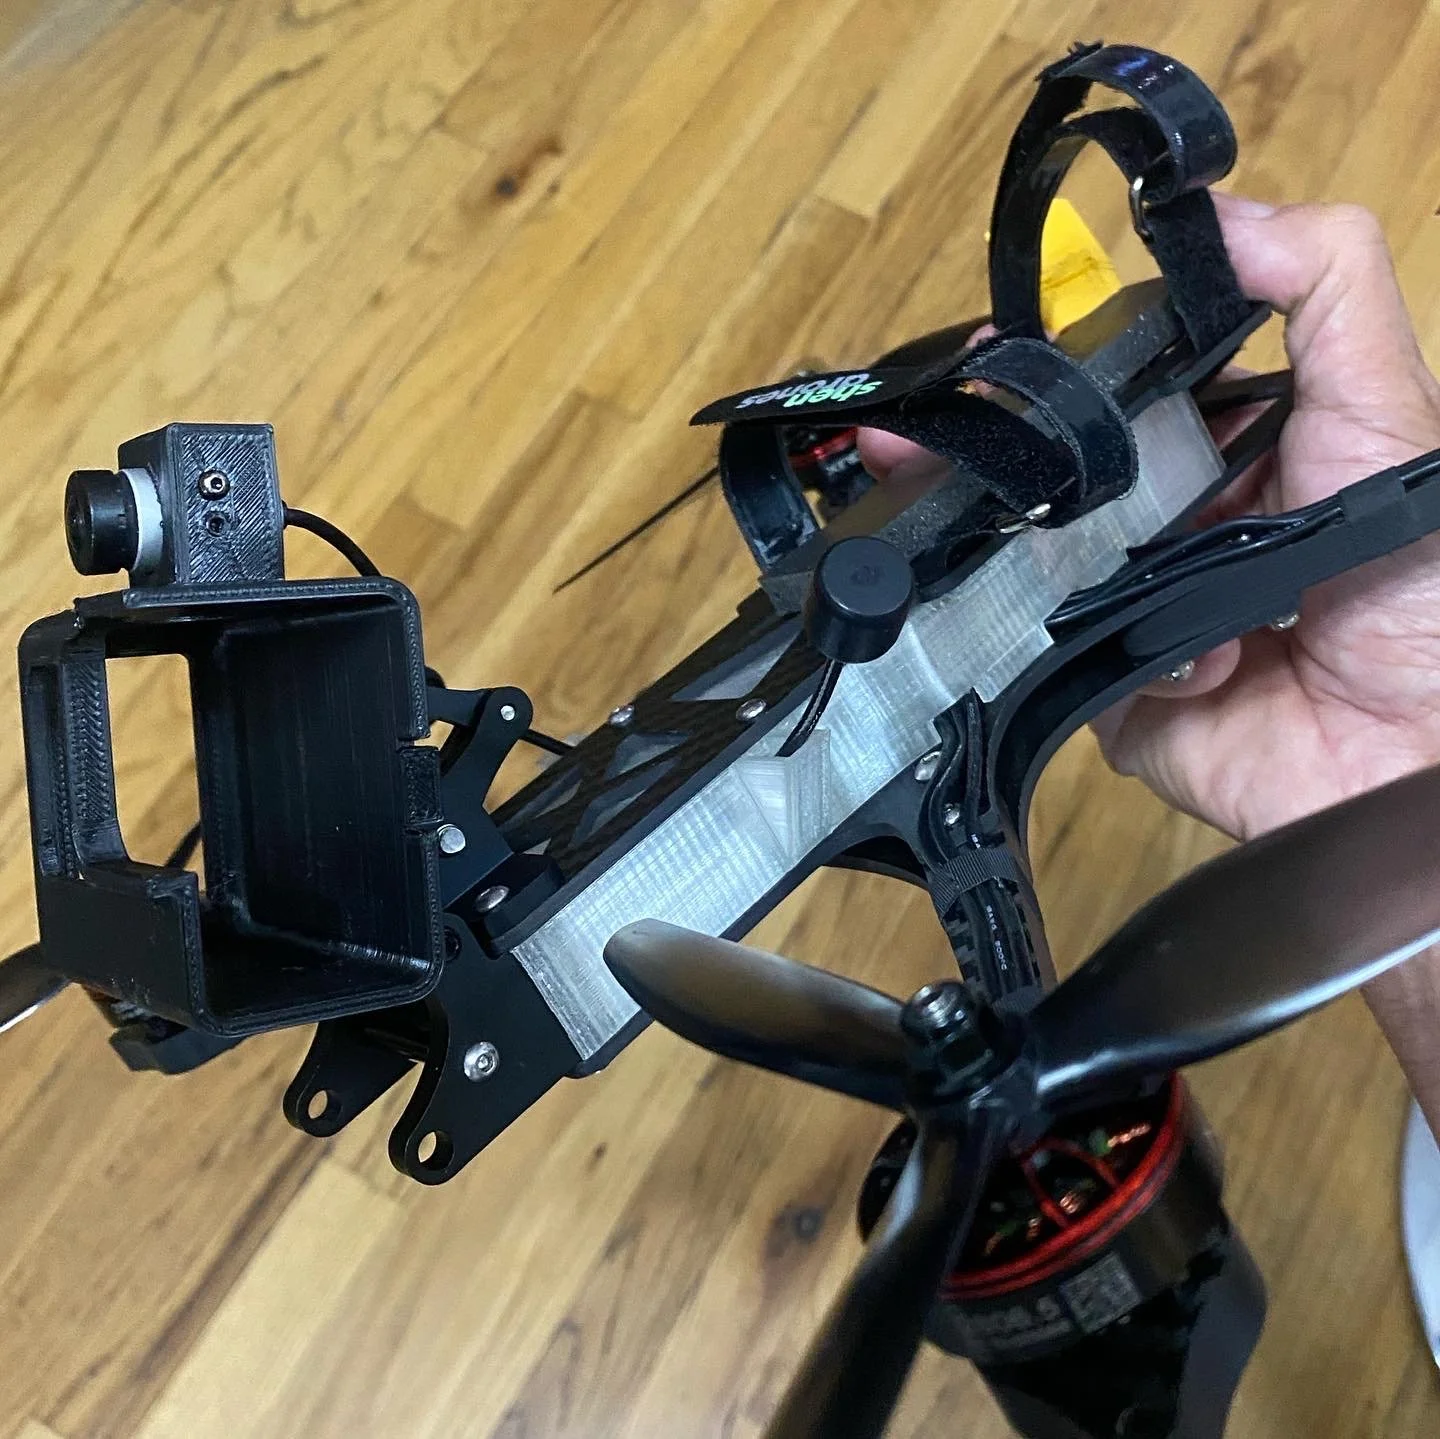
Here’s the camera in the lower forward position for negative tilt.

And here’s the conventional configuration with the fpv cam down below, in case you like it more in line with the frame, or if you want the two cams at different angles. It’s a real Swiss Army Knife of a front end.
With the nose sorted it was time for a proper Brian White tune, as well as waterproofing. My skill level at Brian’s basement tuning technique is in the ‘knows just enough to be dangerous’ level, so I’d pushed the tune to the point of getting a d term pitch oscillation, which kinda freaked me out. Brian started us back from the defaults and we got a nice solid tune. Oddly enough the gains got back to right about where I had them, but it was all the other magic Brian applied that made the tune. This was a major relief after all the crazy vibes from the previous cam mount iterations.
Waterproofing
With the tune done it was time to close her up (and lose access to the FC). I drew up a skirt with a top, to eliminate another edge to seal.

The channel is for the battery strap. The opening up front has a lip that pushes down on the Air Unit.
I printed it up with clear TPU. I like the skirts clear ‘cause you can see if water has seeped inside. With a couple tweaks I got a nice fit, with notches in the right places for all the wiring.
The Air Unit is exposed on both sides to aid cooling. All those edges will need some sealant.
With a good test fit done it was time to apply sealant. I haven’t sealed a build since the first Hydrophobe 3 years ago, so I checked with Troy to see what’s he’s using now, and he recommended E6000. I had a ten year old tube lying around which I bought for my daughter’s crafting projects, and amazingly, it wasn’t a solid hardened hunk. I wedged the skirt up a few mm and applied a bead. Relatively painless, a relief to not have to seal the top as well.


I wanted the antennas to arch up a bit more so I pulled them together with a bit of tape while the E6000 set. Note the sealant on the Air Unit. When this side cures I’ll do the bottom.

Troy asked for plugs for the antenna holes. I’ve always just flooded the hole with sealant, but it occurred to me that the plug could tilt the antenna up a bit, so I drew this up.

And it goes in like this:

Meanwhile, work on the headtracking gimbal is ongoing with Josh Medlin. But for now the frame is available in the non-gimbal version here.
O3
As luck would have it, the O3 air unit comes out just as I was buttoning up the design. Luckily it could be accommodated with minimal changes. First I drew up a print that would cradle the air unit.

Then I changed the opening on the skirt to work with the O3.

Justin’s building one with the O3, and he’s using TrueRC singularity’s. I made little plugs that’ll hold the antenna and close up the hole in the skirt.


Finally, I adapted the cam mount for the O3 fpv cam.
