Tweaker 5"
It's like a Tweaker, only bigger.
This is one that people have been requesting for ages. I resisted for a long time because there's already plenty of good H frames out there, and I saw no need to add another to the mix. I'd rather advance frame design, so instead I focused on making frames that are faster (Krieger, Mixuko, Mako) or better balanced (Corgi) than the typical H. I was so successful at this that people saw the light and totally stopped asking for a big Tweaker.
No, wait, I'm confusing my fantasy life with reality again. The requests never stopped. Nate Horning made a nice looking one and agreed to cut some for people who wanted one. I thought I was finally off the hook but I heard he had troubles with his CNC so it didn't happen. Then Scott Roome started a petition on my FB page. Meanwhile, my good friend and photographic mentor Steve Cohen, now the head of the NY/NJ Drone User Group, asked me if I could donate a design for an educational program. I started thinking about a simple 5" quad that would be a good first build basher and oh dammit that's a big Tweaker. Alright, let's do this.
A quick aside on Steve Cohen
I was a self taught photographer who had somehow gotten a job as a design firm's in-house shooter. I was ok, but never having been a photo assistant, I missed out on a photo apprenticeship and so there were a few problems in lighting that stymied me. My firm paid for seminars during Photo Expo, and I took them whenever possible. I was always the most advanced student in the seminars and I would grill the teachers (all pro photogs) with very specific questions. They would all refuse to answer the advanced questions, saying they don't give away trade secrets.
Then I took a seminar with Steve, and he explained the last two things that were keeping me from replicating daylight in the studio (in case you're wondering it's managing color temperature and controlling falloff). He literally opened the doors and made my career possible. I stayed in touch, of course, and kept peppering him with questions, all of which he gladly answered. It got so bad I finally asked him why he was willing to give away so many secrets when every other photographer clammed up. His answer? "I could tell you everything I know and you'd still never shoot like me."
That attitude is part of the reason I started this blog (that and my incessant need to blab about myself). In an industry rife with clones, I'd like to believe I can be pretty open and still retain a certain individuality that's impervious to copying. And finally, it's funny that after losing touch for over a decade we're both out of photography but in the same industry again.
I thought this was about Tweaker
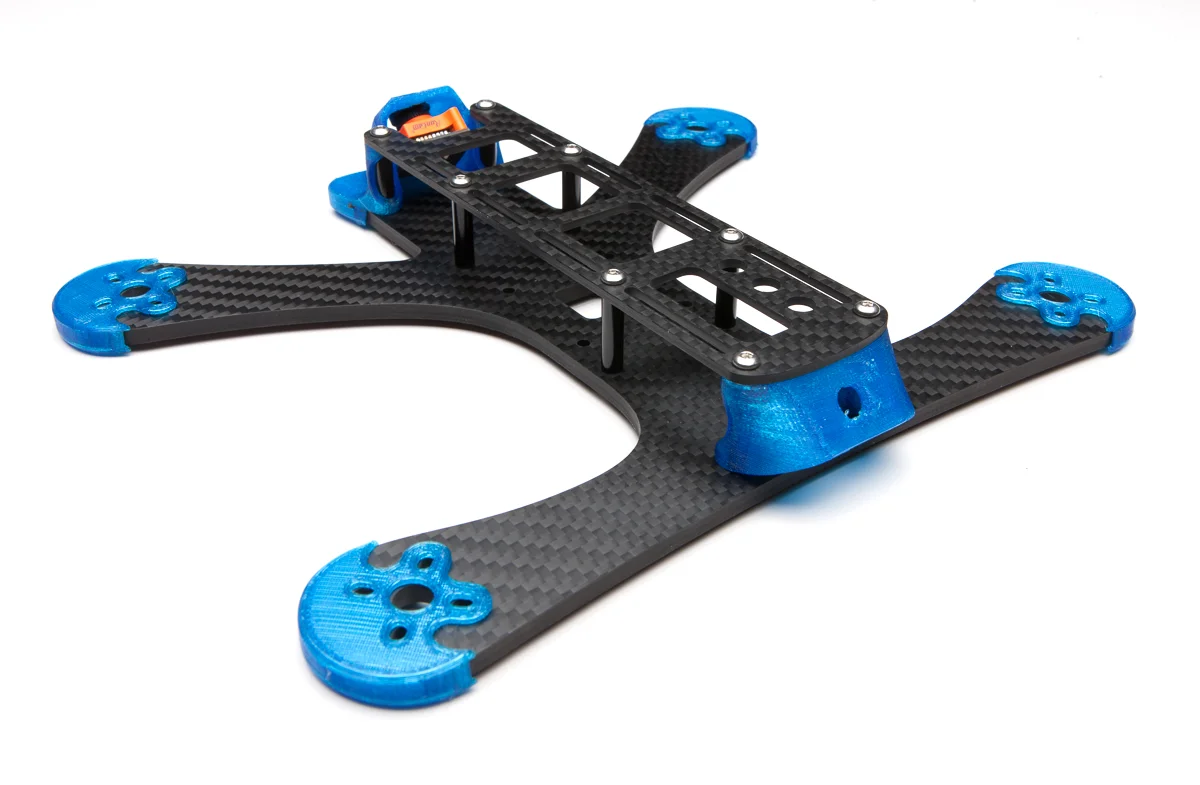
I think part of the Tweaker's appeal is its rather cute and pleasant profile, so I had to make sure to replicate its look. I drew it up in Illustrator rather than Solidworks because Illustrator handles curves better. The bigger quad gets 8 standoffs instead of 6, and the longer top plate means that there's no need for the extension on the 4" top plate – a GoPro and a 1300 battery fit just fine up top. Other than that it was a straightforward enlargement, and I really enjoyed reliving the original drawing process and figuring out again the logic behind each line.

Can you spot the stupid mistake here?
I did find a use for my new 3d modeling skills with a 3d printed camera mount. It slides on over the front two standoffs and locks onto the fpv cam's nubs. The lens snaps into preset angles. Mako had 10 degree increments from 30-60 degrees, which made each snap pretty shallow – you have to apply a little glue on the lens barrel and let it dry to give it more friction to stay put. Since this frame could be used by beginners and advanced pilots I gave the camera a wider range, from 0 to 45 degrees in 15 degree increments. I've been flying the x frames at 50 degrees, but since an h is usually a tad slower I thought 45 would be a good max angle. 15 degree increments make the snaps deeper and the lens holds firm without needing any glue.
I couldn't slide the standoffs out of the first iteration, so I cut reliefs into the columns. Then it was a matter of getting it to visually integrate with the frame as well as possible, by moving the side walls in, and adding fillets to make it flow better.

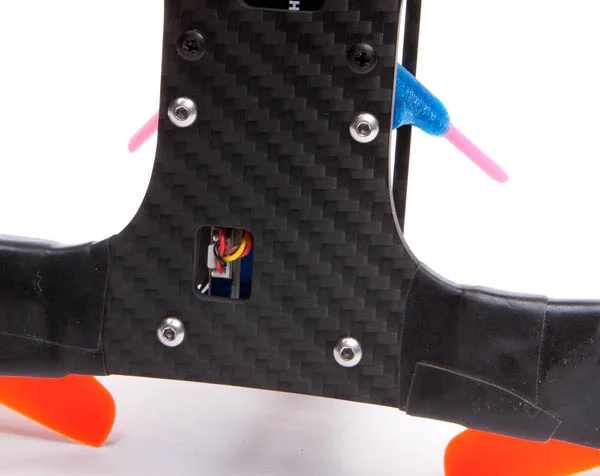
When the first carbon bits came in I found the aforementioned stupid mistake. Illustrator is a 2d program, so after drawing the bottom plate I duplicated the standoff holes on a new layer and drew the top plate around them. I grabbed two of the fc mounting holes by mistake and transferred them to the top plate. Luckily a slot aligned with the unmatched standoff hole so prototypes could be built without Dremeling.
See the stupid mistake now? No I'm not talking about the missing screw. That's the clunky first iteration of the cam mount.
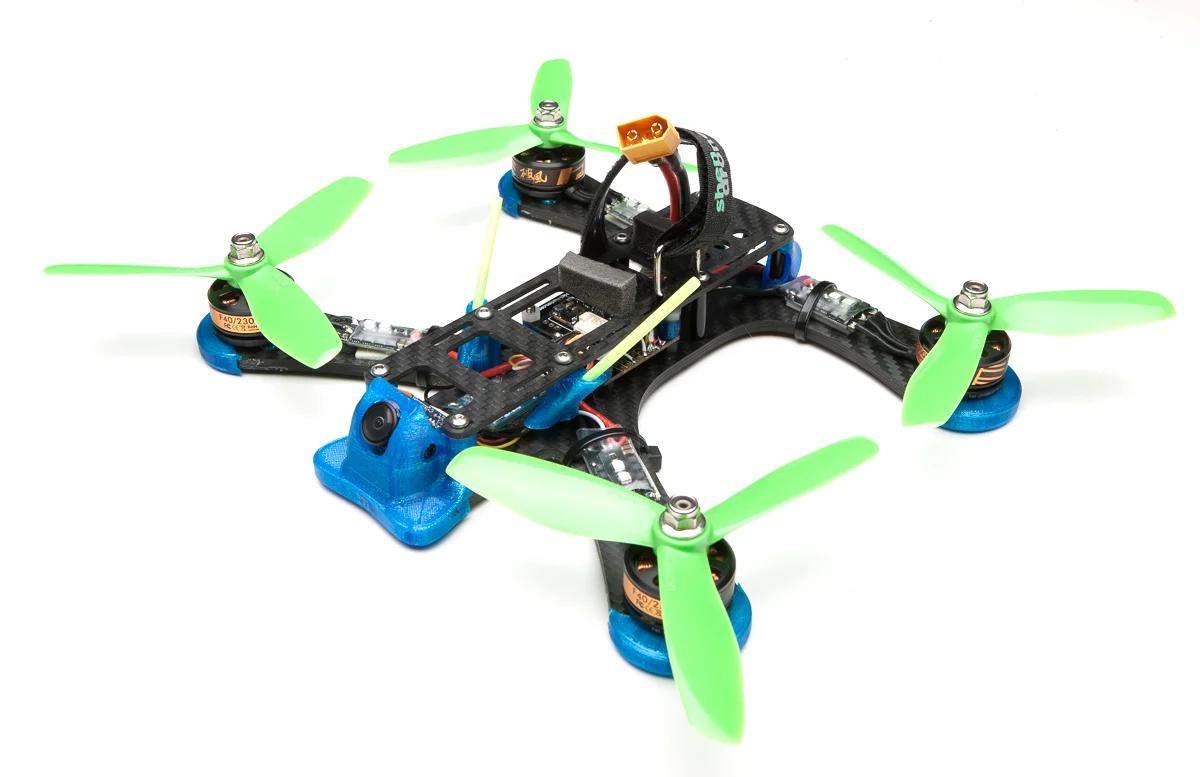
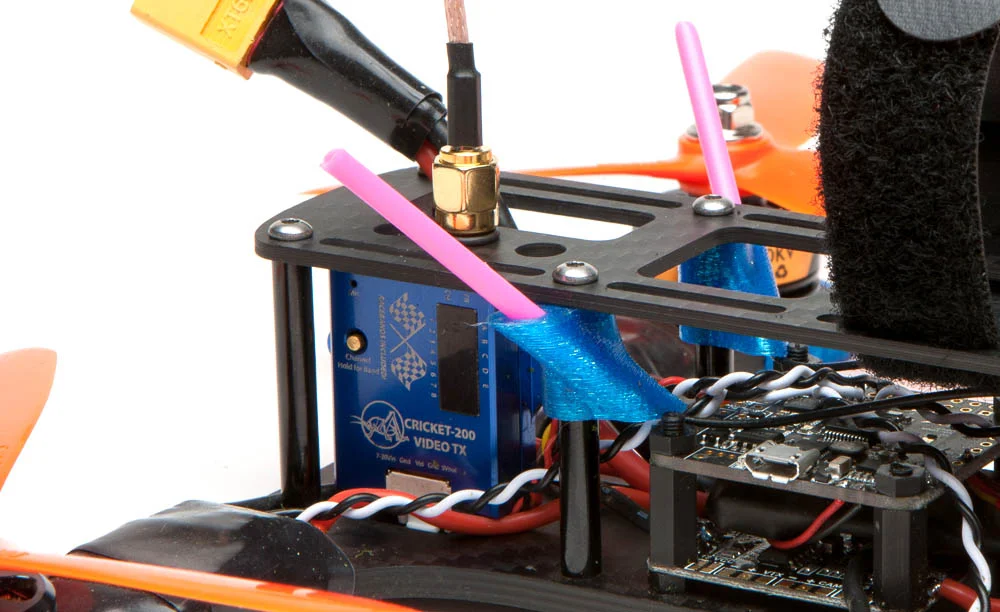
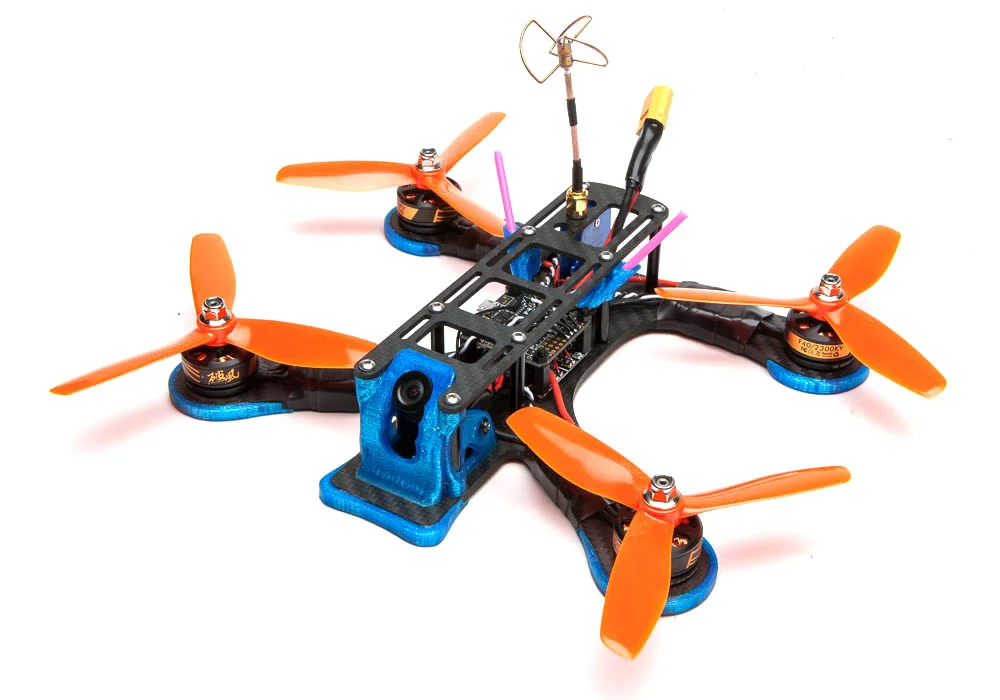
After a series of pod builds, the Tweaker build was laughably easy. The only tricky thing is to preplan your vtx placement. There's a relief cut into the bottom plate for the connectors on those extra tall vtx's. Plan ahead so the connector fits in that gap and the push button is easily accessible. Mine's on the right, but if you want your antenna as far back as possible put it on the left. I put mine together with the super smooth Tiger F40's, Rotorgeeks 20's, a Dodo, Cricket, and a Matek and took it out.
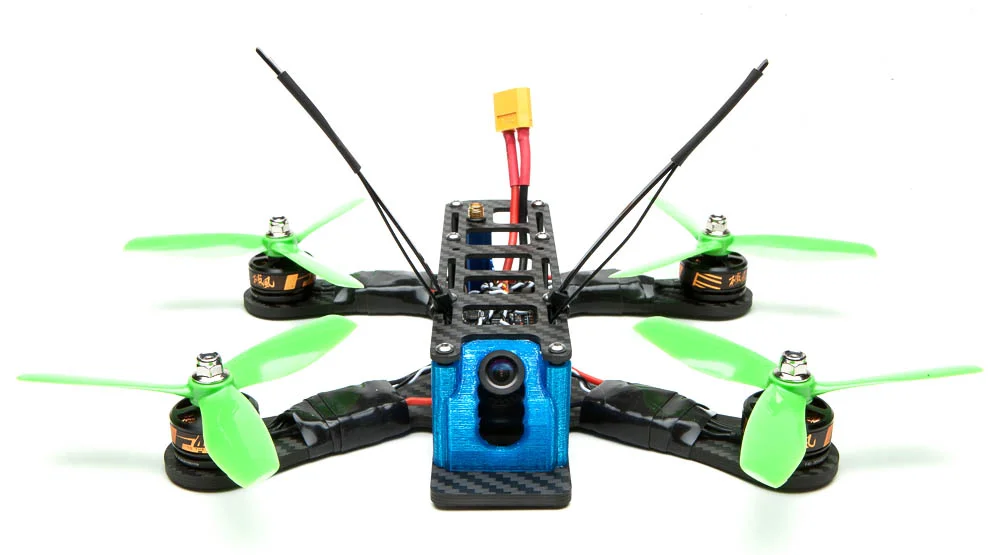
This is what happens when you break all your antennas and have none left for photos.
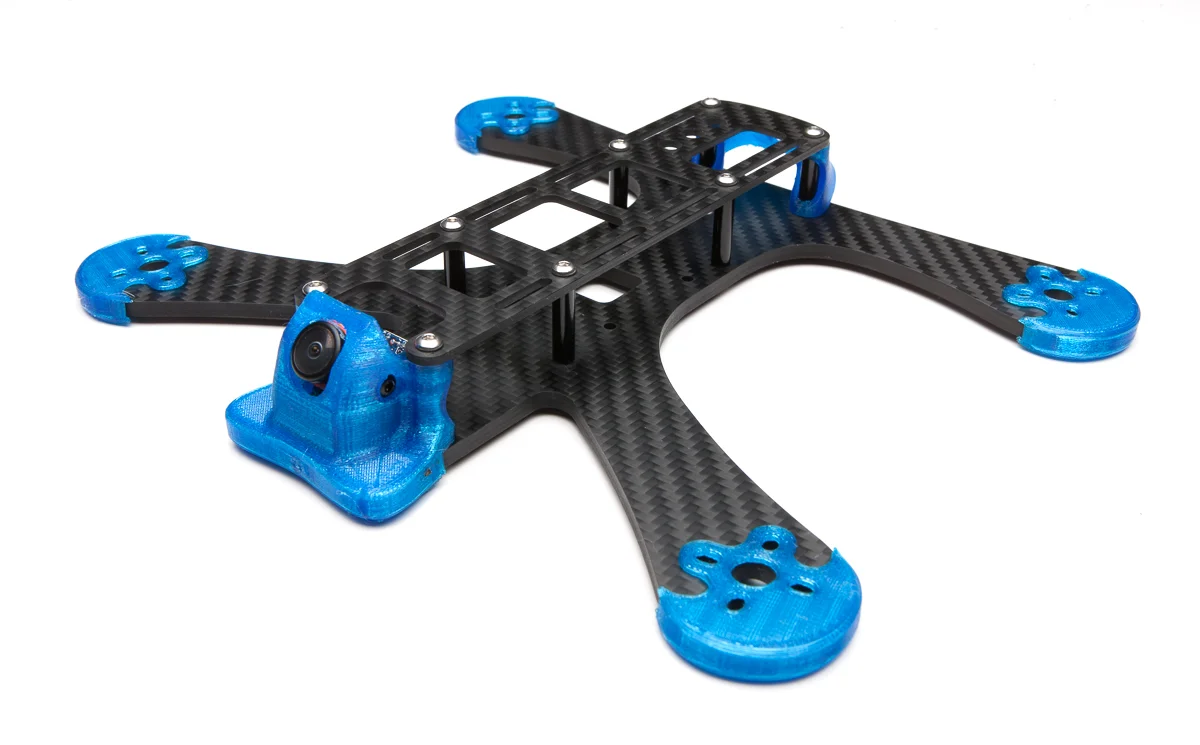
The maiden went perfectly well with no surprises. Even my guessed pids ended up being almost right on. I did find that 45 wasn't enough tilt, so I redrew the cam mount to go from 5 to 50 degrees. Other than that there wasn't much to change except fixing my error on the top plate.
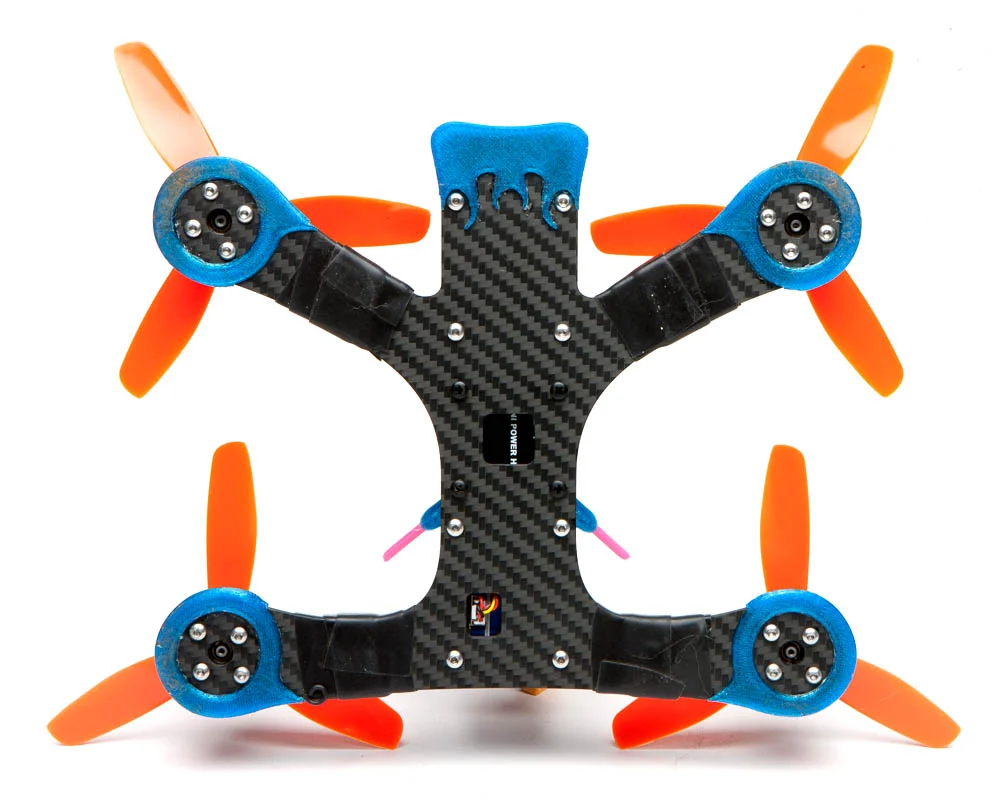
And now that I have my own 3d printer I can quickly whip up accessories. Someone teased me about the ziptie'd antennas so I drew up some tube mounts. These are super modular, they go on any standoff, tilt back so they're vertical in forward flight, and rotate in a crash. Print two at a time on a raft so the extruder will leave the part and let it cool.
I also whipped up some arm and nose guards. Alex Walsh told me all the accessories had to be as stylin' as the frame, so here you go. All the parts are up on Thingiverse.
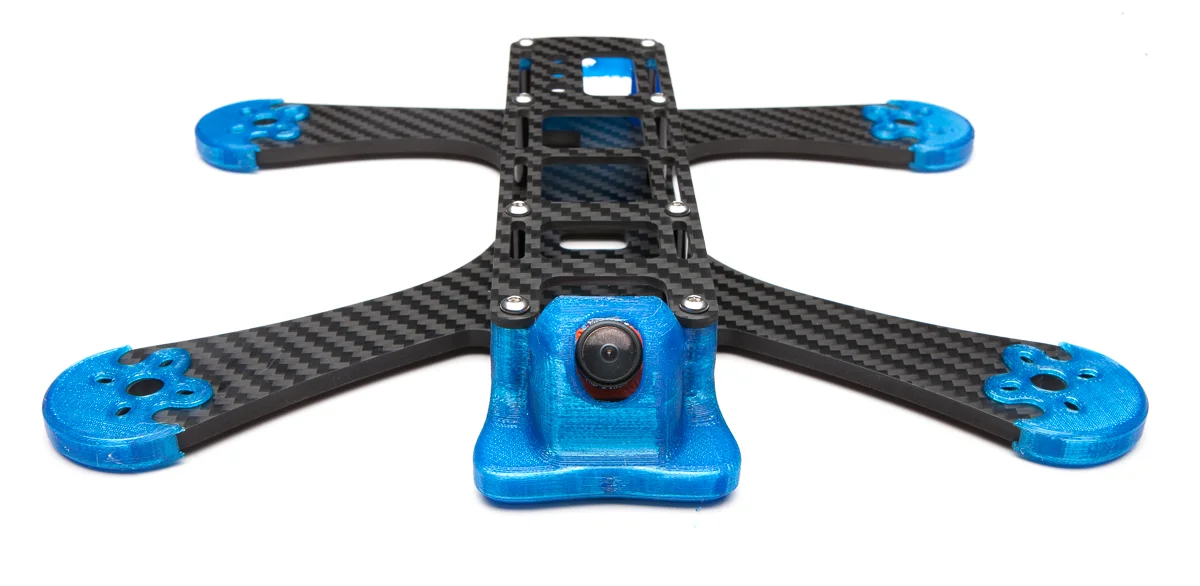
With the corrected top plate. The final version of the fpv cam mount makes the front end look much less clunky.
So that's about it, a whole lotta words about a simple H frame. Even though I resisted and resisted it's grown on me, it really is an adorable little package. Actually, market research tells me I shouldn't describe my frames as 'cute' or 'adorable', so let's say it's really badass and radical. The kit will include the 3d printed cam mount, and as marketing research further dictates, it'll be none more black with black standoffs. Get yours here.
It's Baaaaack
It's been about a year and a half, and things have really moved on. Now I'm mostly flying Flacos, Raptures, and Arkangels, and I haven't flown a Tweaker in ages. Then one day Brian Lee posted on the Safety Third Slack, asking if anyone had spare top plates. He wanted to cut two of them to make a split level slammed build. I suggested that he use a Runcam Micro instead and slam the whole thing, essentially volunteering myself to make a new 20mm tall cam mount.
My first thought was to do a simple strap like I'd done for Flaco and get it over with quick, but I thought it'd be nice to have variable angles.

Plus, it'd be nice to seal the nose so it doesn't act like a shovel and scoop dirt into the frame. That brought the mount really close to the noseguard, so I decided to merge the two. That'll make a cool integrated nose, and eliminate the need to glue the guard.
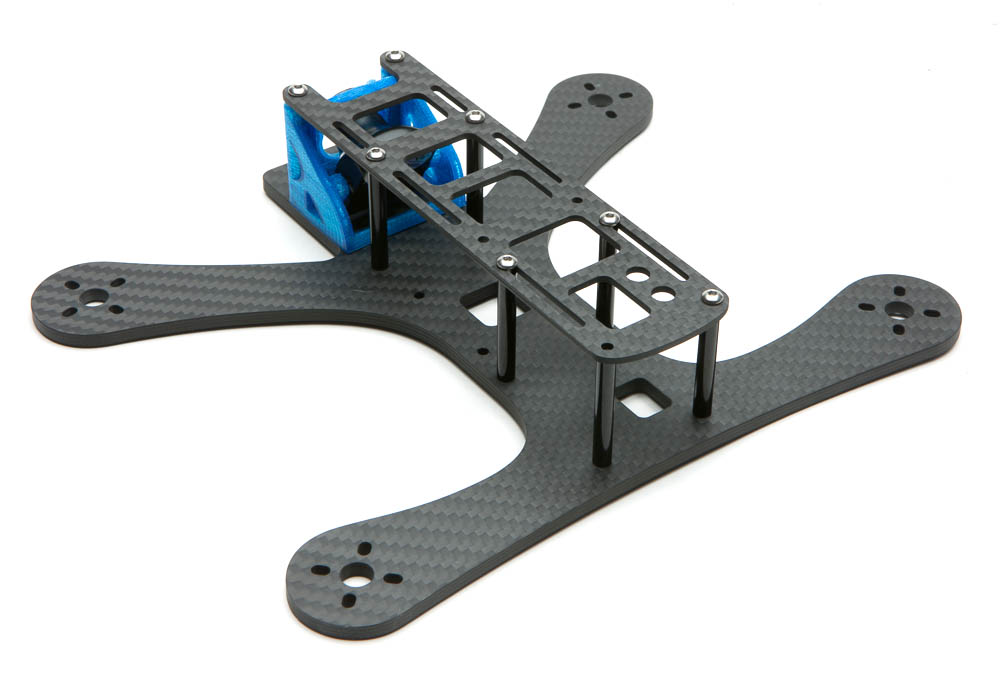
A lot of 3d modeling is like solving puzzles, and this one was a particularly enjoyable puzzle to crack. The guard is a few stacked extrusions, while the cam mount is a series of surfaces that are thickened. Then they're merged and filleted and chamfered to clean things up. I made one for the 4" Tweaker afterwards and the process was more streamlined the second time around. Here's some shots:

Three extrusions start the noseguard. The dxf of the frame serves as the template.

Standoff post added. A recess is cut to save weight. Also, it's almost impossible to standoffs out without that recess cut.

The cam mount is surfaced with extruded surfaces and a boundary surface (the part that curves around).

The surface is thickened to make it a solid, and the extra material on the noseguard cut away.

Fillets and chamfers. The bottom is chamfered instead of filleted so it has a consistent 45 degree slope to print up from the print bed.

Cut holes, mirror, and voila.
I originally told Brian to build his up and take nice pics, but I liked the part so much I had to build up my own. Here it is:
All parts are slip-on now, no more gluing! The armguards double as motor soft mounts.