
3d Shrieker
The Shrieker is the one instance where I've prioritized aesthetics over function, and wouldn't you know it, it's been an enduring design that continues to sell long after its inception. And now that components have changed so much (smaller cams, 20x20 stacks, smaller vtx's, etc.), I wanted to give it an update.
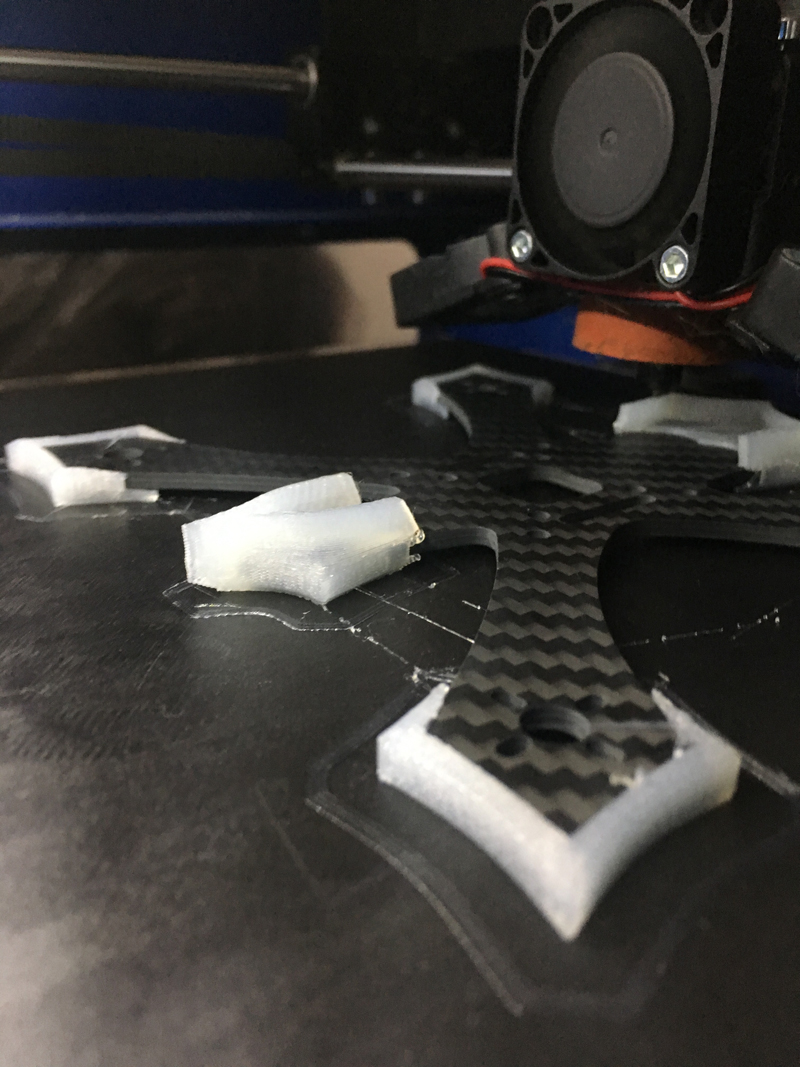
I've been experimenting with embedding things inside 3d prints – print a cavity for the part, pause the print and drop in the part, then print over it all and seal it in. Here's a test piece enclosing a carbon part:

And here's some nuts printed in another part.


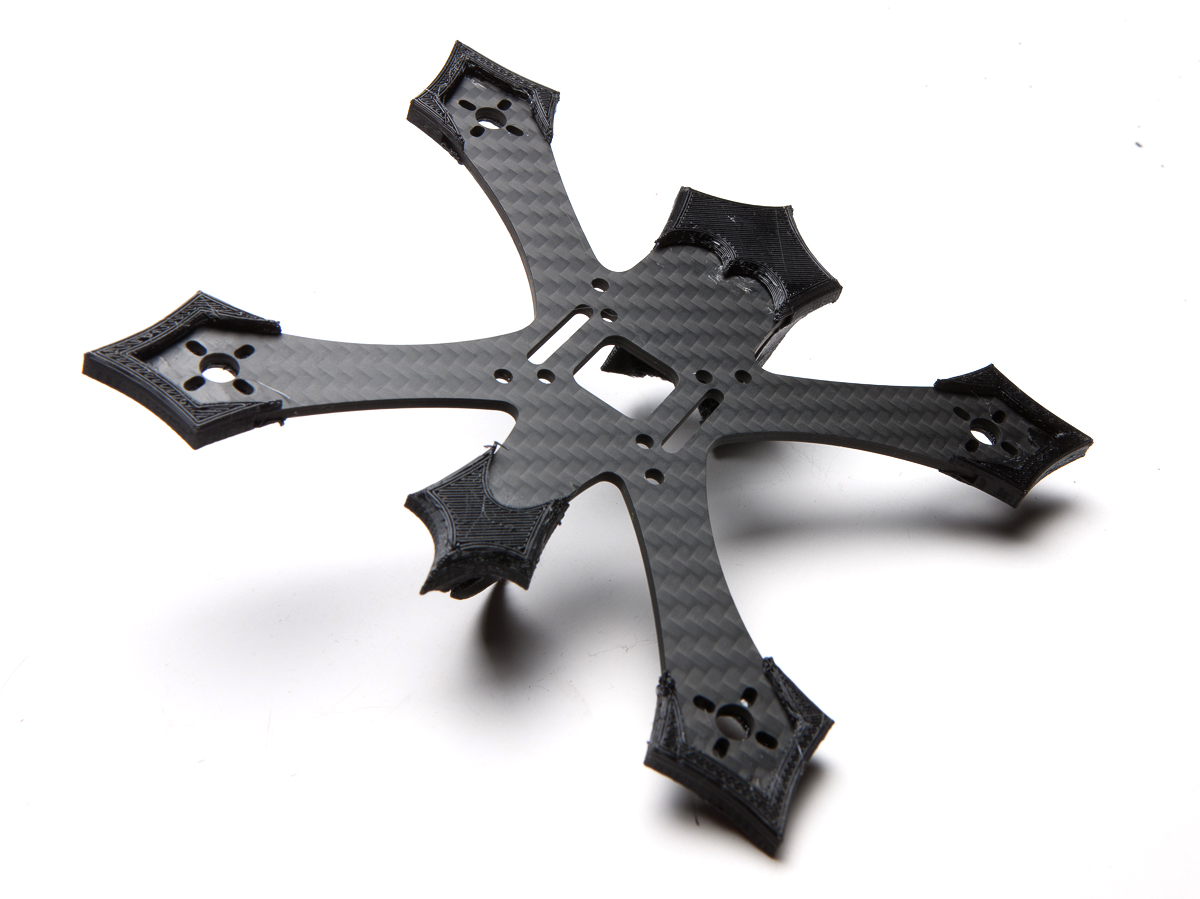
Given the small size and light weight of the Shrieker, it seemed like a perfect opportunity to try a fused frame. The idea of a one piece frame that requires no assembly really appealed to me. The process is pretty straightforward. Import the dxf outline of the frame, offset it a bit so the part will fit inside the cavity, and then draw around it. Here's the nose, to give you an idea of what the part looks like.

It's a tiny part but it still has variable tilt for the cam, with click stops at 30, 45, and 60 degrees.
Note that material is printed through holes in the frame. Those posts turned out to make a big difference in how well the print attached to the carbon. I also drew up armguards which had no pass-throughs, and they ended up with some play. The nose and the tail, which had pass-throughs, were rock solid. All the parts drew up pretty quickly, just three or four hours of work. I dropped them in Simplify3d and then eagerly fired up the printer.

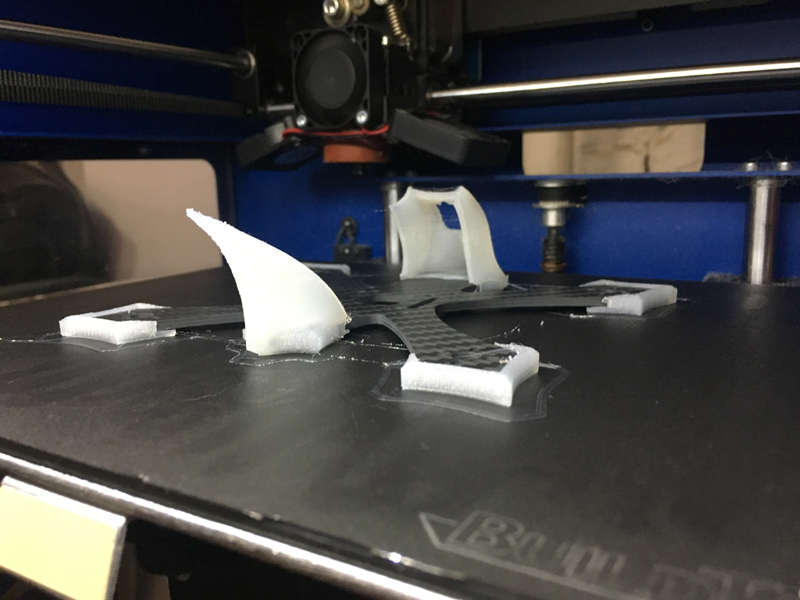
A script paused the print at the right layer height, and I dropped in the frame. It's really fun to watch it slowly get printed over.

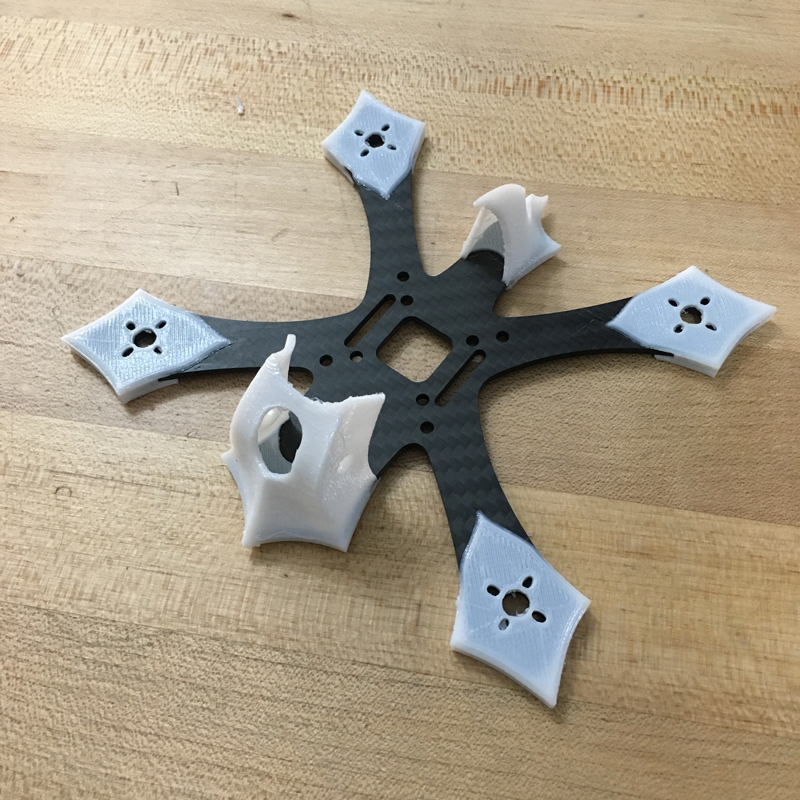
I built it up with Rotorgeeks 1407 4000kv's, Furious Piko + Innova, Runcam Micro, and a 4in1 from...myabe Banggood? From original idea to built quad in about six hours, such instant gratification.

I didn't like how big a gap there was between the nose and the tail, so I revised the tail and printed up another version. Either way there's not much protection for the stack, but it's still better than frames with structural stacks, which never made sense to me.


Then I realized it was 3am and went to bed.
I maidened it the next day and had a blast. The last 3" rig I flew was the Hedwig with 500mah batteries, and it was incredibly light and floaty, with a very low inertia/drag ratio. That meant staying on the throttle more to maintain speed, pushing all the way through turns, and pulling out of dives much later. Those 500's are all dead now, so I flew Shrieker with a 1000, and the extra weight made it fly more like a 5" rig. Here's some of my crappy flying:
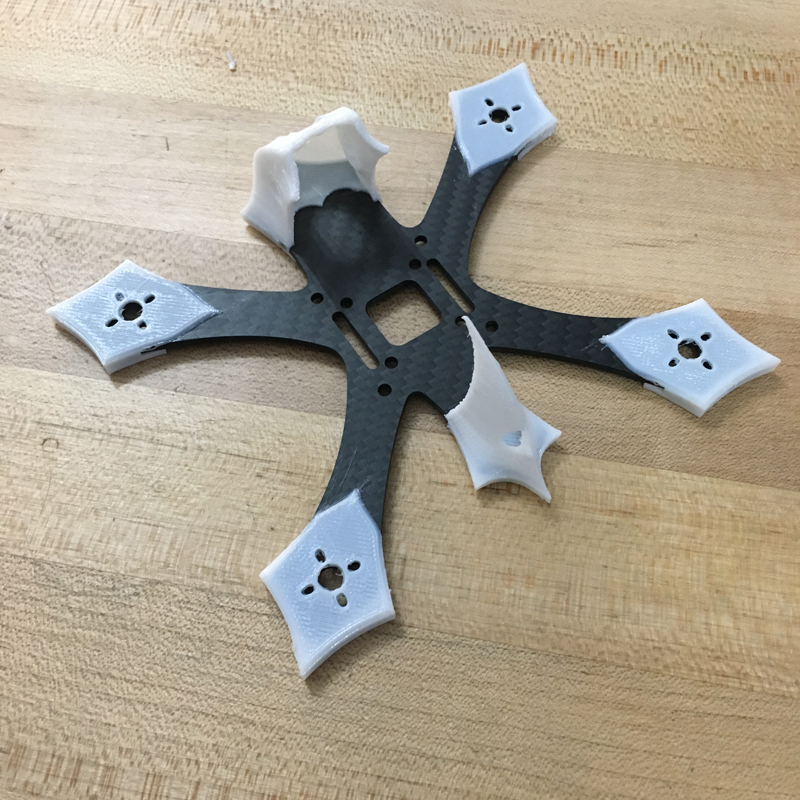
Then I hit a branch and ripped the head off, and the flaw in this frame came into focus: no easy repairs! Break a part and you have to strip the frame down and restart from scratch. Damn.
I rebuilt it with the other print from the night before, and added a tpu top for the stack.

This build held up just fine, mostly because I didn't drill it straight into any trees. I took it out with two 5" rigs and a bunch of 1000's and 1300's. The plan was to fly the Shrieker with the 1000's and the 5" rigs with the 1300's. But when both 5" rigs broke I finished the 1300's with the Shrieker, and managed to tie my personal best time on my tight little test course.
It was clear that the printed parts would be better in TPU – they're so small that TPU's flex wasn't an issue, and TPU's greater durability is a huge asset for this hard to repair setup. And now that I'm using TPU, I extended the armguards under the motors so they'd double as motor soft mounts. I built it in red and black, and printed another one in white to show off the parts better.


I wasn't crazy about the look of the armguards so I redid it in black.


I've bashed the latest build repeatedly and am pretty confident in the durability of the printed parts. If you're handy with a printer you can try it yourself, just pause it after 4.2mm (between layer 21 and 22). If not, you can pick one up here.