Blast: Build Log
Here’s how you build up a Blast.
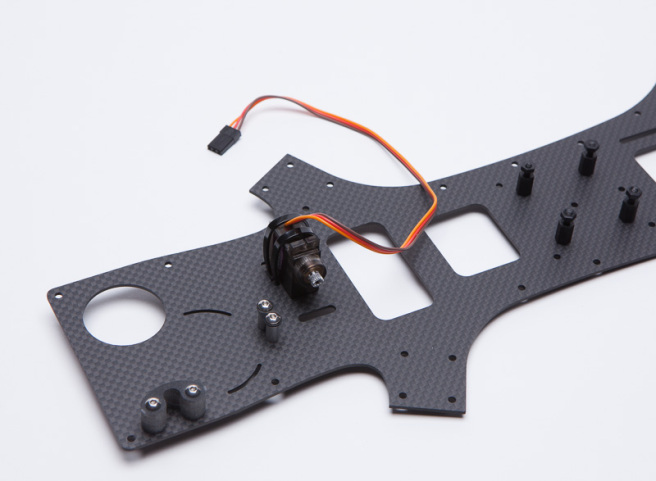
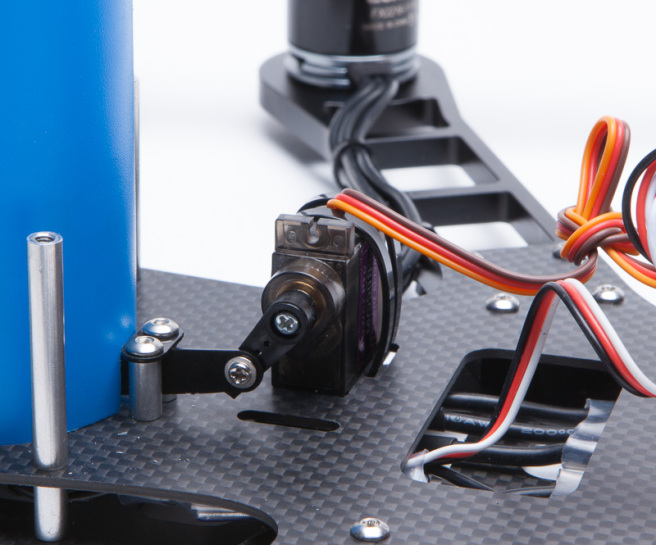
Attach the servo with a couple of zip ties. The pusher cover is mounted with 2 10mm standoffs, and the crescent is bolted on with 2 long M3’s and lock nuts. I made a mistake here, the nuts should go on top. The holes for the crescent are slotted in the middle plate so you can tweak the shooter’s aim if you want, and you can access the hex bolt heads through two holes in the bottom plate. Having said that, the shooter should be perfectly aimed if you mount the crescent in the middle of the slots.
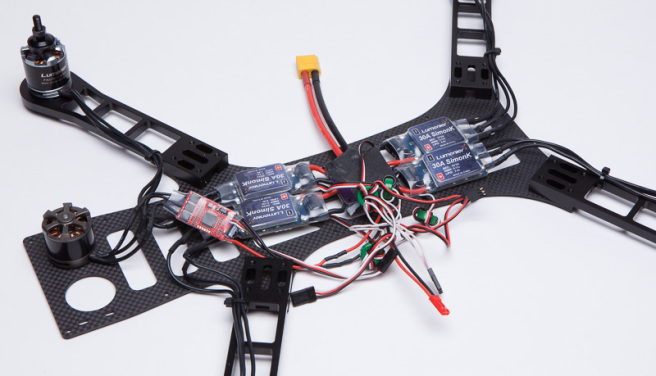
Extend the power wires on the provided ESC. It’ll have to reach around the main ESC’s to reach the PDB.

Heh, you said reacharound.
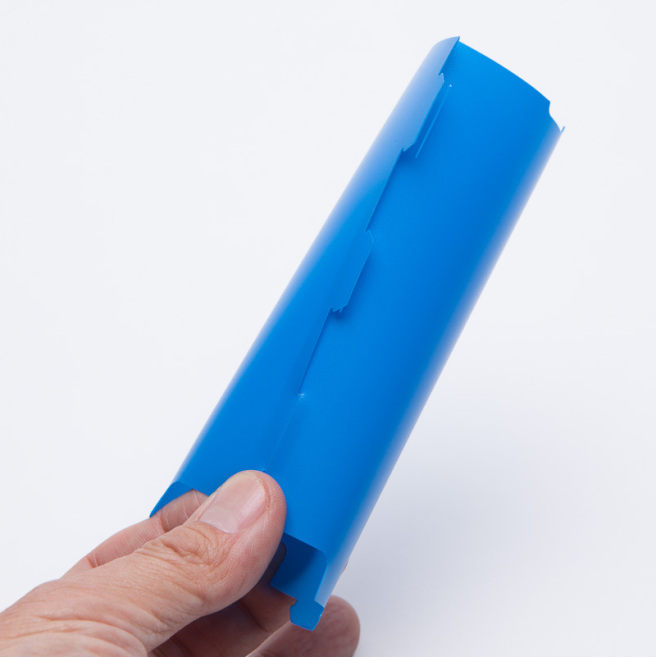
Snap together the barrel with the snaps coming around the outside of the slits. Make sure the snaps make it all the way through.

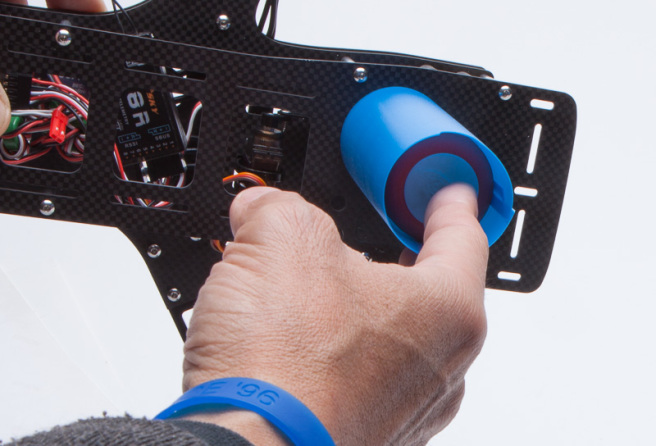
Snap the barrel onto the middle plate. This can be tricky so be patient. Wedge one side of the snap through the slot and rotate it firmly against that edge, then snap the other side through. Celebrate with a beer after if you wish.
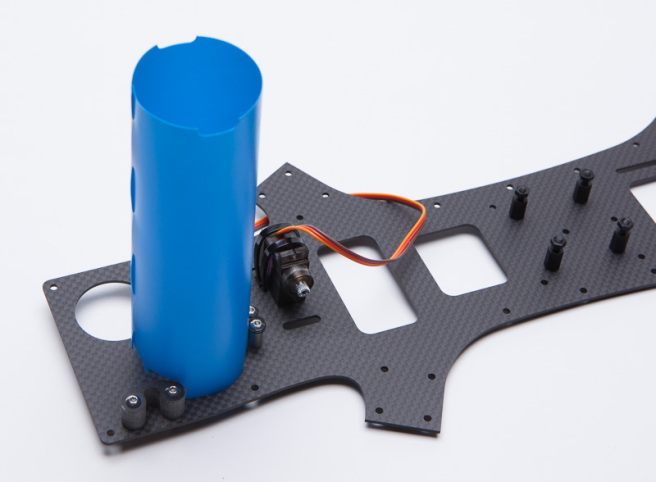
Don’t worry if you make a mess of it. The top plate has a perfect fit over the barrel, once it’s on it’ll be rock solid.

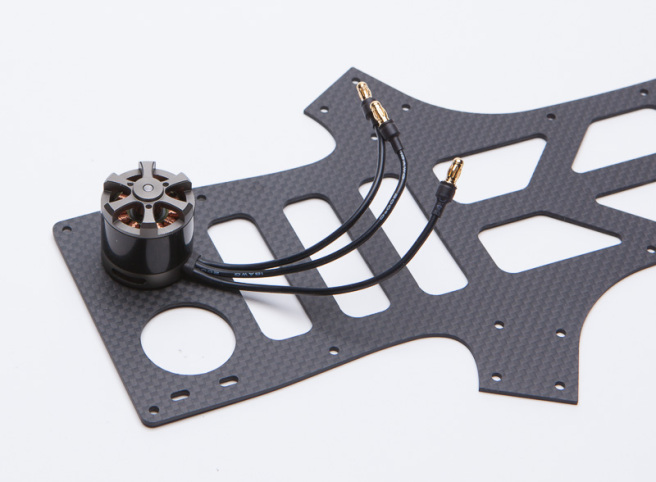
Mount the shooter motor to the bottom plate. Make sure to use the supplied shorter M3x4 screws. You don’t want to risk the screws touching the windings and shorting out against the carbon.
Attach the arms and motors.

Using the frame as a template, solder the ESC’s to the PDB. There’s only 10mm of space between the two bottom plates, so with certain ESC’s you’ll have to be very precise and clean with your wire routing.

The capacitors have to be positioned over the cutouts on the bottom plate. Make sure you insulate the PDB, carbon is conductive!

Connect the motors, including the shooting motor. Make sure it spins clockwise!
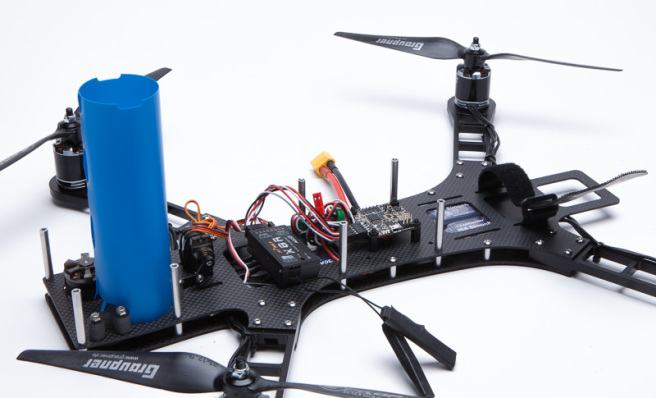
Bolt on 10mm standoffs to the bottom plate and attach the middle plate, don’t forget to add the battery strap to the middle plate first. Check which holes are shared with the top plate, and use long M3’s for those holes, then screw 35mm standoffs to them.
Screw the delrin pusher onto the servo arm, leaving just enough slack so it swings freely. Adjust the throw of the servo so that it’s fully extended into the barrel at one extreme, and out of the barrel but still between the two standoffs at the other.

Add your fpv gear, slide the top plate on and you’re done!

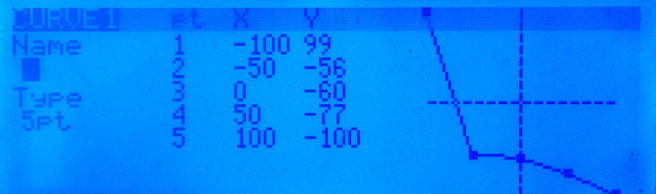
The servo and the fifth ESC are on additional channels. To shoot, start the motor and push out a disk with the servo. On my Taranis I have both channels assigned to the same switch. The motor hits full speed at the middle position, and I have the servo curve set so it doesn’t advance a disk until the motor’s running. This is probably excessive – the motor revs up so quickly it shoots fine with a simple two position switch operating both channels.
Finally, a quick tip on loading the disks. They have an uncanny knack of landing upside down if you try to load them one at a time, so do this instead. Lay as many disks in your hand as can fit and slide the barrel over them inverted.

Pin the disks against the middle plate as you flip the Blast over, then top off the rest of the way.