
Odonata
The sad tale of a stillborn frame
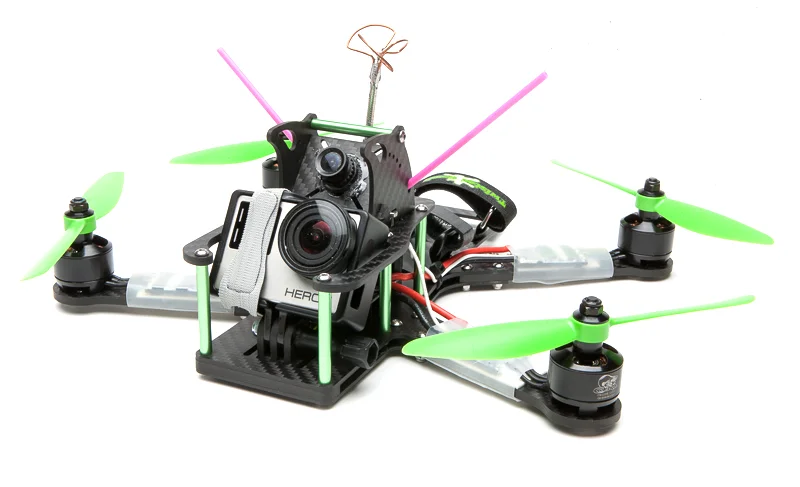
This one was a request from Alex – he said I needed a dedicated GoPro hauler in my fleet. While the Krieger can easily carry a GoPro, and surprisingly yields perfect video with it hard mounted against carbon, it's an awkward and wonky fit. Alex wanted a Superbeast-style H quad that gives the GoPro better protection.
It's weird to go back to an H after Krieger. The symmetrical X flies so well that in my mind H's were obsolete. Besides, the Superbeast’s GoPro cage has been copied so much that there’s no lack of offerings in the category, so I set myself some goals to see if I could create something slightly better.
I wanted easily adjusted cam tilt for the GoPro and the fpv cam. Weight should be as centralized on every axis as possible so it’ll be a nimble flyer. Now that everyone’s spoiled on ludicrous power to weight ratios this baby has to be a beast too, so it’ll be 6” props on 2206 or 2208 with an 1800. And of course it has to look good.
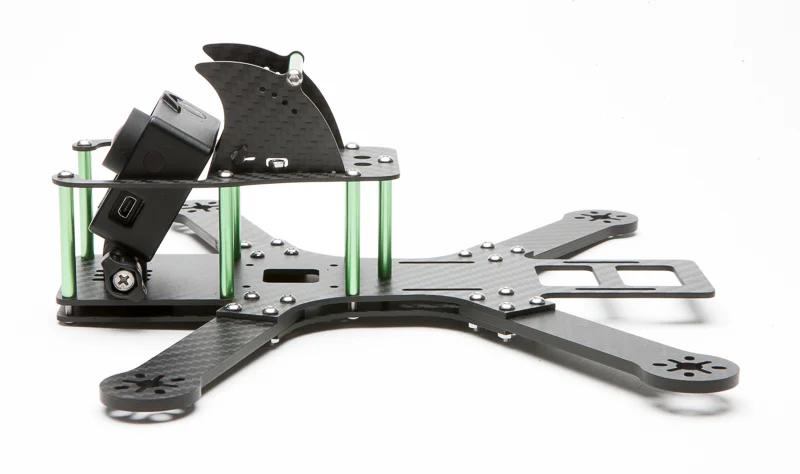
My first idea was to use GoPro’s The Frame mount. It has 3mm tabs, easily replicated with CNC’d carbon. Plus, it’s an easy standard to adopt, in case anyone wants to 3d print a better mount. The fpv cam will have a Krieger/Mitsuko style mount. A lot of people have been using the metal bracket that comes with PZ cams, but I hate how it bends in a crash and how those little screws can’t hold the cam angle steady. My pod has to be rock solid and provide lots of protection for the GoPro and the fpv cam.
The GoPro and the battery are the two heaviest components in the build, and they reside on opposite ends. I wanted them as close as possible to reduce rotational inertia for pitch and yaw. And I wanted them both in line with the props to make roll snappy as well. I could butt them together and put the FC under the middle plate, but that’ll make it tough to build and maintain. So I opted to move the FC up against the back of the GoPro. That puts the FC off center, but we don't use the accelerometers so this will have no ill effects on flight.
I put the three pieces on a little board and found the balance point and began the layout from there. The GoPro cage makes the front end super wide so it was a real struggle to make something aesthetically pleasing. People have been asking for a bigger Tweaker so I tried a similar arm layout.

Then it languished for weeks. It wasn’t awful, but it was far from perfect, a little too clunky for my taste.
When I came back to it I started fresh again. I realized that the middle and bottom plates didn’t need to be as wide as the cage, just the GoPro. And maybe the rear could be narrowed as well, by ending the top plate at the battery. With the rear of the copter unsupported by the top plate, I swept the rear arms back so the gap between the arms would be smaller and torsionally stiffer.
I also made it a dead cat to make the rear more compact and stiffer, which Alex objected to vociferously. I countered that prototypes are for experimenting and I could always revert to a rectangular layout. I was curious to see how well a custom motor mix could compensate for the motor layout.
The middle plate extends quite a ways on its own. To stiffen it up, I’m using two battery straps, one inside the reinforced section and one outside it. The battery is effectively stiffening up the middle plate, preventing it from being a diving board. It’s a tip Tim Nilson gave me ages ago on a botched gimbal quad design – it’s good to have a pile of failures to build on.
With those parameters set the design came together pretty easily. I’d just gone through several iterations of the Mitsuko fpv cam pod, so I applied those lessons to this pod. I made the sides of the pod 2mm since they're in a position to take a good hit. The only other noteworthy detail is the use of 40mm standoffs to accomodate the new push button vtx’s, ReadyMadeRC’s Cricket and Rotorgeeks’ FX799T.

V1 built up quickly and easily, with the new Tiger F60’s, Kiss 30’s, an X4r, and a Dodo. Before she even got to the field the crew had a couple suggestions: fill in the bottom lip with a 4mm carbon insert for crash protection, and double up the GoPro cage.

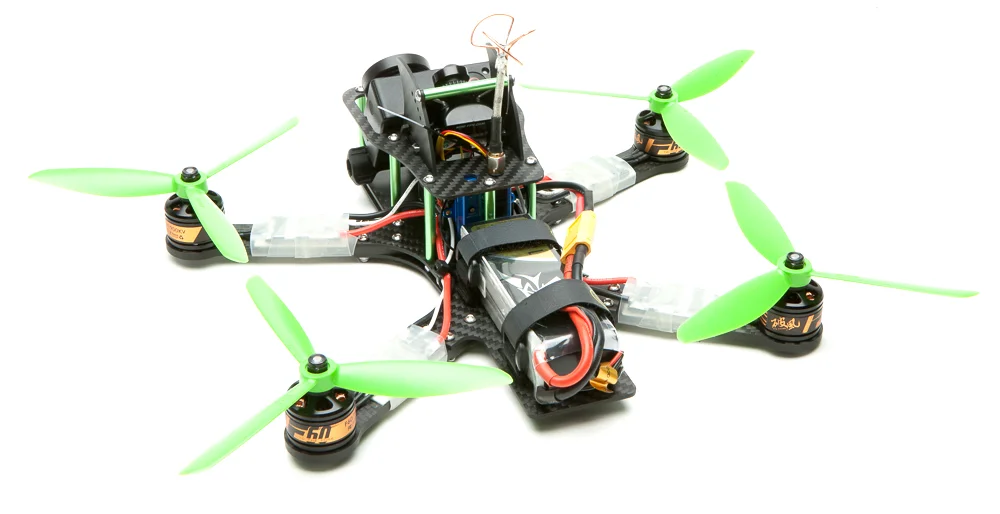
Alex got the first crack at it the next day. LOS tuning began and I was relieved to see that rolls were perfectly axial. I’d never read up on dead cat motor mixes before, I just assumed that the shorter levers needed proportionally reduced outputs, so I was glad that my motor mix was working. Thanks to its mass and the super smooth Tigers, she flew beautifully, though Alex (but not I) wanted more punch. He’d build it with 2208’s.
I was worried that the video would have jello, in which case I’d have to get a Ninja Flex mount printed, but thankfully the video quality was perfect. I can’t believe how hard I had to work at getting perfect video from my big aerial photo rigs, and this little guy is just fine out of the box.
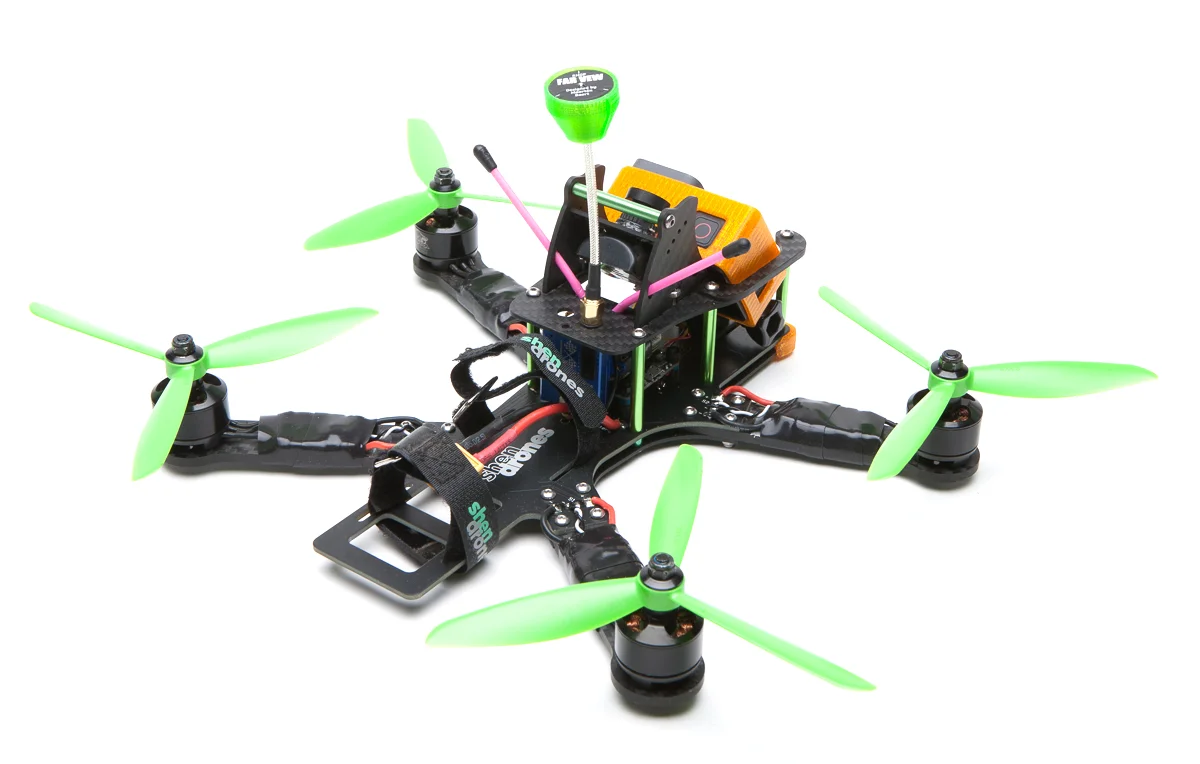
Here's V2, with the changes suggested by the boys. The cutter mistakenly made a 3mm filler for the front lip, so the 4mm gap isn't so clean. I added a couple extra slots for mounting tabs so someone could create a more robust GoPro frame if they wished.
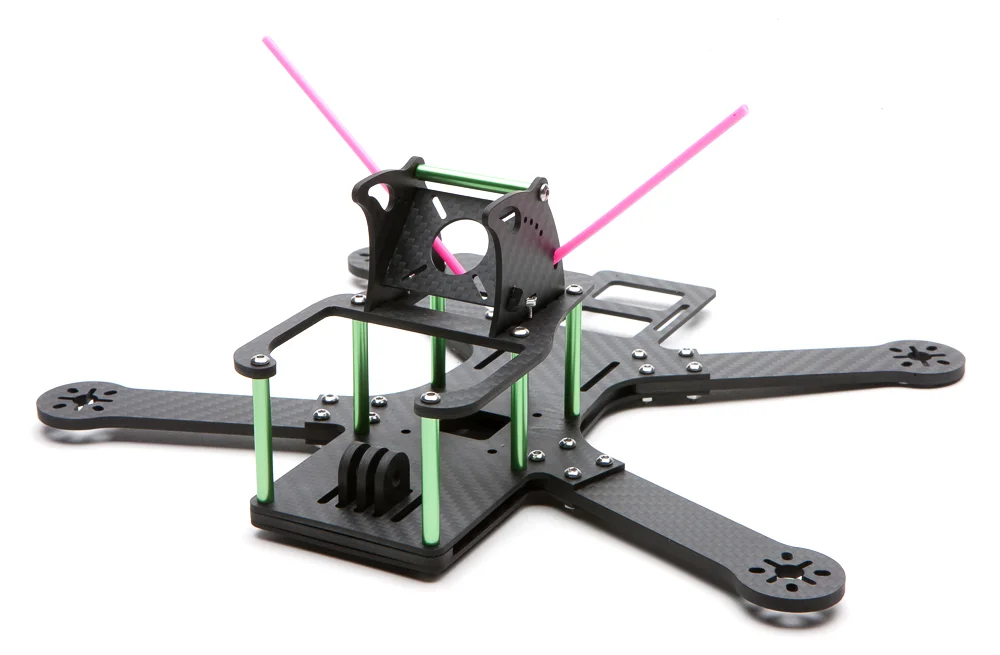
I'm really proud of the antenna straw mounts. The two holes are slightly misaligned so that the straw is held in place under tension. It's the little things.

I took V2 out and promptly drilled it into a tree at speed on the first battery.
Don't ask me why I didn't go around that tree. The GoPro Frame sheared off on impact, so I'll be using a strap in conjunction with the Frame in the future. The good news is the frame brushed off the impact, so there's that.
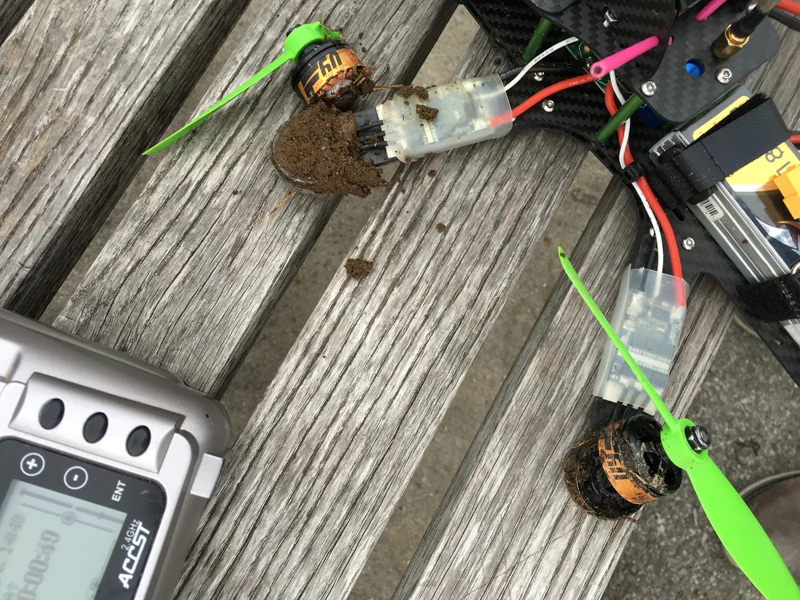
Then I flew it back to back with a Mixuko, and whaddaya know, those F60's started to feel underpowered after all. I also managed to lawn dart it into some mud, which had an adverse effect on said motors.
Here she is rebuilt with Cobra 2208's, and a recut 4mm lower lip which fills the gap just right. Also note the strap for the GoPro, which keeps it from ejecting forward and snapping the Frame. I also tweaked the GoPro mounting tabs a bit so the cage is no longer visible on video, even with the GoPro tilted as far forward as possible.
Here's Shane ripping it. I kept treating mine like a large smooth cruiser, but Shane just tears it up like it was a 180 or 210. The funny thing is Shane didn't have a GoPro with him, so he mounted his Session using its frame, which just happens to be compatible with the Odonata's mount. It hadn't even occurred to me that this frame could easily carry either camera.
And then...
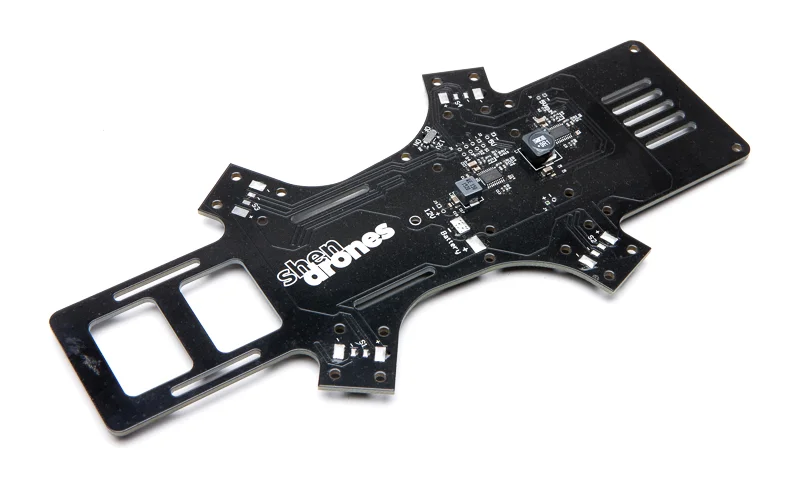
At this point I was pretty happy with the frame and considered it ready for release, but Alex, a longtime subscriber to PDB Aficionado Magazine, noted that it would be sooo much nicer with a pdb. Looking at the tangle of wires, I had to agree, but I, an electrical idiot, had no experience designing a pdb. I found an electrical engineer and started the process with Ken Loo's help, and after a few weeks and much progress...he became unresponsive.
So the search was back on, and another EE was found. This time Alex joined in on the process, and we refined the specs for what we felt would be a perfect pdb. And after a few weeks and much progress...he became unresponsive. What is it with EE's???
I was starting to get really disheartened by this. The process was taking so long – four months were lost – that I was ready to either release the frame without a pdb or give up altogether. Alex gave it one last shot, with advice from Ryan Gury of DRL (all their rigs have pdb's), and began a search for an EE on Upwork. He found someone who knew quads (!), so we gave it another shot.
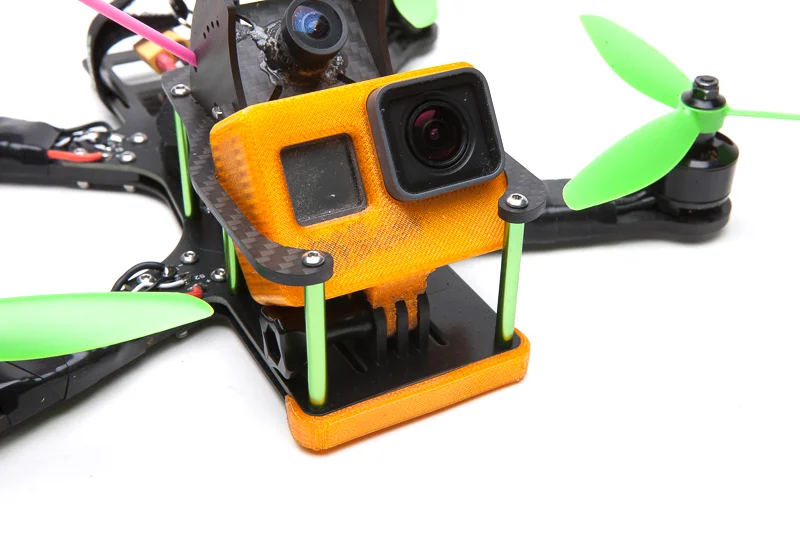
Amazingly the design was completed and samples were made. I took mine apart and rewired it with the pdb. By now six months had passed, and things were pretty different now. For one, wider lenses have become the norm, so now those protective horns on the cam mount are prominently in view. I'd also gotten heavily into 3d printing, so I drew up a TPU noseguard to replace the 4mm carbon filler. It's a cool little piece that slides in between the plates and protects the nose while doubling as a spacer. And since it's flexible, you can compress it slightly to clamp the GoPro mount tabs. I also grew tired of snapping GoPro Frames, so I drew up a TPU version.
Alex spec'd the pdb to handle 6s, so there were no worries firing it up the first time. We put in a few 4s batteries each on our builds and then Alex put on some 6x3 dual blades and whipped his rig around on 6s like it was an agile 5". He then put another 6s on my rig and told me to give it a shot. I'd totally forgotten that it was missing a prop nut (I borrowed one from it when I lost a nut on another rig), so it instantly flipped over and a Kiss30 went on fire. And that was the full extent of my experience on 6s.
We did a couple more revisions on the pdb, and it was looking really nice. Alex gave it a vtx switch so you could power on without video, and he ran power to the GoPro so you could fly without a GoPro battery. The factory sent a couple of different finishes and the matte board looked amazing. The whole thing was a year in the making but now it was finally ready.
AND THEN...
GoPro announced their new camera lineup, with a 4k Session and a $400 Hero. My Zoompod sales already told me that Sessions vastly outnumber Heroes in miniquads, and now this news pretty much made the Odonata obsolete before its launch. There's just no way I'd recoup the expense of an initial order of pdb's.
And so ends the sorry tale of the Odonata.

Odonata, George wants to tell you about some rabbits.
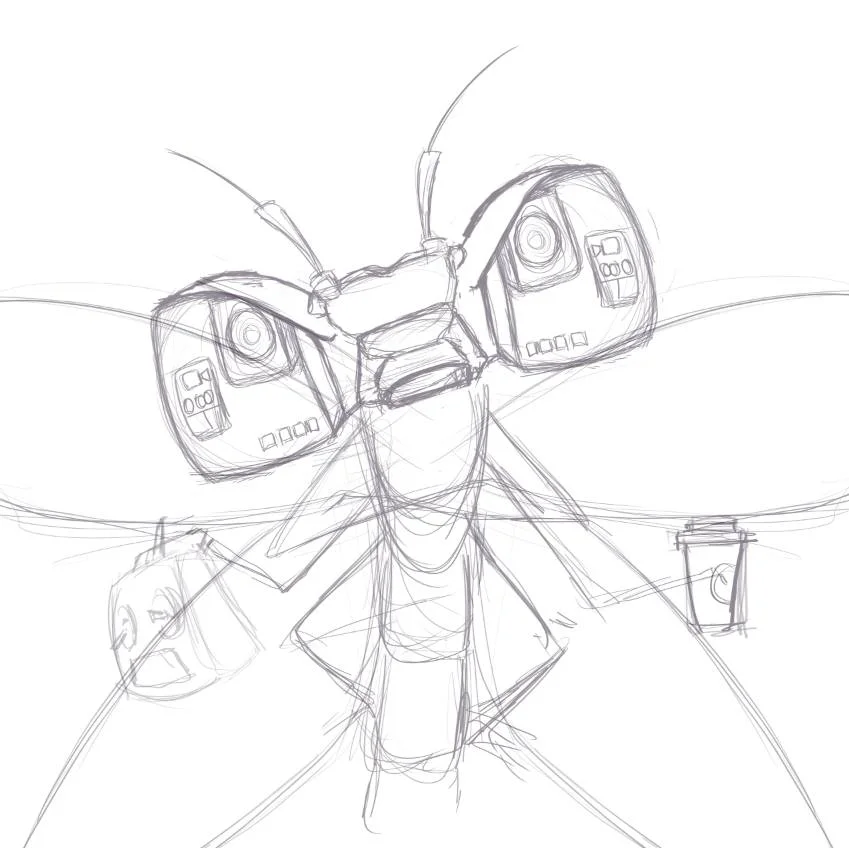
One last thing. Odonata is the order for dragonflies. Pam's concept sketch for the sticker is too good not to share.
But Wait There's More
Gab707 wrote and claimed the last prototype and hacked it up to suit his needs, and those mods led to Ichabod. Before he moved the parts over he shot this amazing video with the Odonata. This alone kinda makes the whole ordeal worthwhile.