
Booboo
Hello, my name is Inigo Montoya. You killed my father. Prepare to fly.
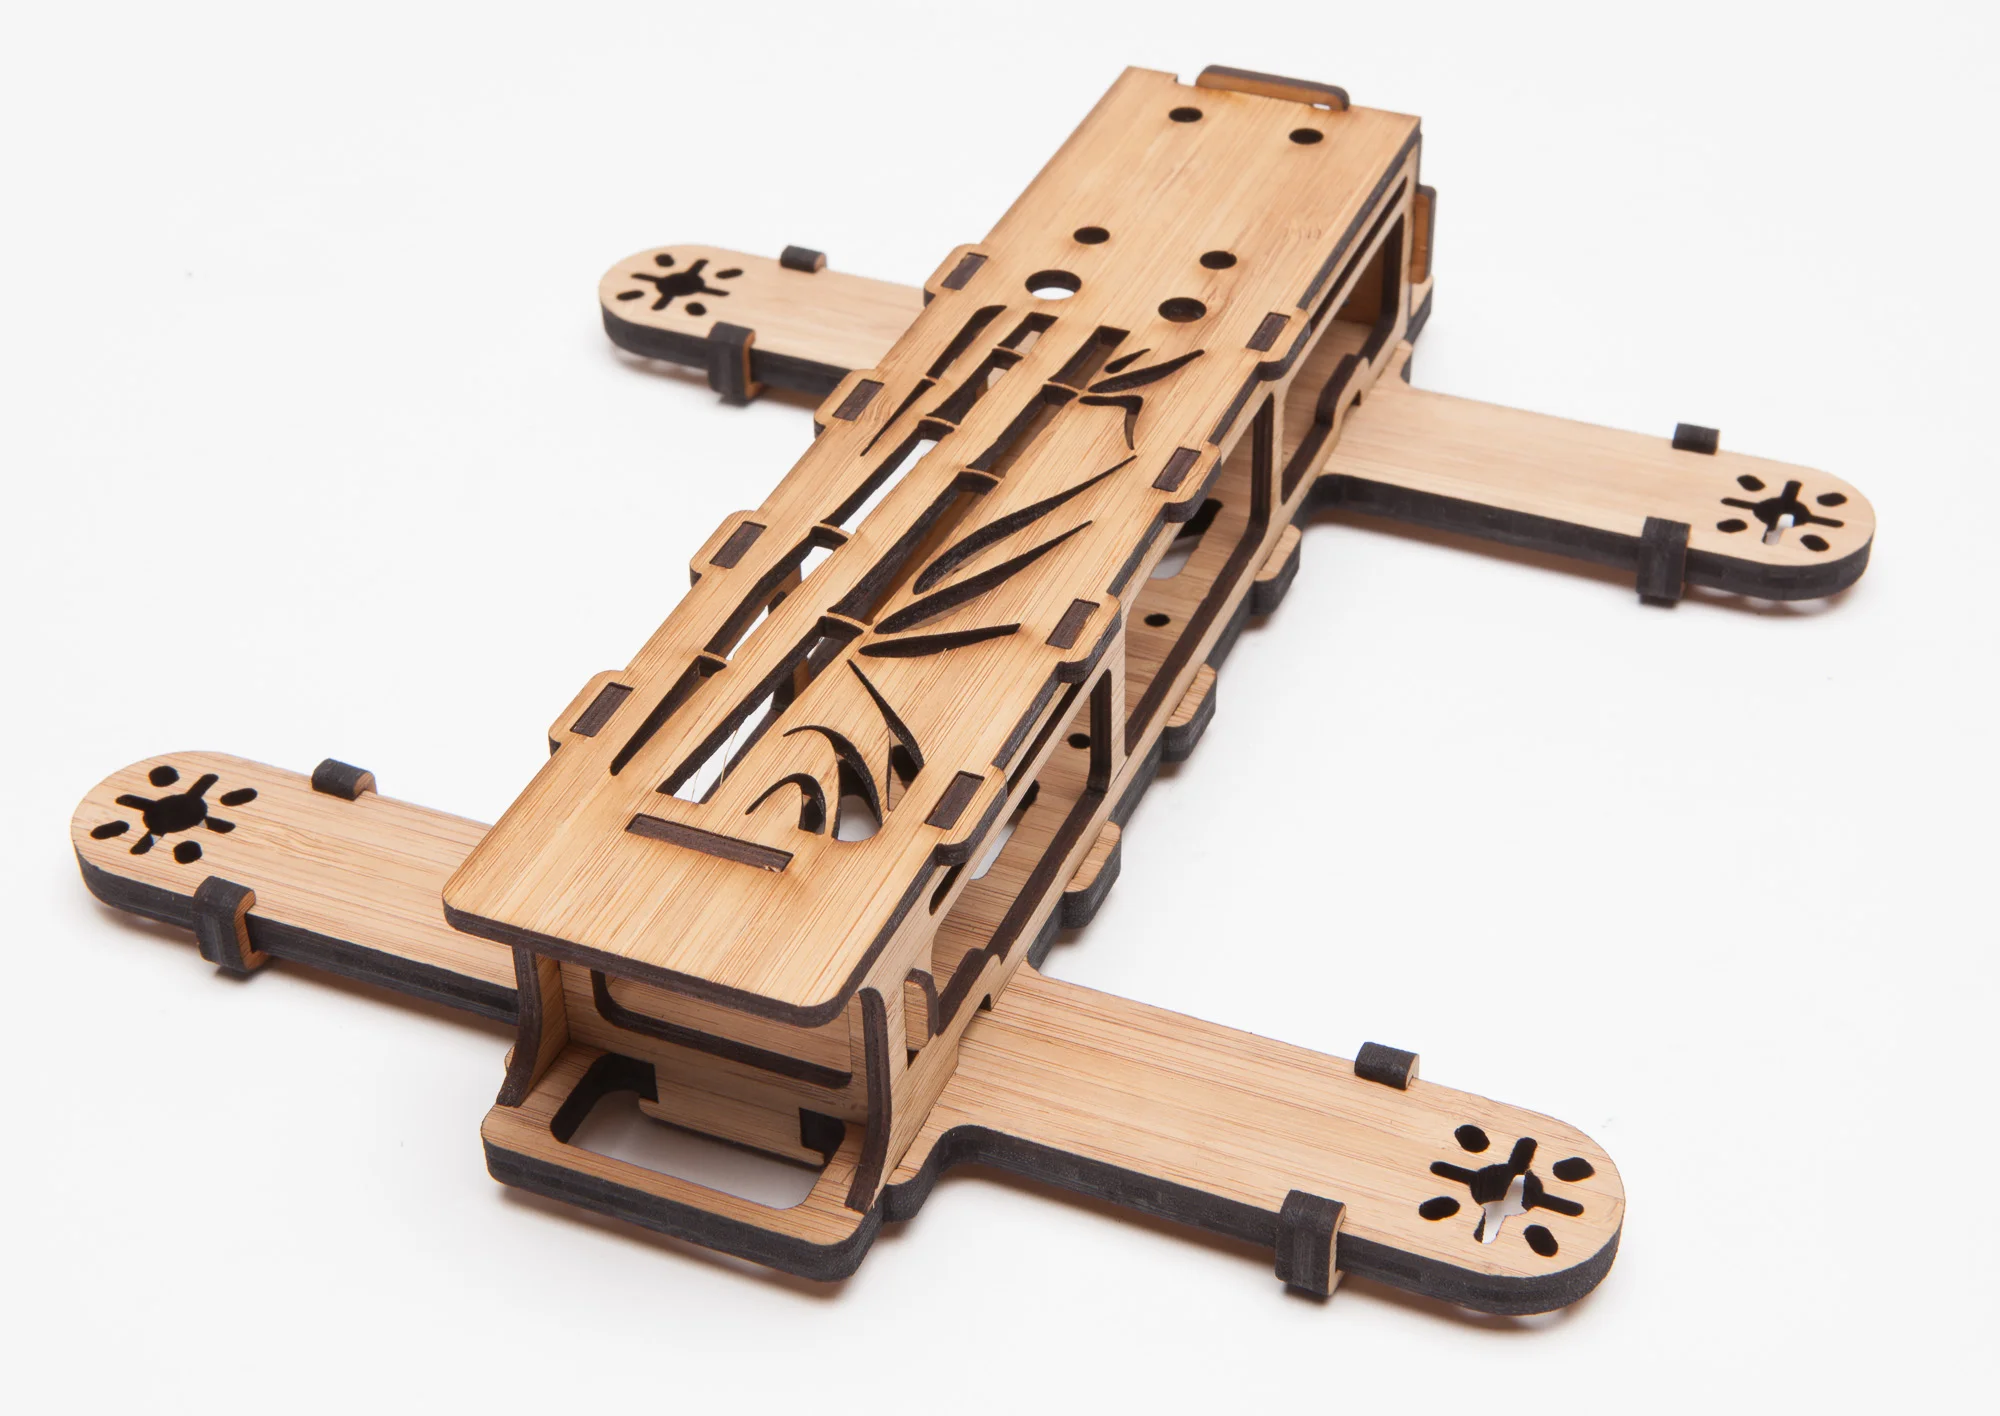
I saw a wooden quad on Facebook and that got me thinking. First I thought I could make a SLiC out of laser cut 2.7mm bamboo from Ponoko, but instead of using zip ties, I could CA it together and make it look real cool. But a glued frame is hard to repair, so I started thinking about interlocking the pieces so it would assemble without glue. Then I decided I wanted to make the entire frame out of bamboo, so instead of using standoffs I'd make bamboo side plates and make the whole frame without any hardware.
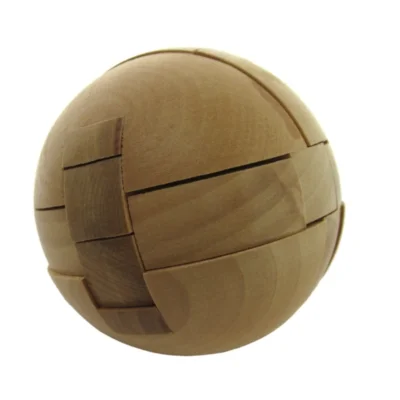
Then I harkened back (yes I harkened) to those wooden puzzles of my childhood, 3d jigsaws where pieces interlocked and one final piece would key in and lock everything in place. Hey I can make the world's first quad puzzle!
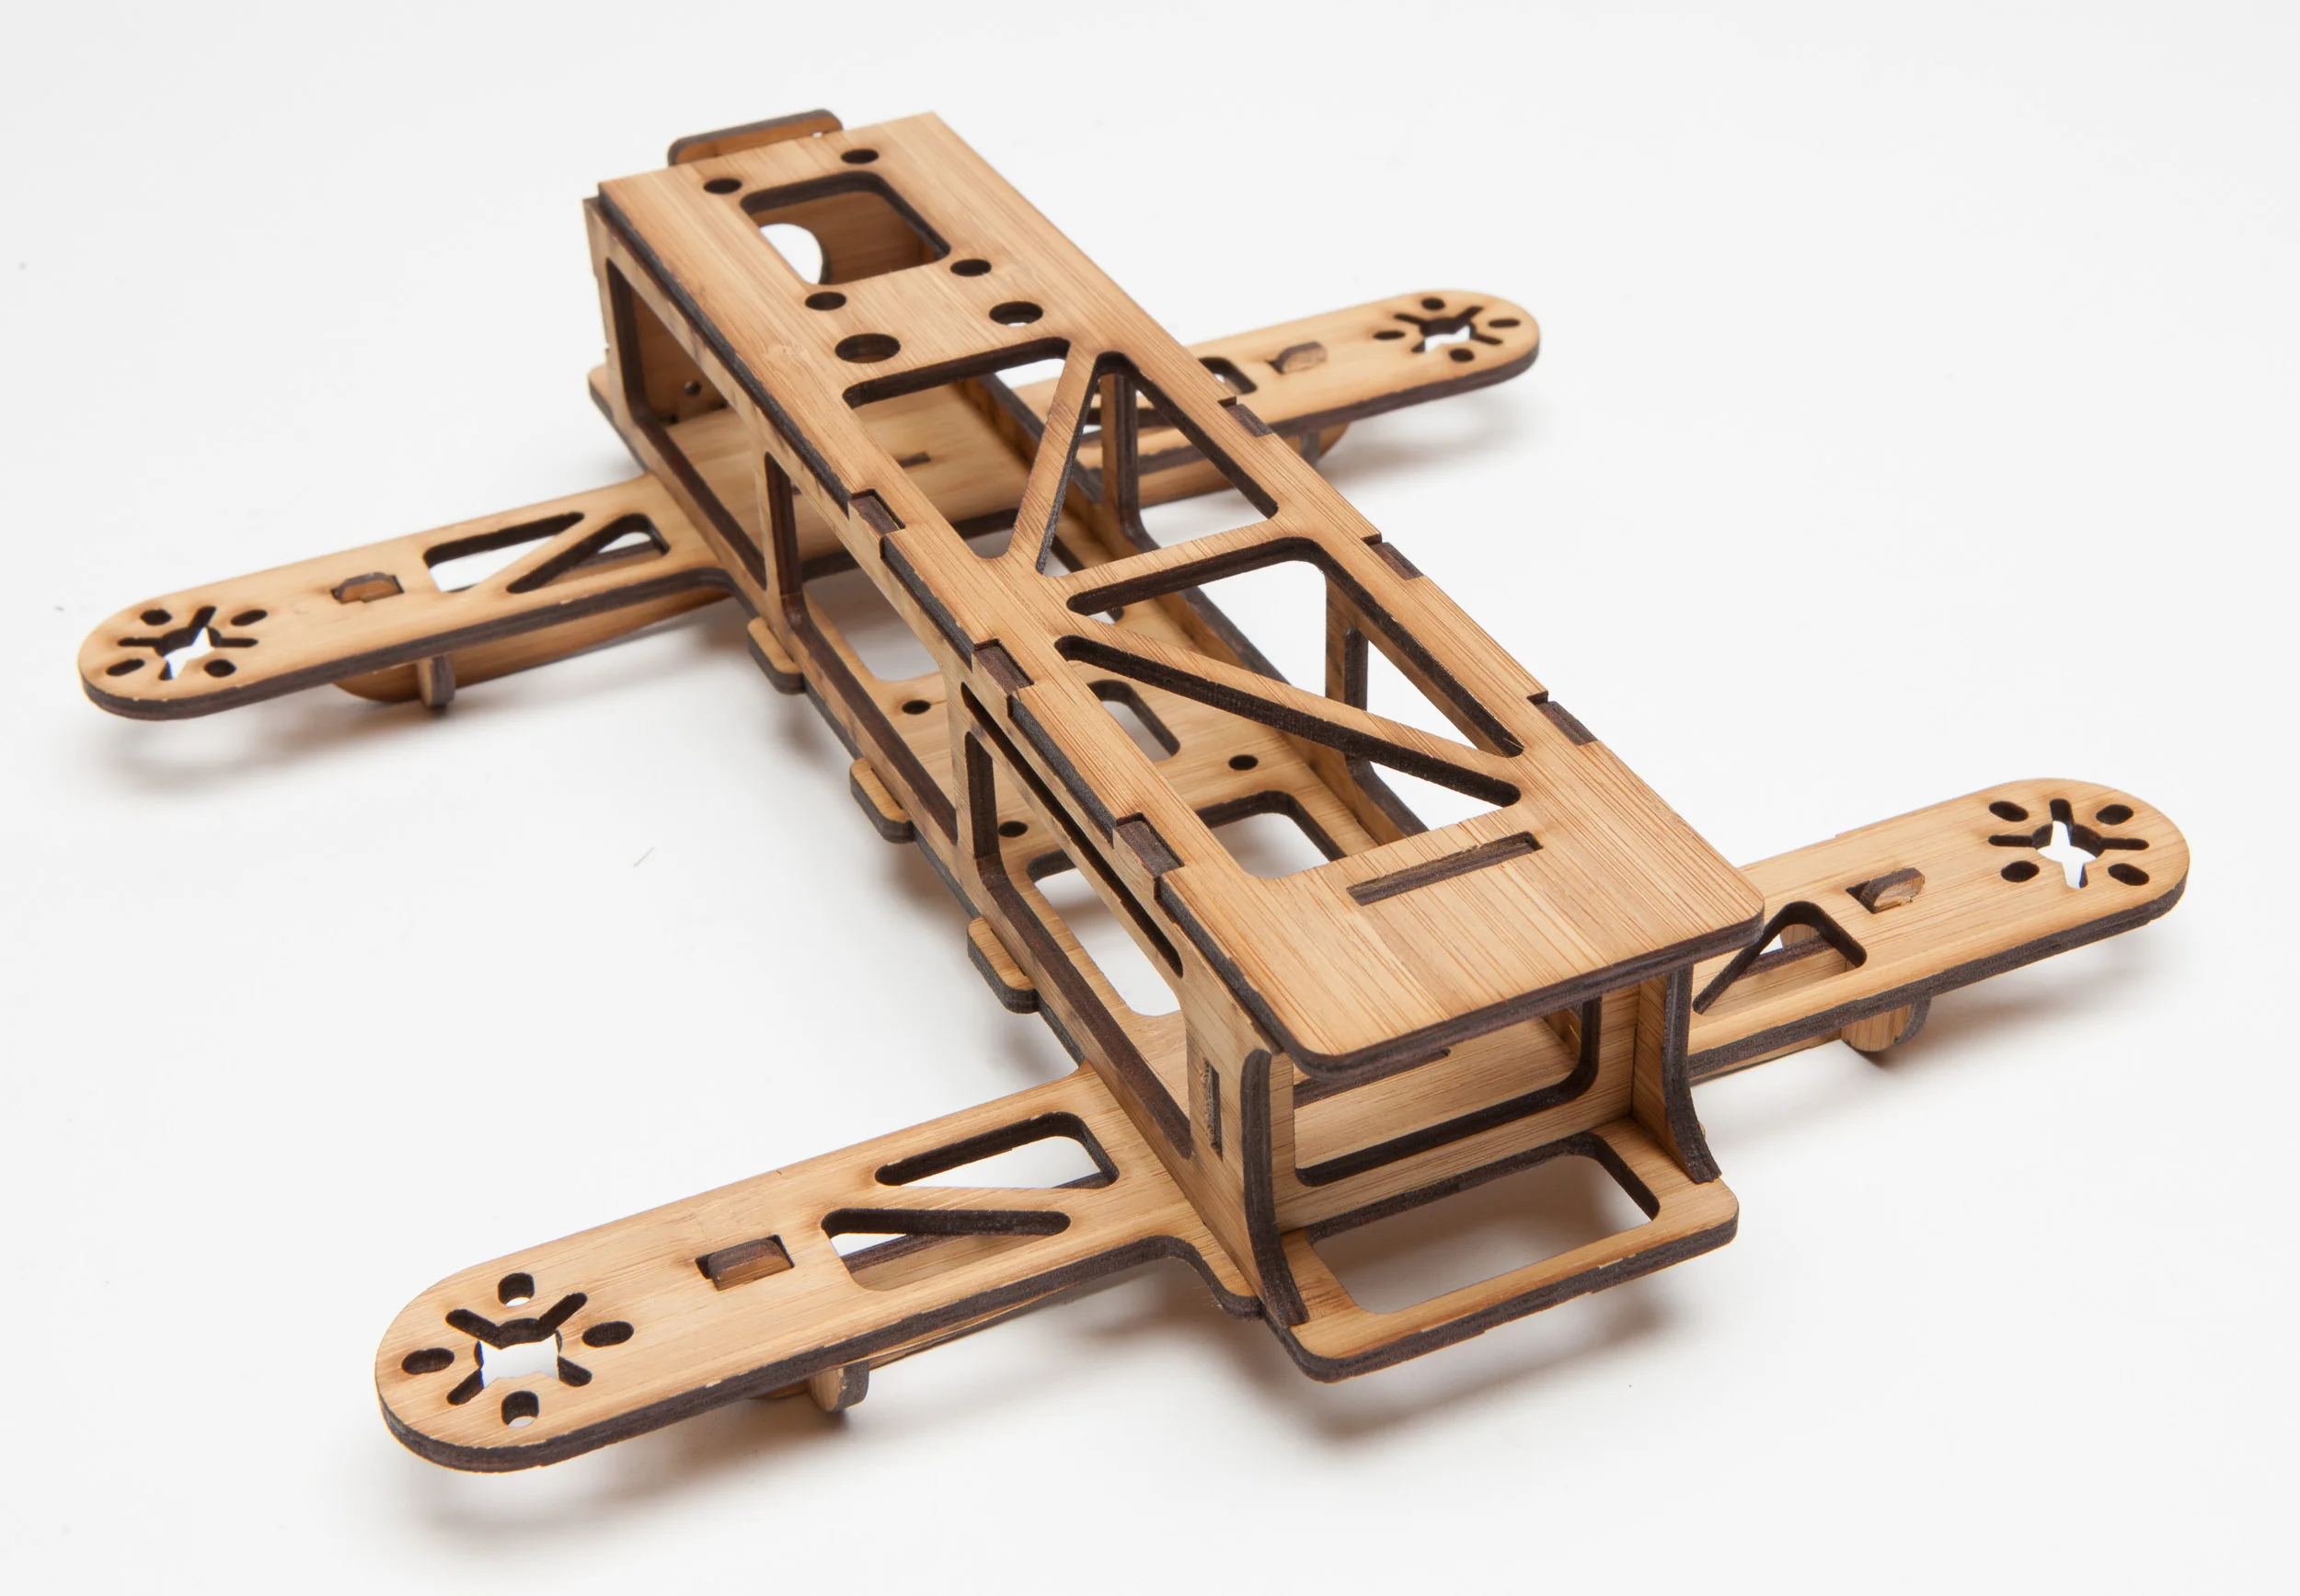
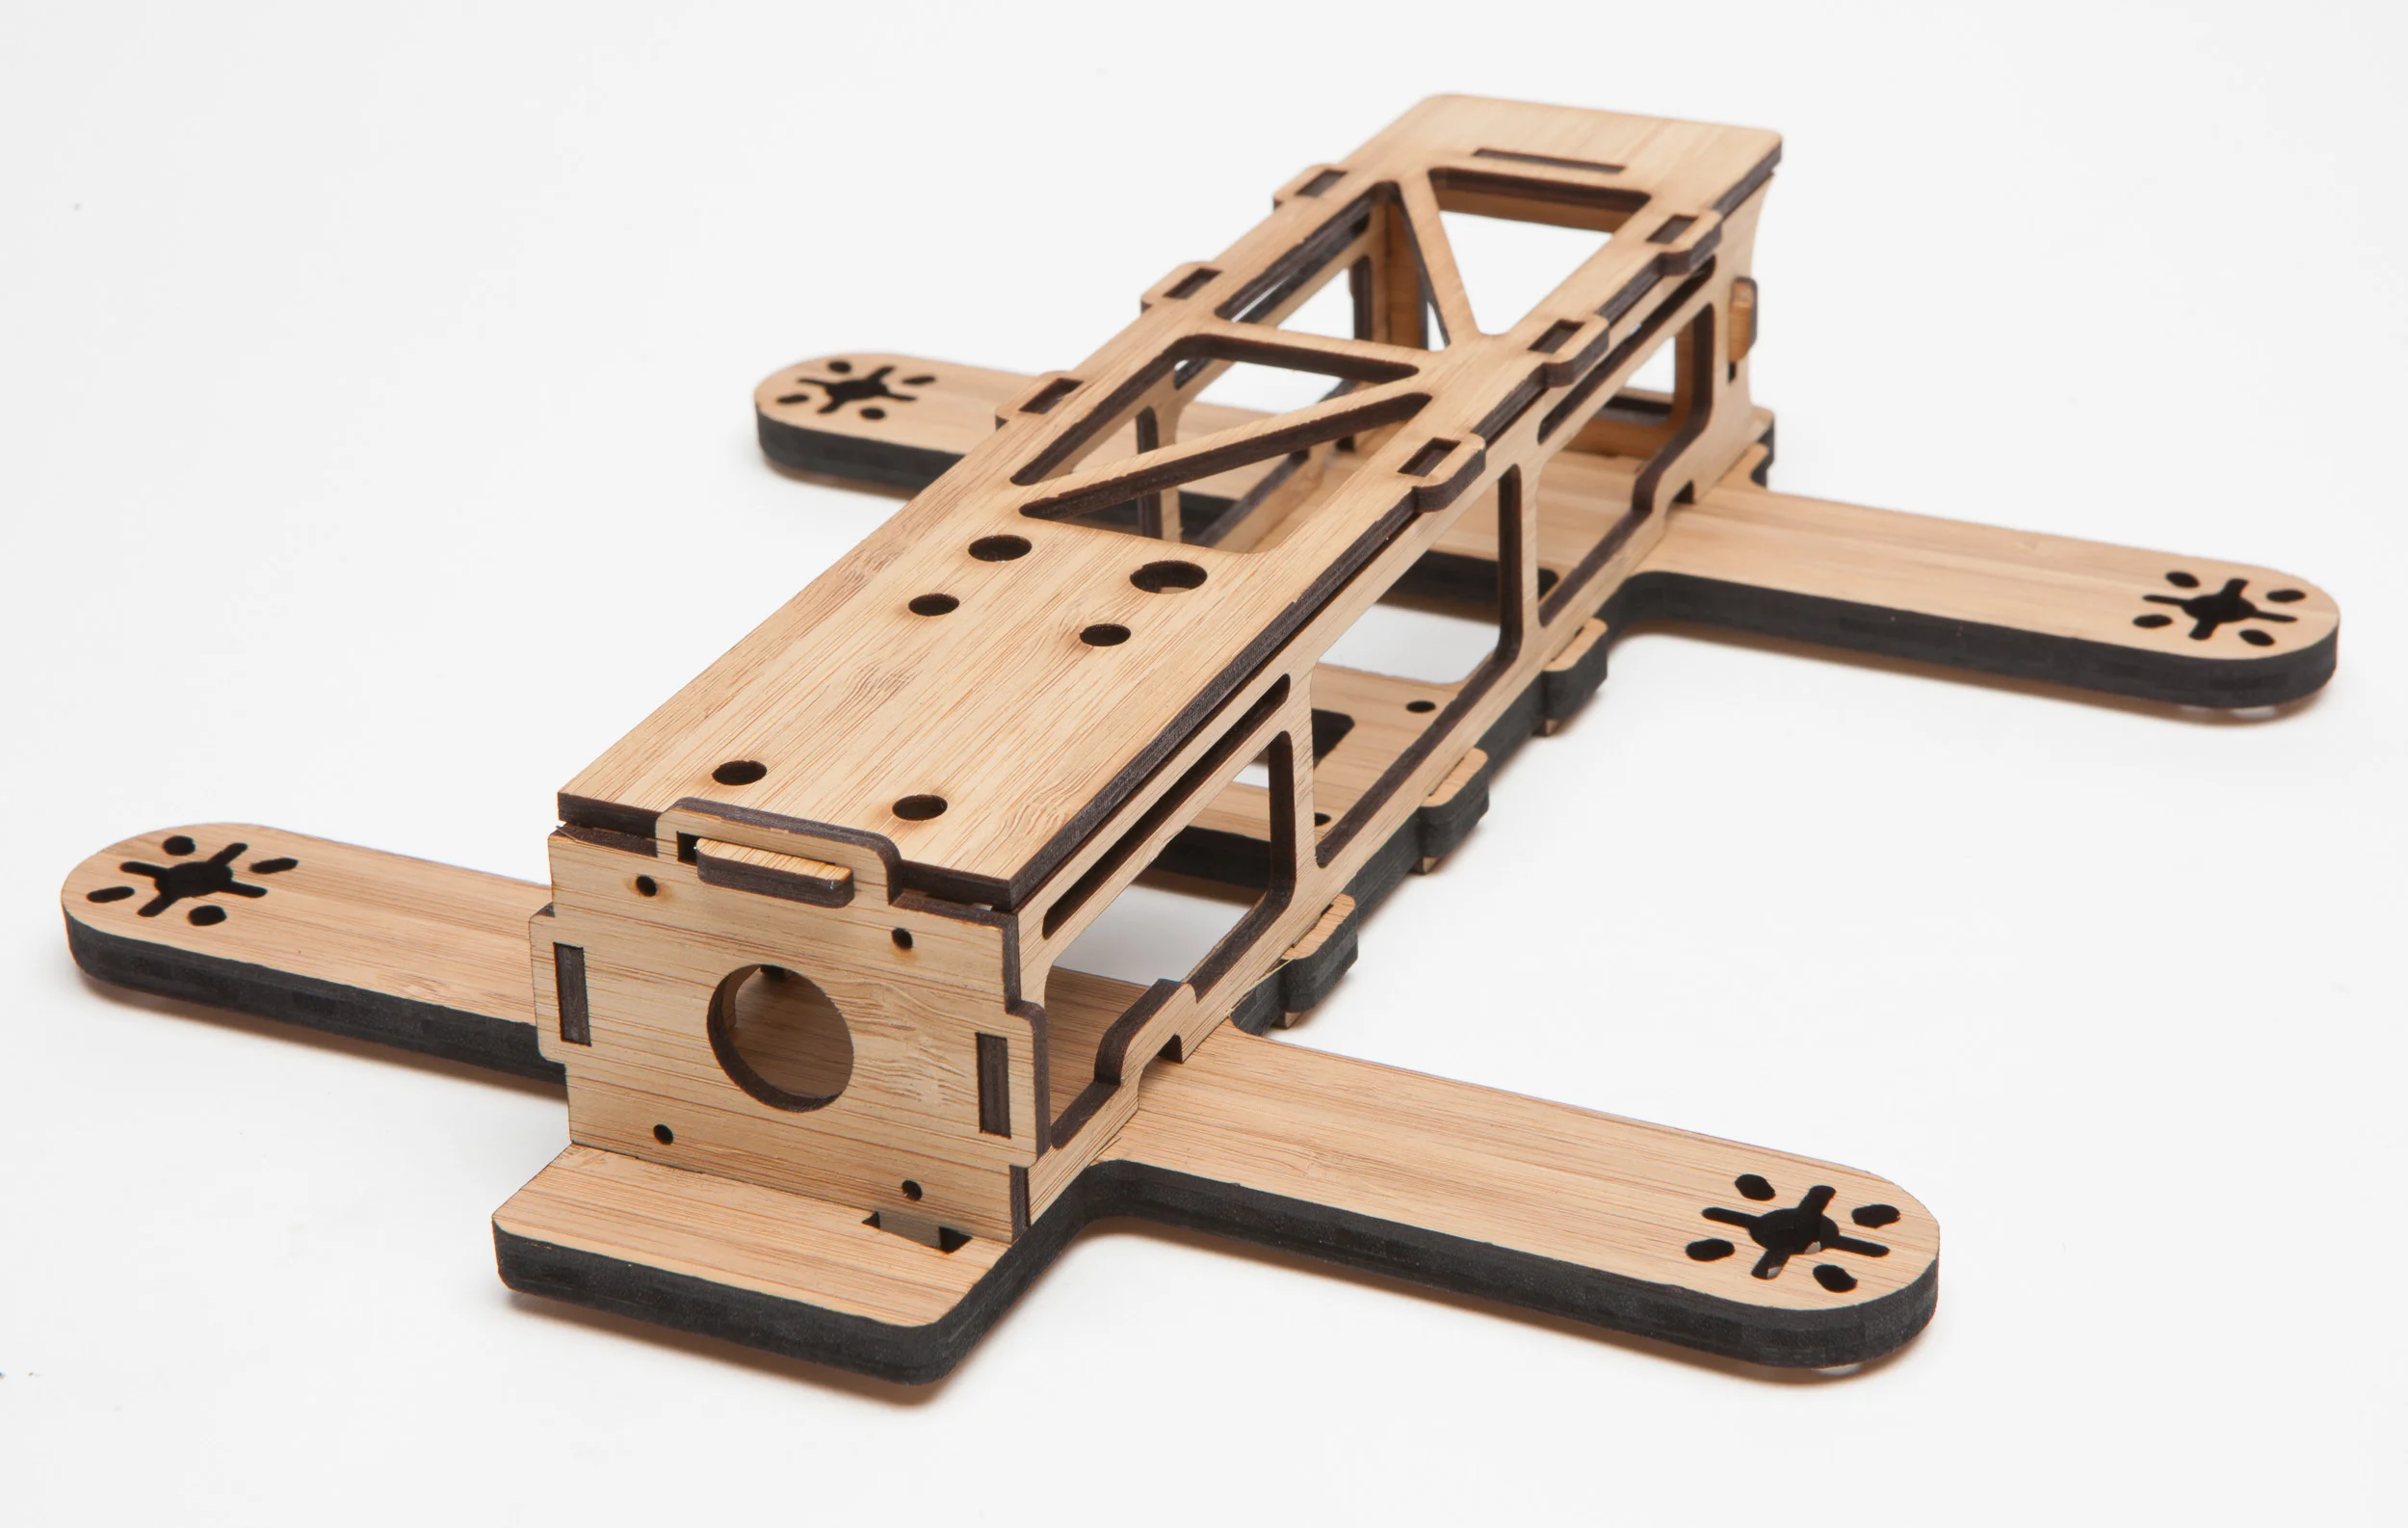
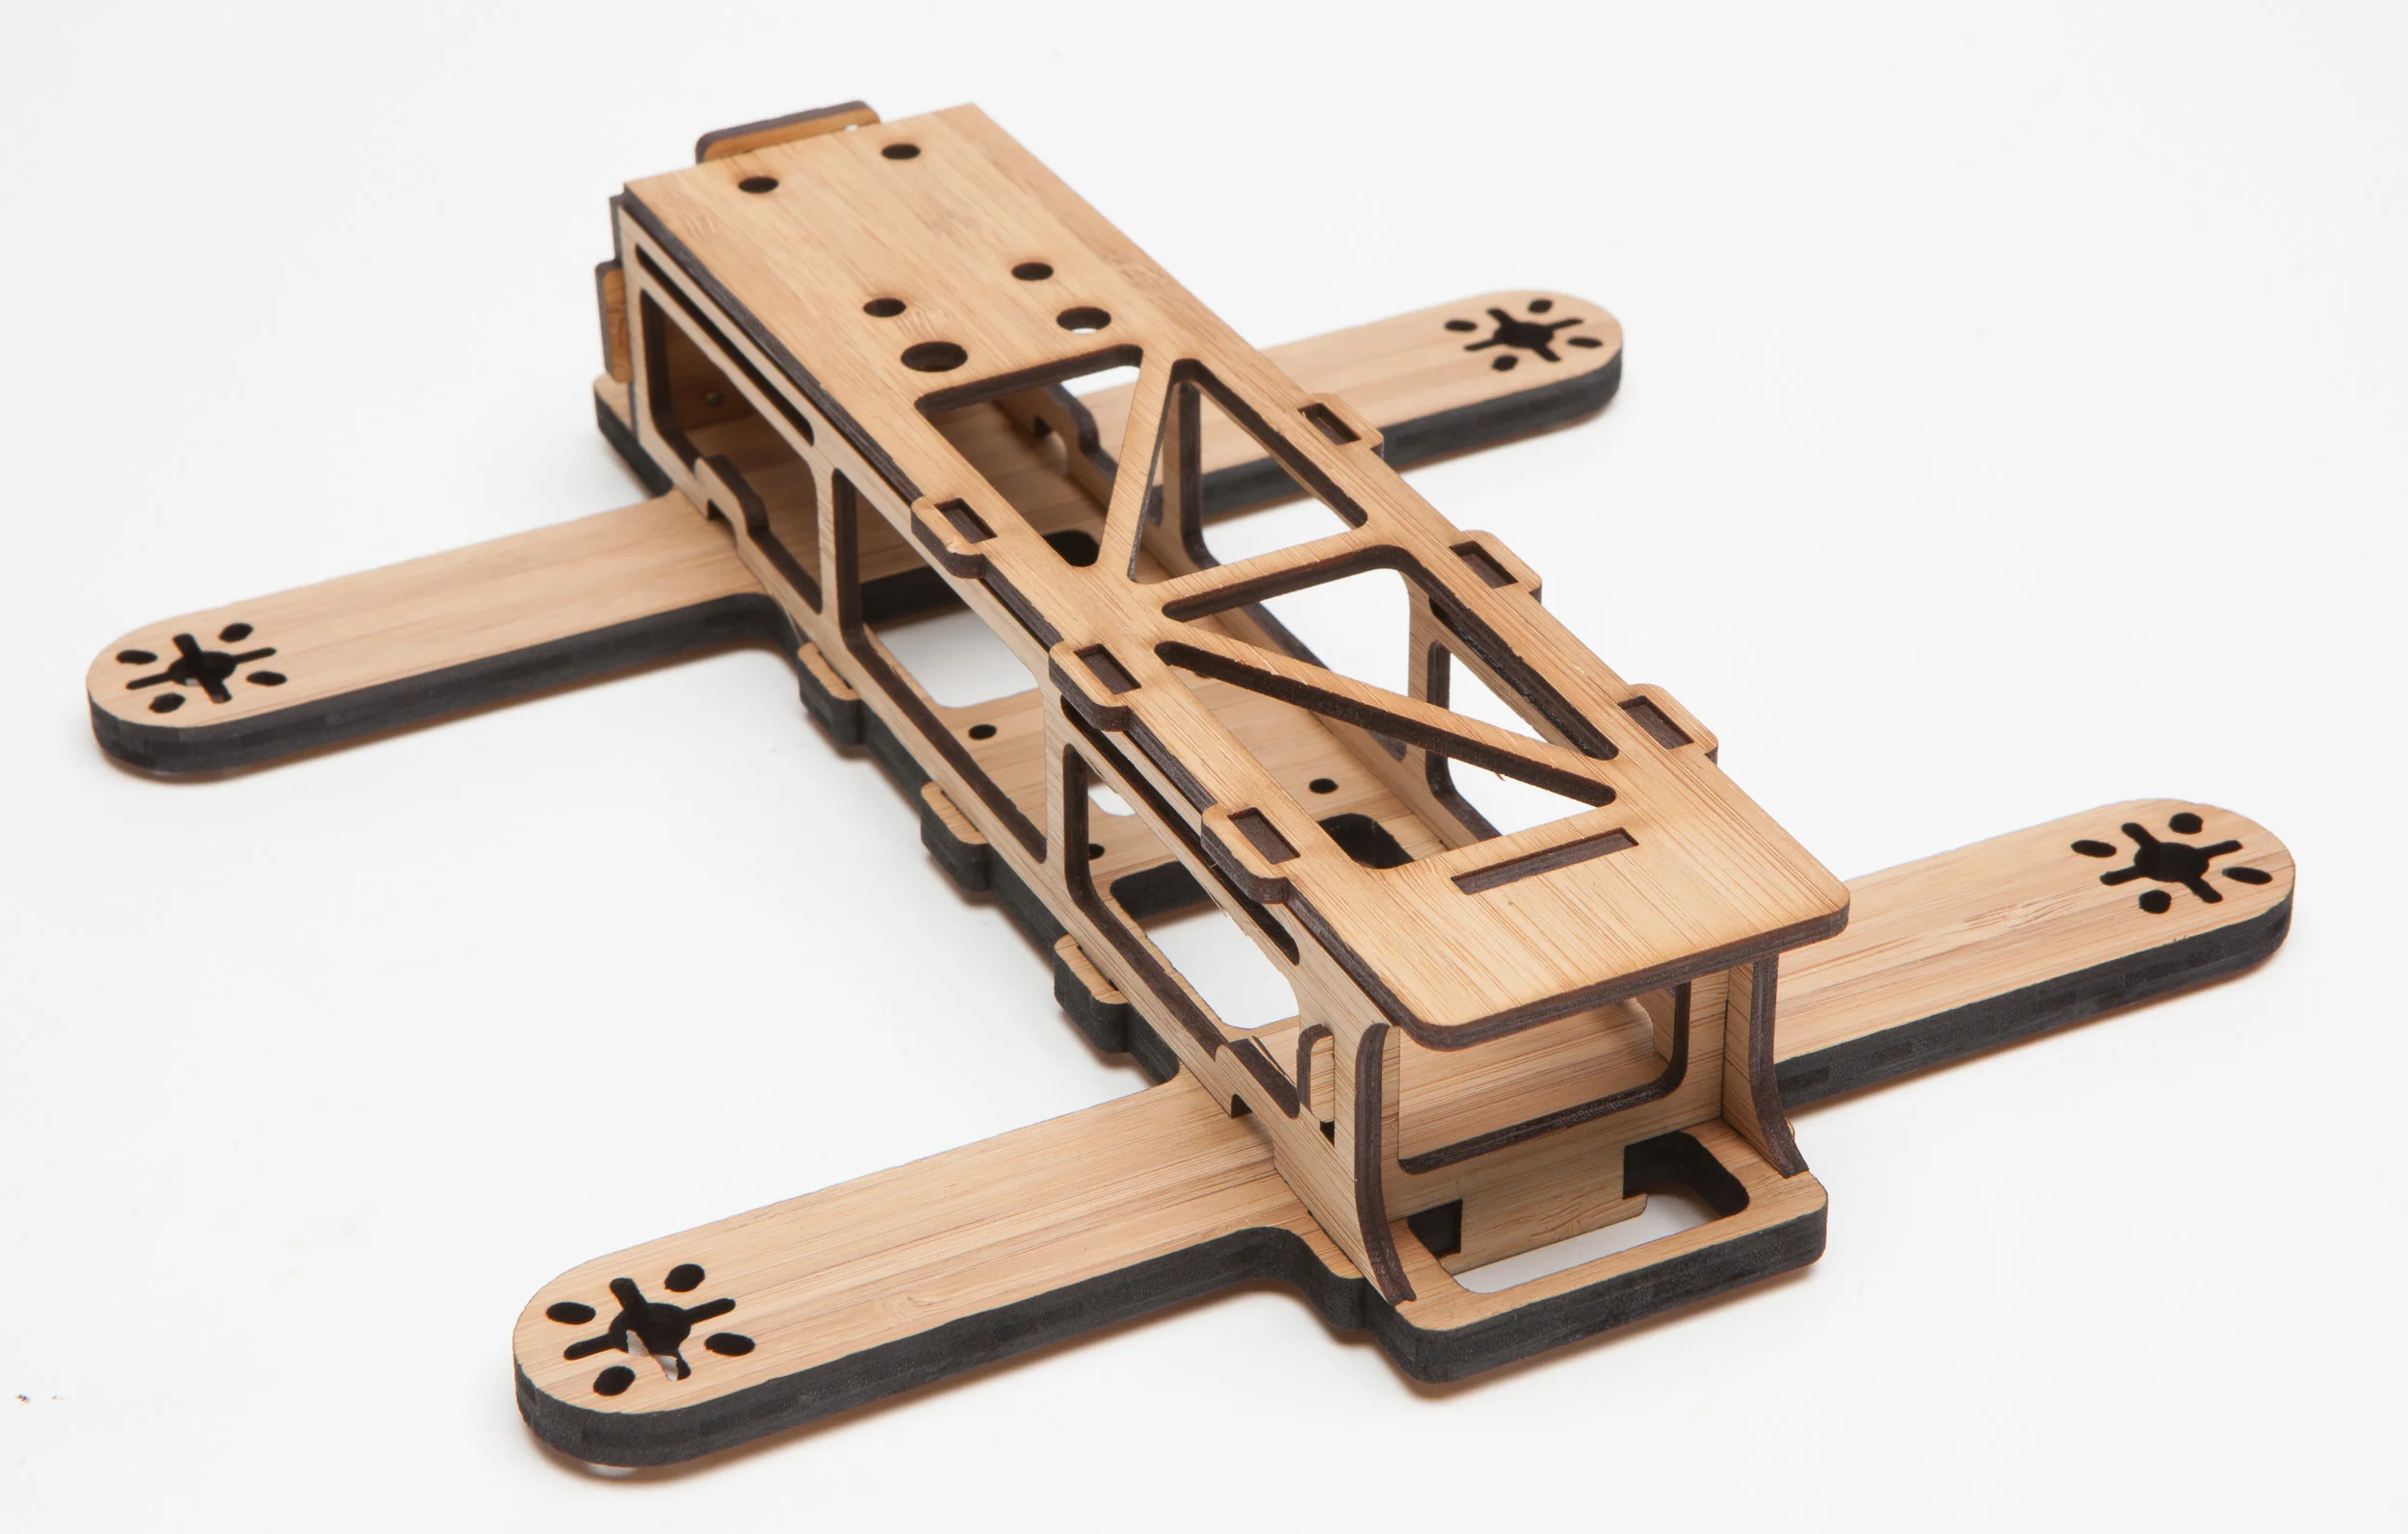
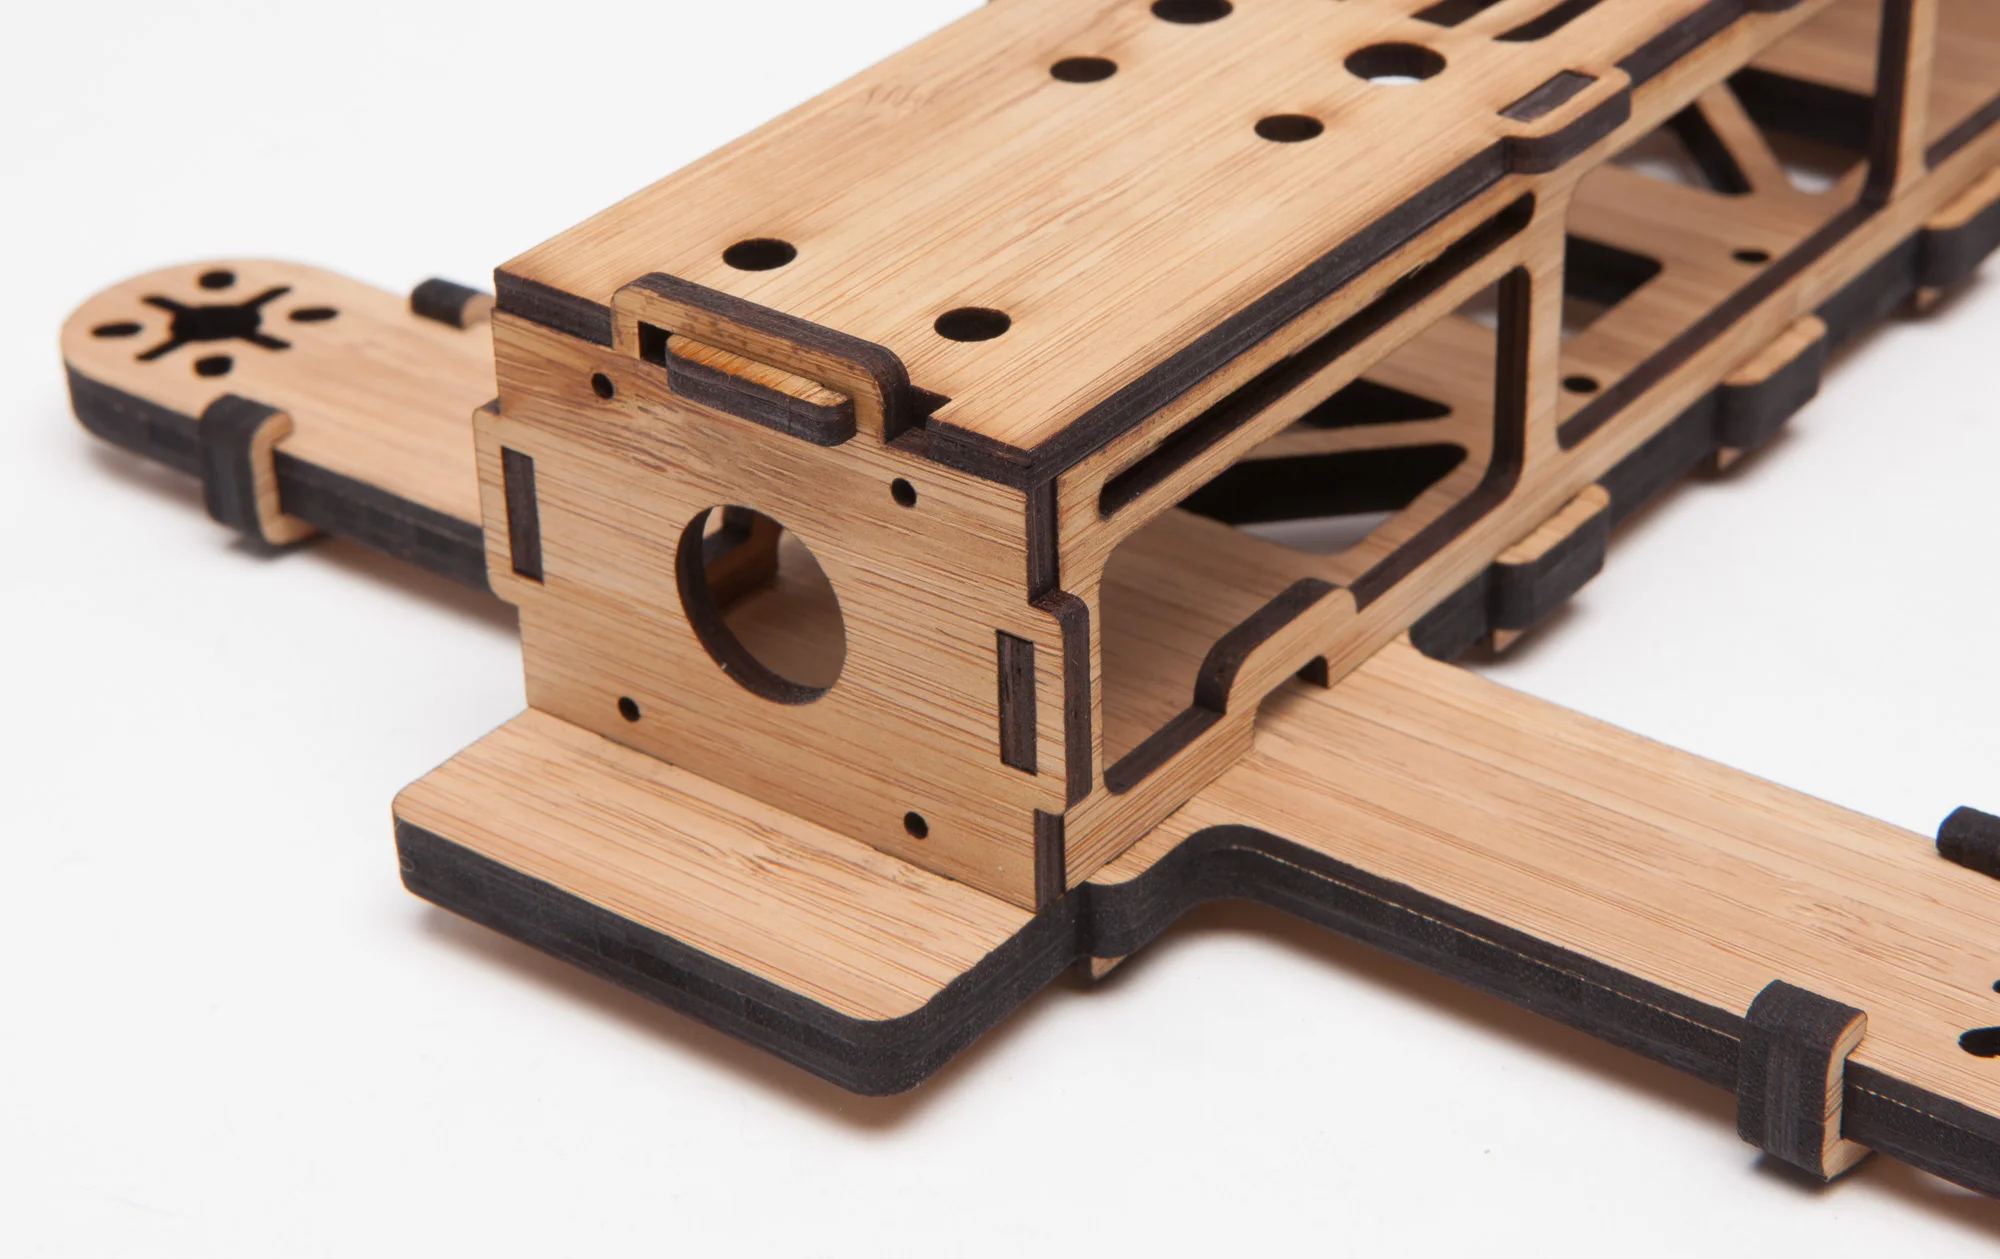
This is what I came up with. First the trusses drop in. The trusses have to bend forward to slide through holes in the arms, and once through they bend back and hook the arm over the top.


Next the fpv cam mount drops in at an angle, and hooks in place with a twist.

The rear wall slides in and up on the side plates.

That assembly drops down on the mainframe and slides forward to hook in. The side plates also slot into the fpv cam mount.

The top plate slides foward into the fpv cam mount and slides sideways to hook in. It then drops down and locks in with the side plates and rear wall, preventing them from sliding back and coming unhooked.

And here's the final key, the last element that keeps it all from exploding. The battery strap goes through the sidewalls, so that when you tighten the strap on the battery it locks the top plate down.

I'm waiting for the first one to come from Ponoko. The material is listed at 2.7mm, but I measured a sample and it was 2.74mm. With all the interlocking pieces it'll suck to get the thickness wrong.
It's a shame it can't be swoopy and pretty, but the bamboo grain needs to run the length of the parts, so everything has to be rectilinear. Having said that, I prefer blocky functional to pointless curvy.
I was pleasantly surprised to find lasercut bamboo is way cheaper than CNCing G10 or carbon. It also might be pretty light. I measured its surface area by counting pixels in Photoshop, and comparing that to a sample piece I get 112 grams for the frame, which is right on par with carbon frames! We'll see how accurate I am when Ponoko delivers the real thing. One thing's for sure: it'll be the most environmentally friendly and sustainable quad frame out there, a real hipster quad.

2 Weeks Later
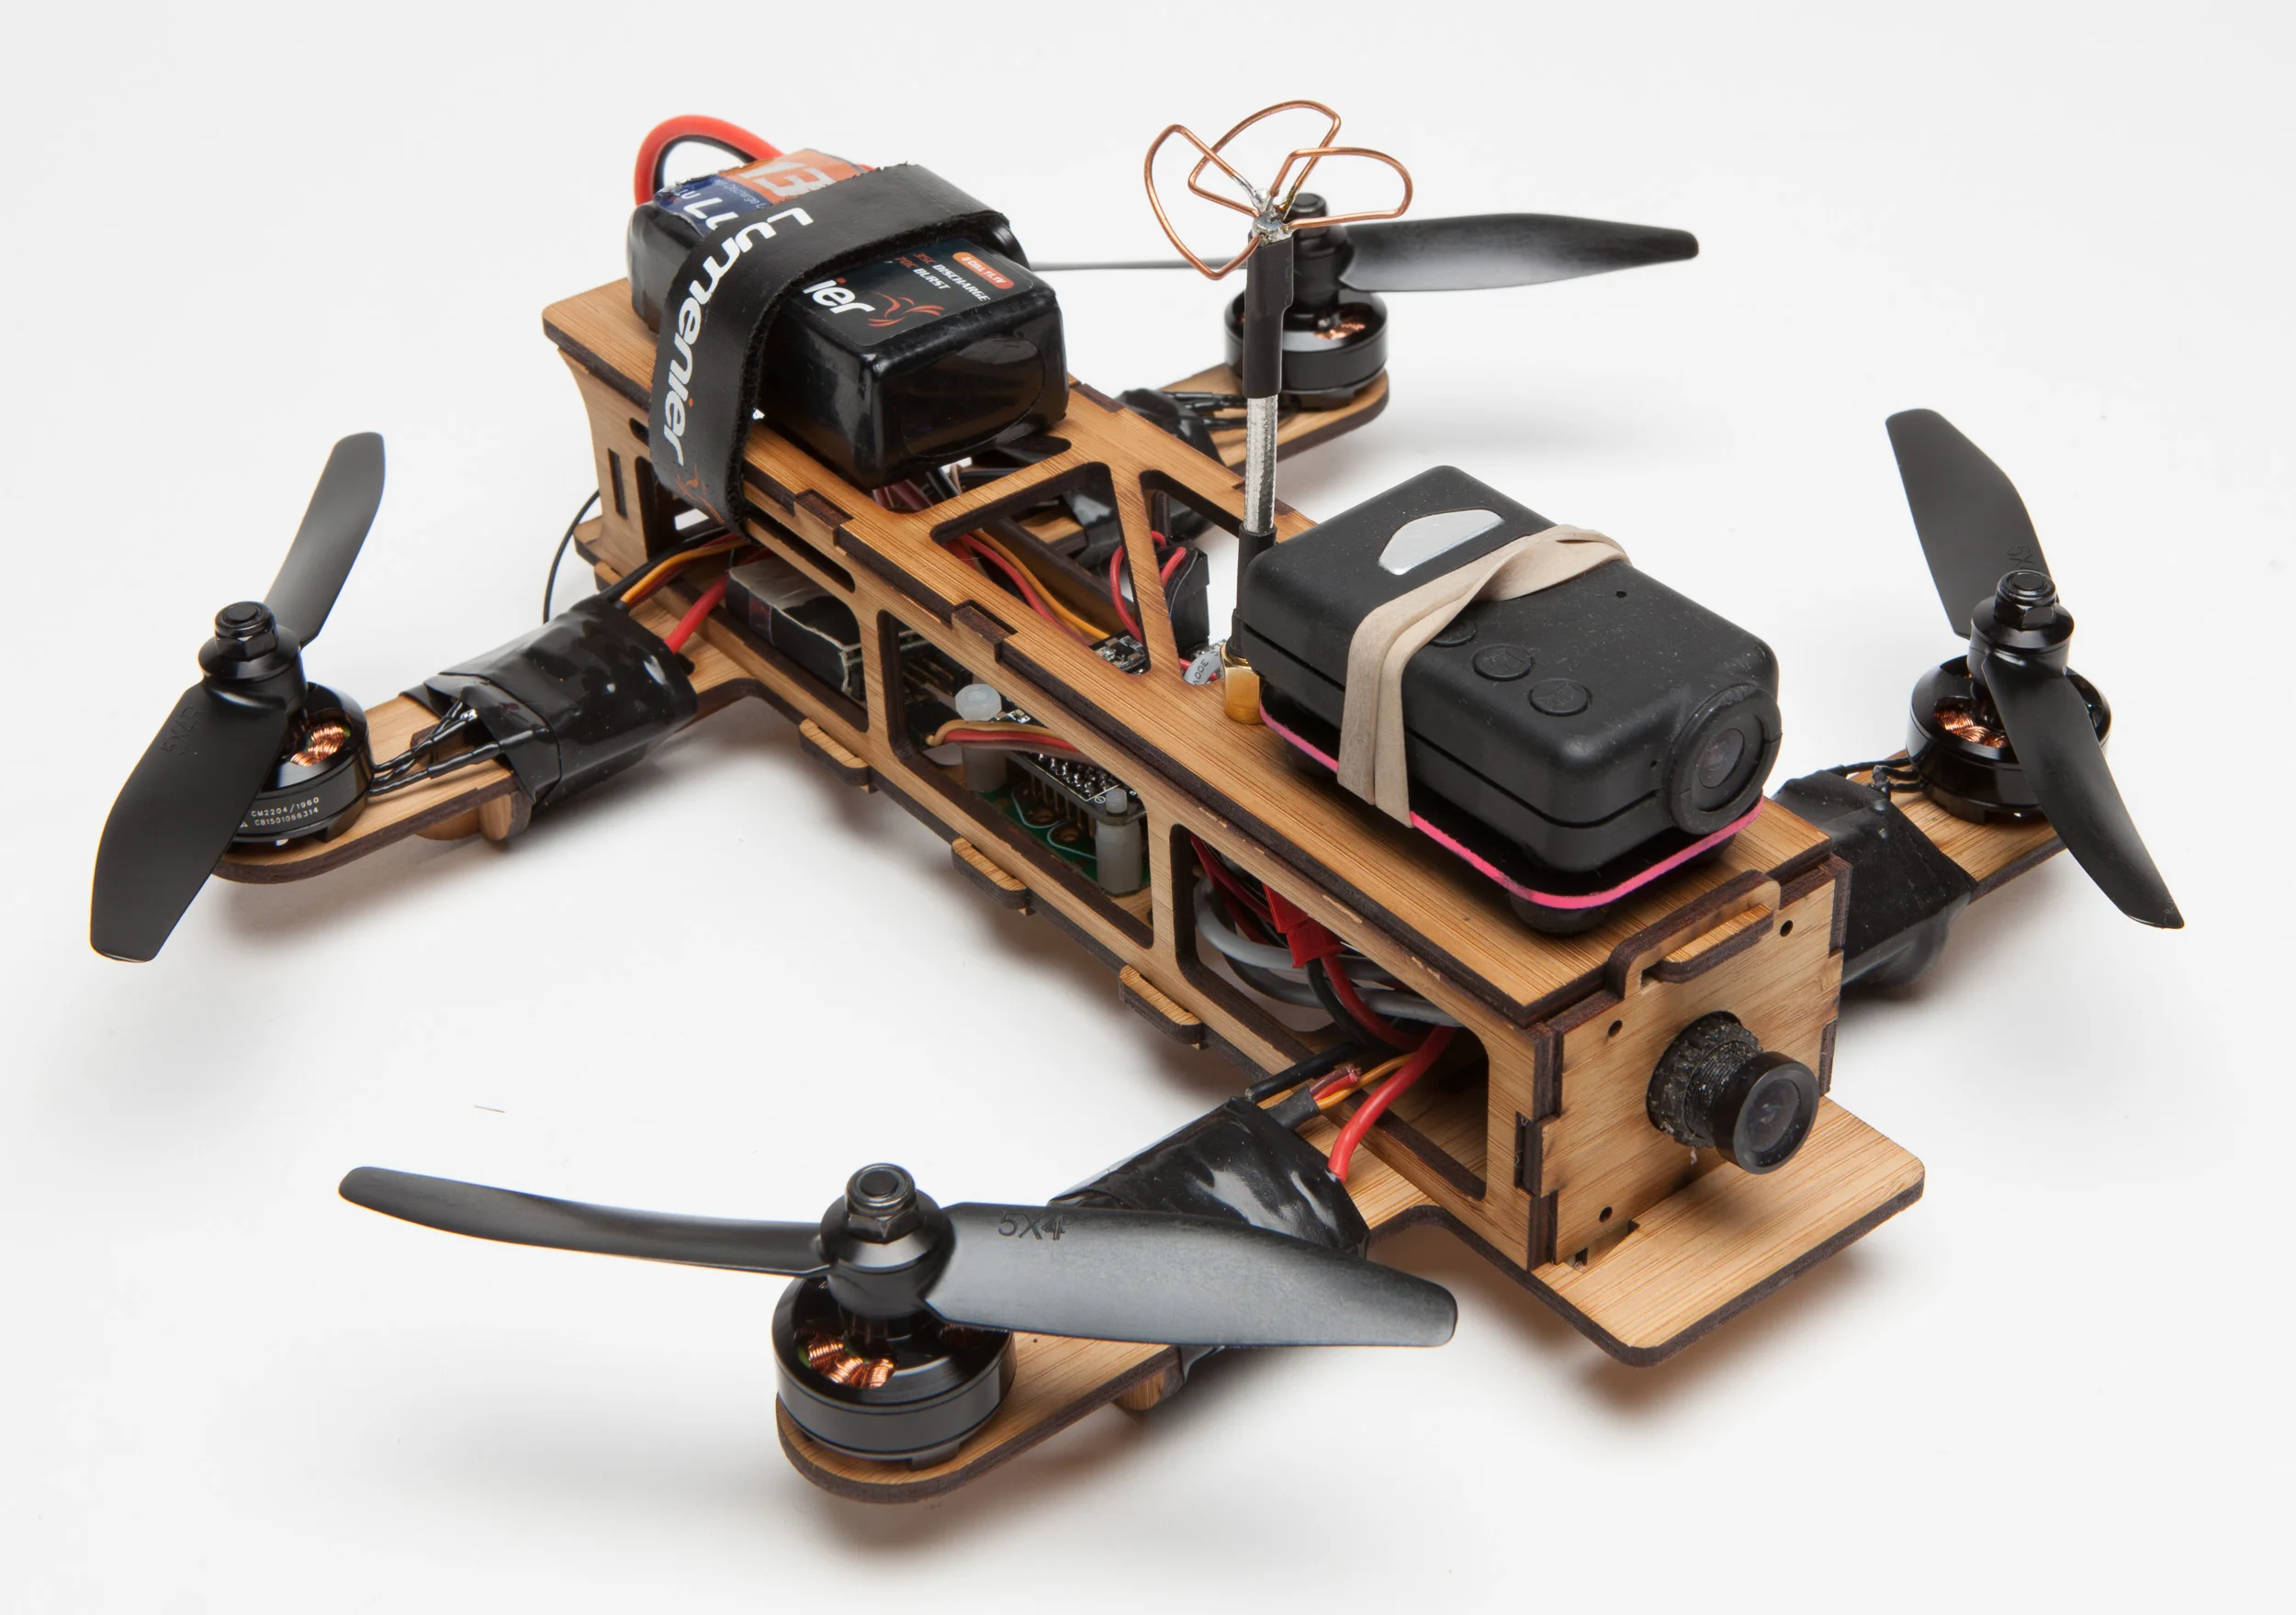
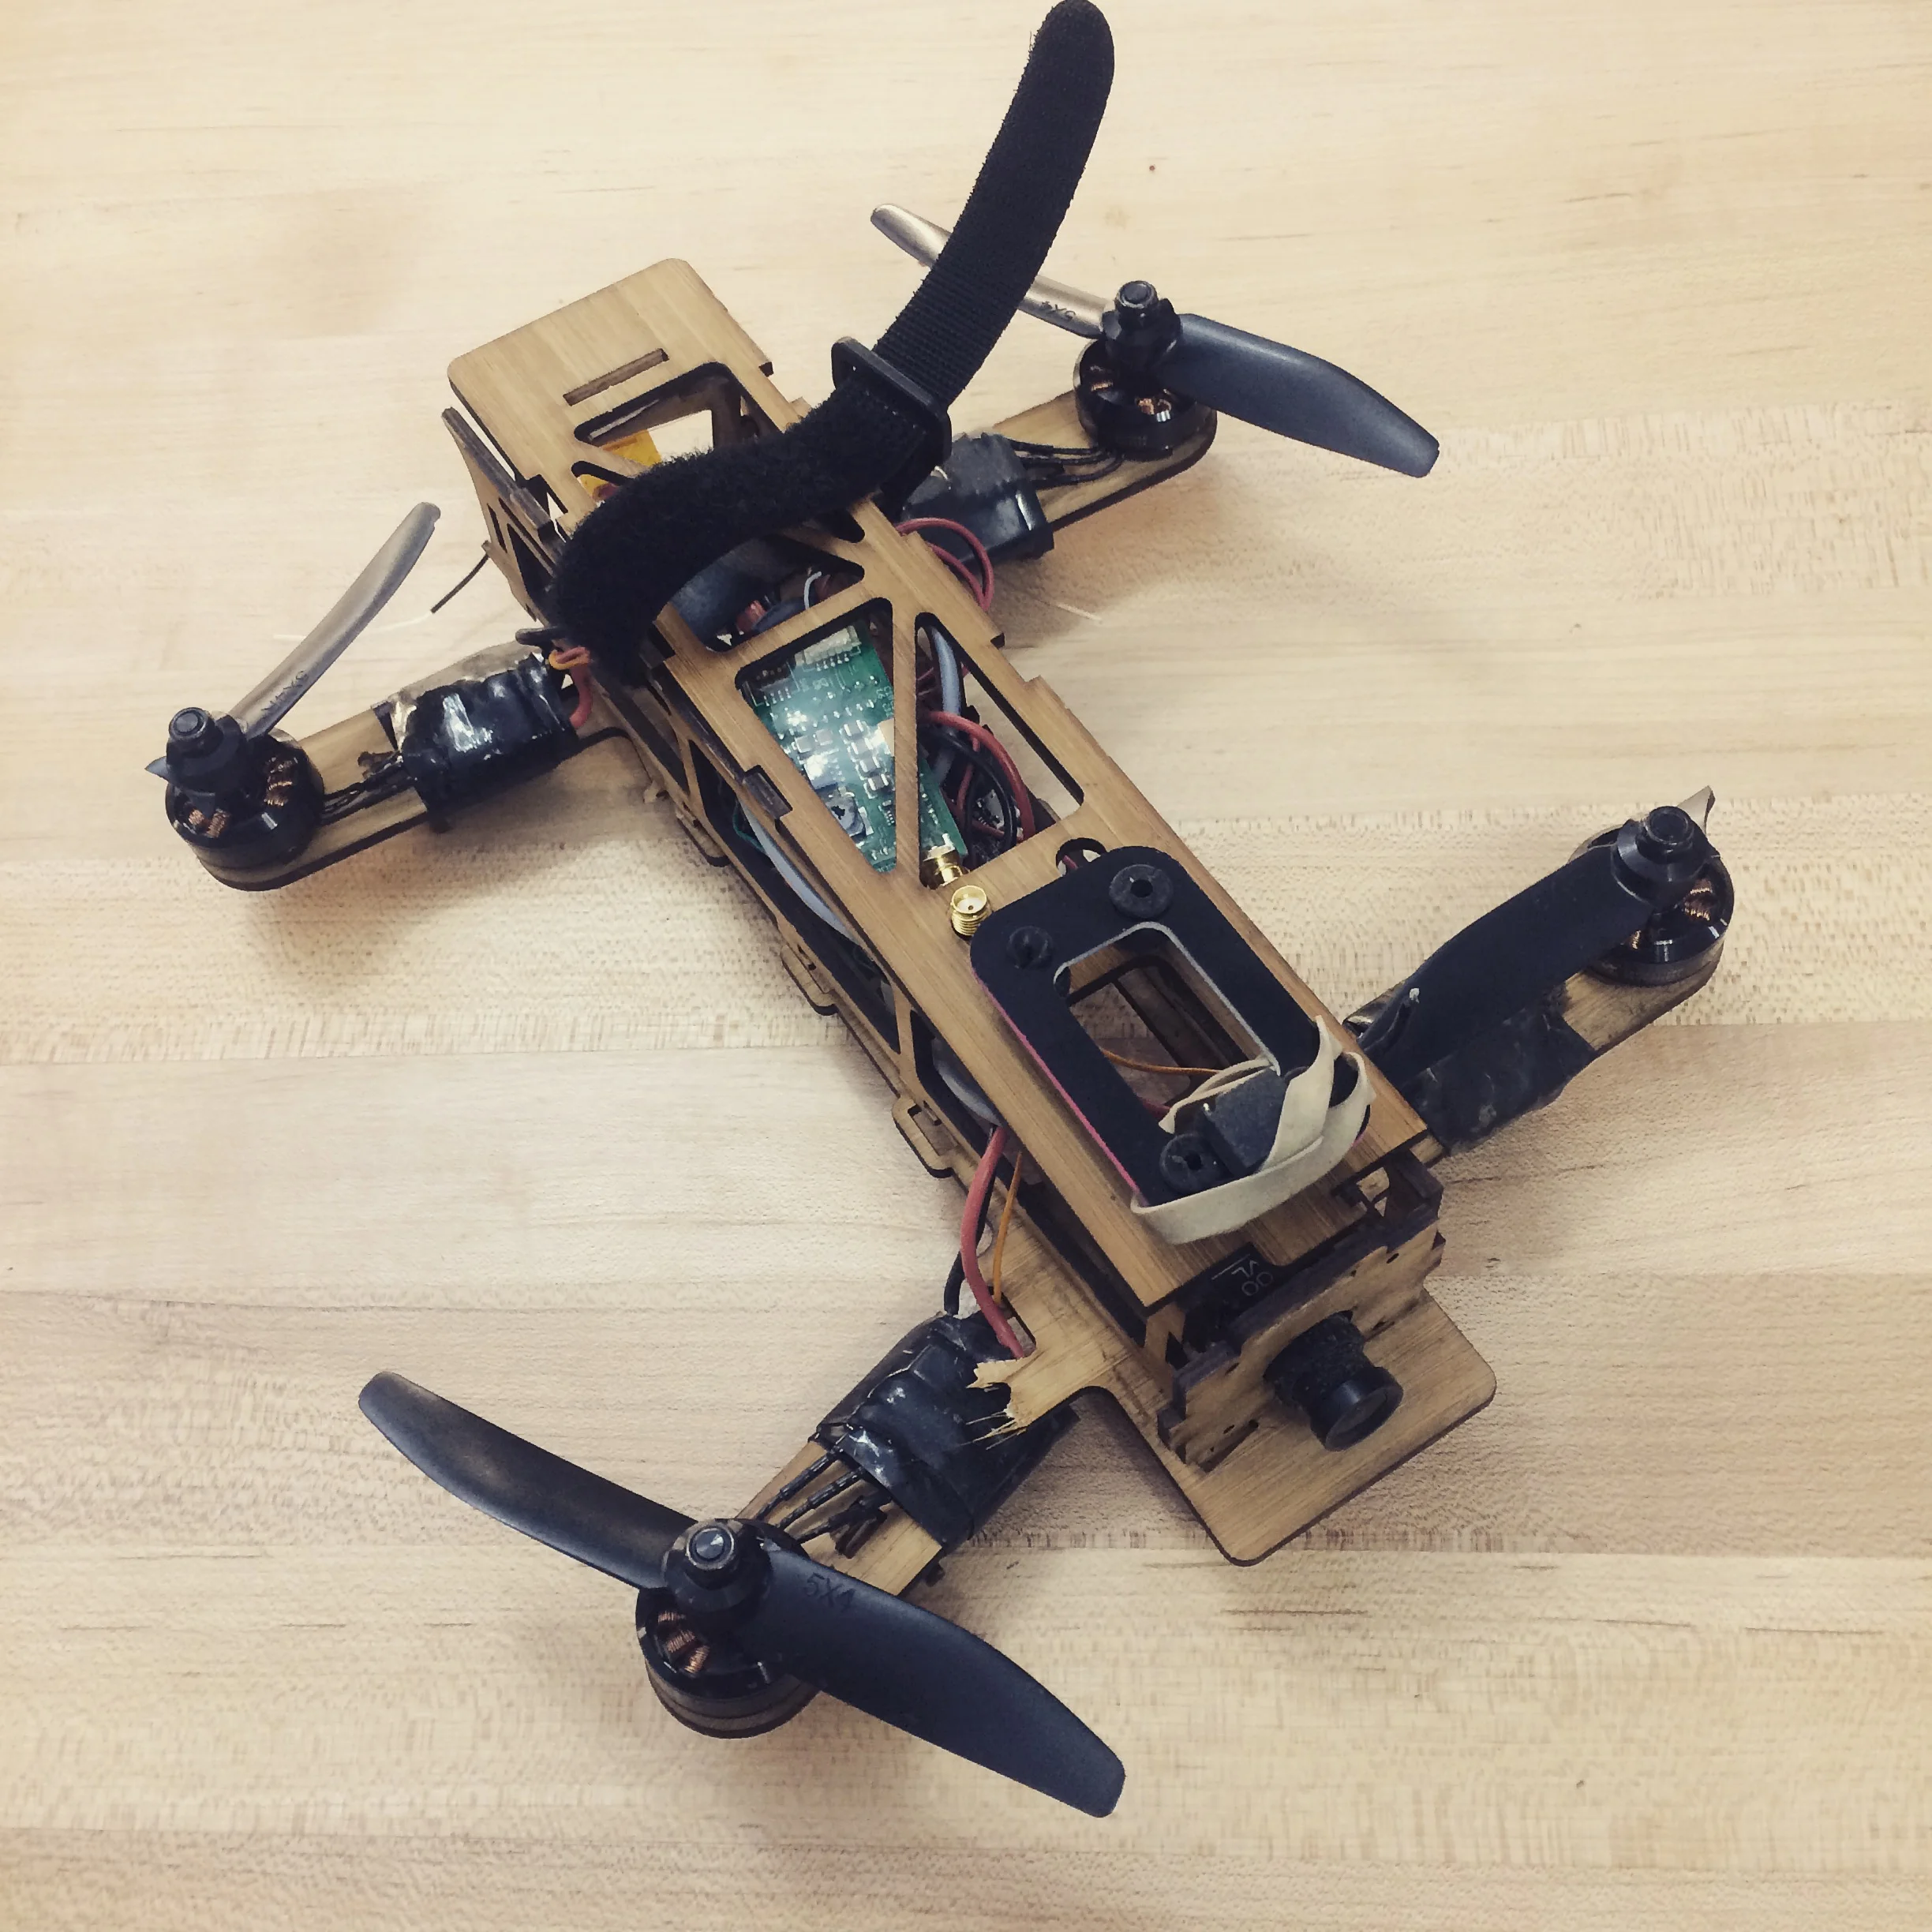
The first version arrived, and I was pleasantly surprised to find that it only weighs 75 grams, with an AUW of 456 grams! Unfortunately the material was actually 3.1mm, so I had to do a lot of filing to get the pieces to slot together. Once assembled it's pretty stiff, and crash testing will determine if it's strong. I built it up as cheaply as possible so I won't be leery of crashing it.
The version in the photos was an earlier drawing, I subsequently added more hooks in the drawings above, so the next version should be even more solid.
I maidened her with a bad vtx and had a nice little crash. The pieces came apart but nothing broke, snapped her back together and kept going.
Day 2, rolled it after changing the roll rate, misjudged it and spiked it. Even though it's stiff enough to fly it's not strong enough to withstand crashes, so I have a 6.7 mm version on the way.
Update
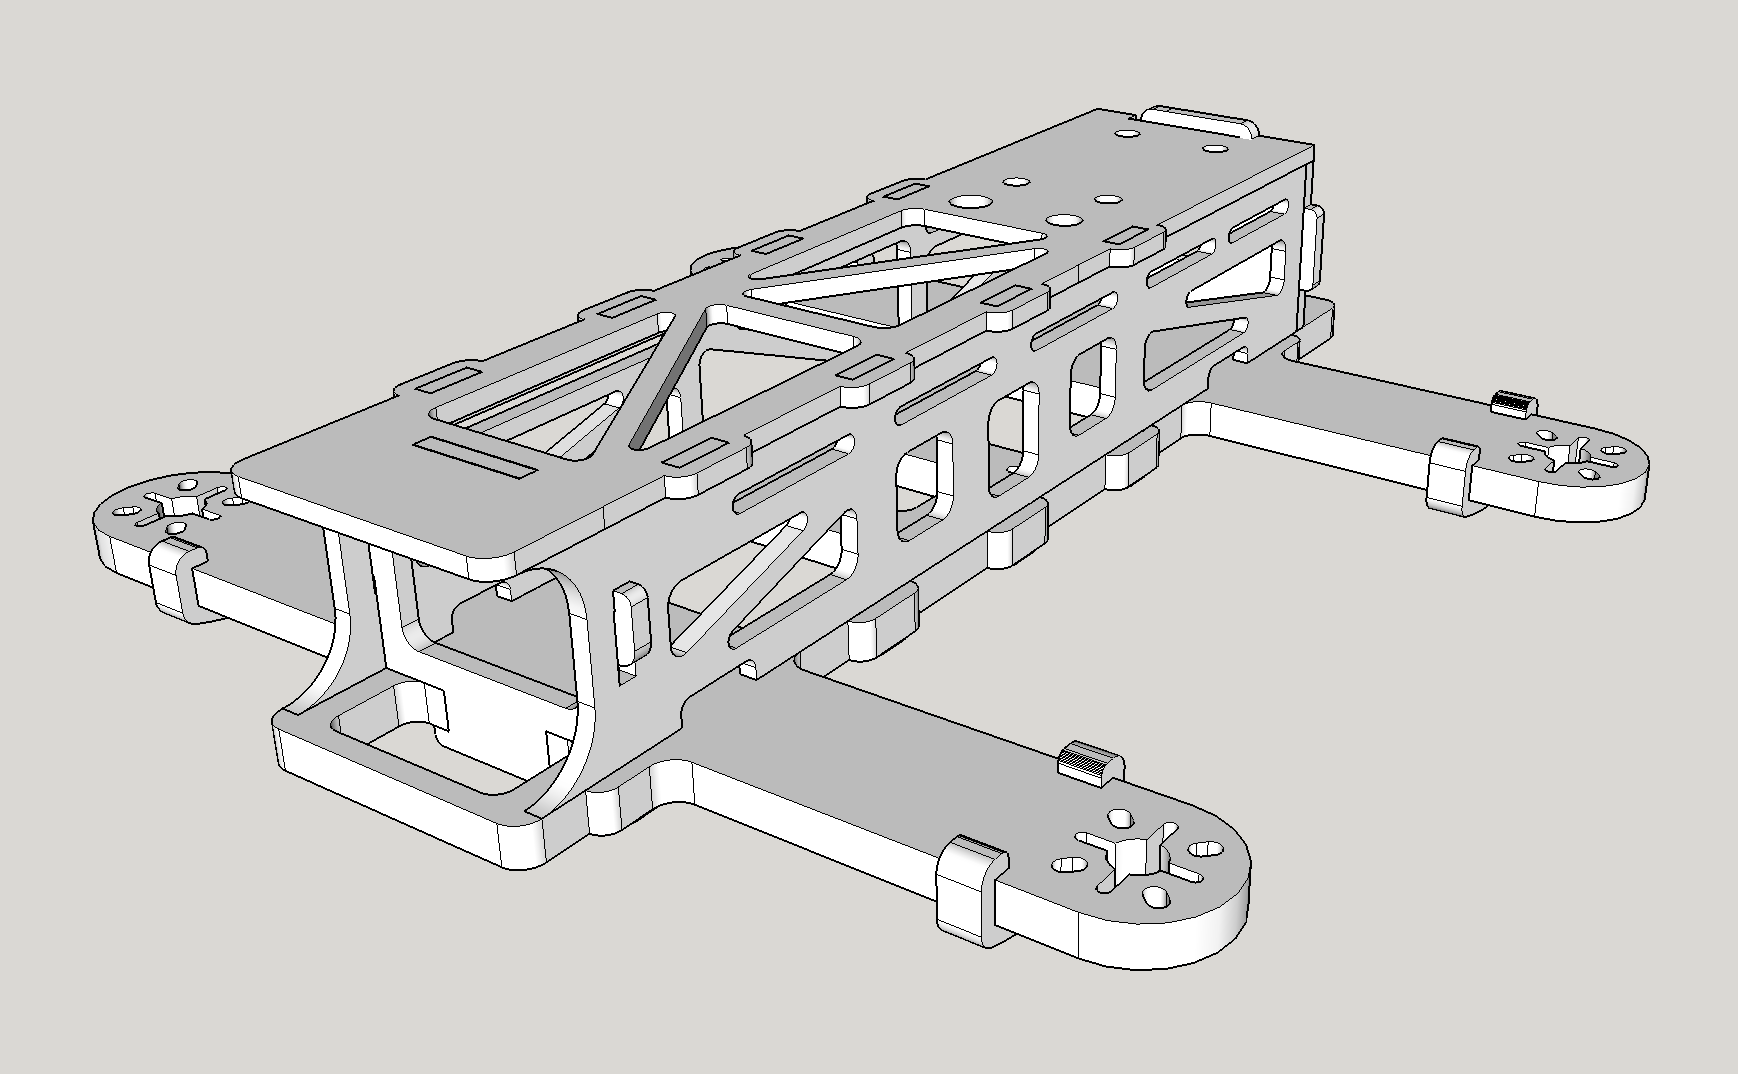
Here's the next revision of the Booboo, with a 6.7mm main body plate. The extra thickness of the main plate really aligns the parts well, making the whole assembly more solid. Weight went up to 105 grams, which is too bad but still very respectable. The lower trusses are now unnecessary and gone.
I think I'm one revision away from finalizing this. The fpv cam mount isn't going to twist into the body any more, it'll drop straight down so it can sit in tighter fitting slots. The side plates will get diagonal trusses to keep wires from poking out. One of the fun aspects of building this up is the fact that you can just throw the components in the enclosure without mounting them.
The top plate will get a nice decorative cutout. I tested it out without the usual rubber ball Mobius mount and the video was pretty good, so I'm going to lose those four rubber ball mounting holes. Finally, she'll get some landing skids to protect the hooks that protrude out of the bottom. Here's how she'll look, sans the decorative cutouts, which are added in Illustrator after exporting the basic outlines from Sketchup.

Finally, here's a quick video of her buzzing around to prove she can move on 3s. Though I meant this frame to be a cheapo beater she flies so well I'm now tempted to put Kiss and 4s on her.
Update 2
Working out production with the laser cutter turned out to be quite a logistical challenge. I wanted pieces to slot together without play, but the material isn't made to the exacting tolerances needed to achieve that. In the end I had to place a large order and have them pull and hold sheets of the proper thickness while we ran one test.
It's a good thing I ran a test, 'cause I mistakenly chose an older version of the side plates, one without diagonal trusses. There was also a stray line that cut through a support, if you enjoy Where's Waldo you can try to find it in the pictures.
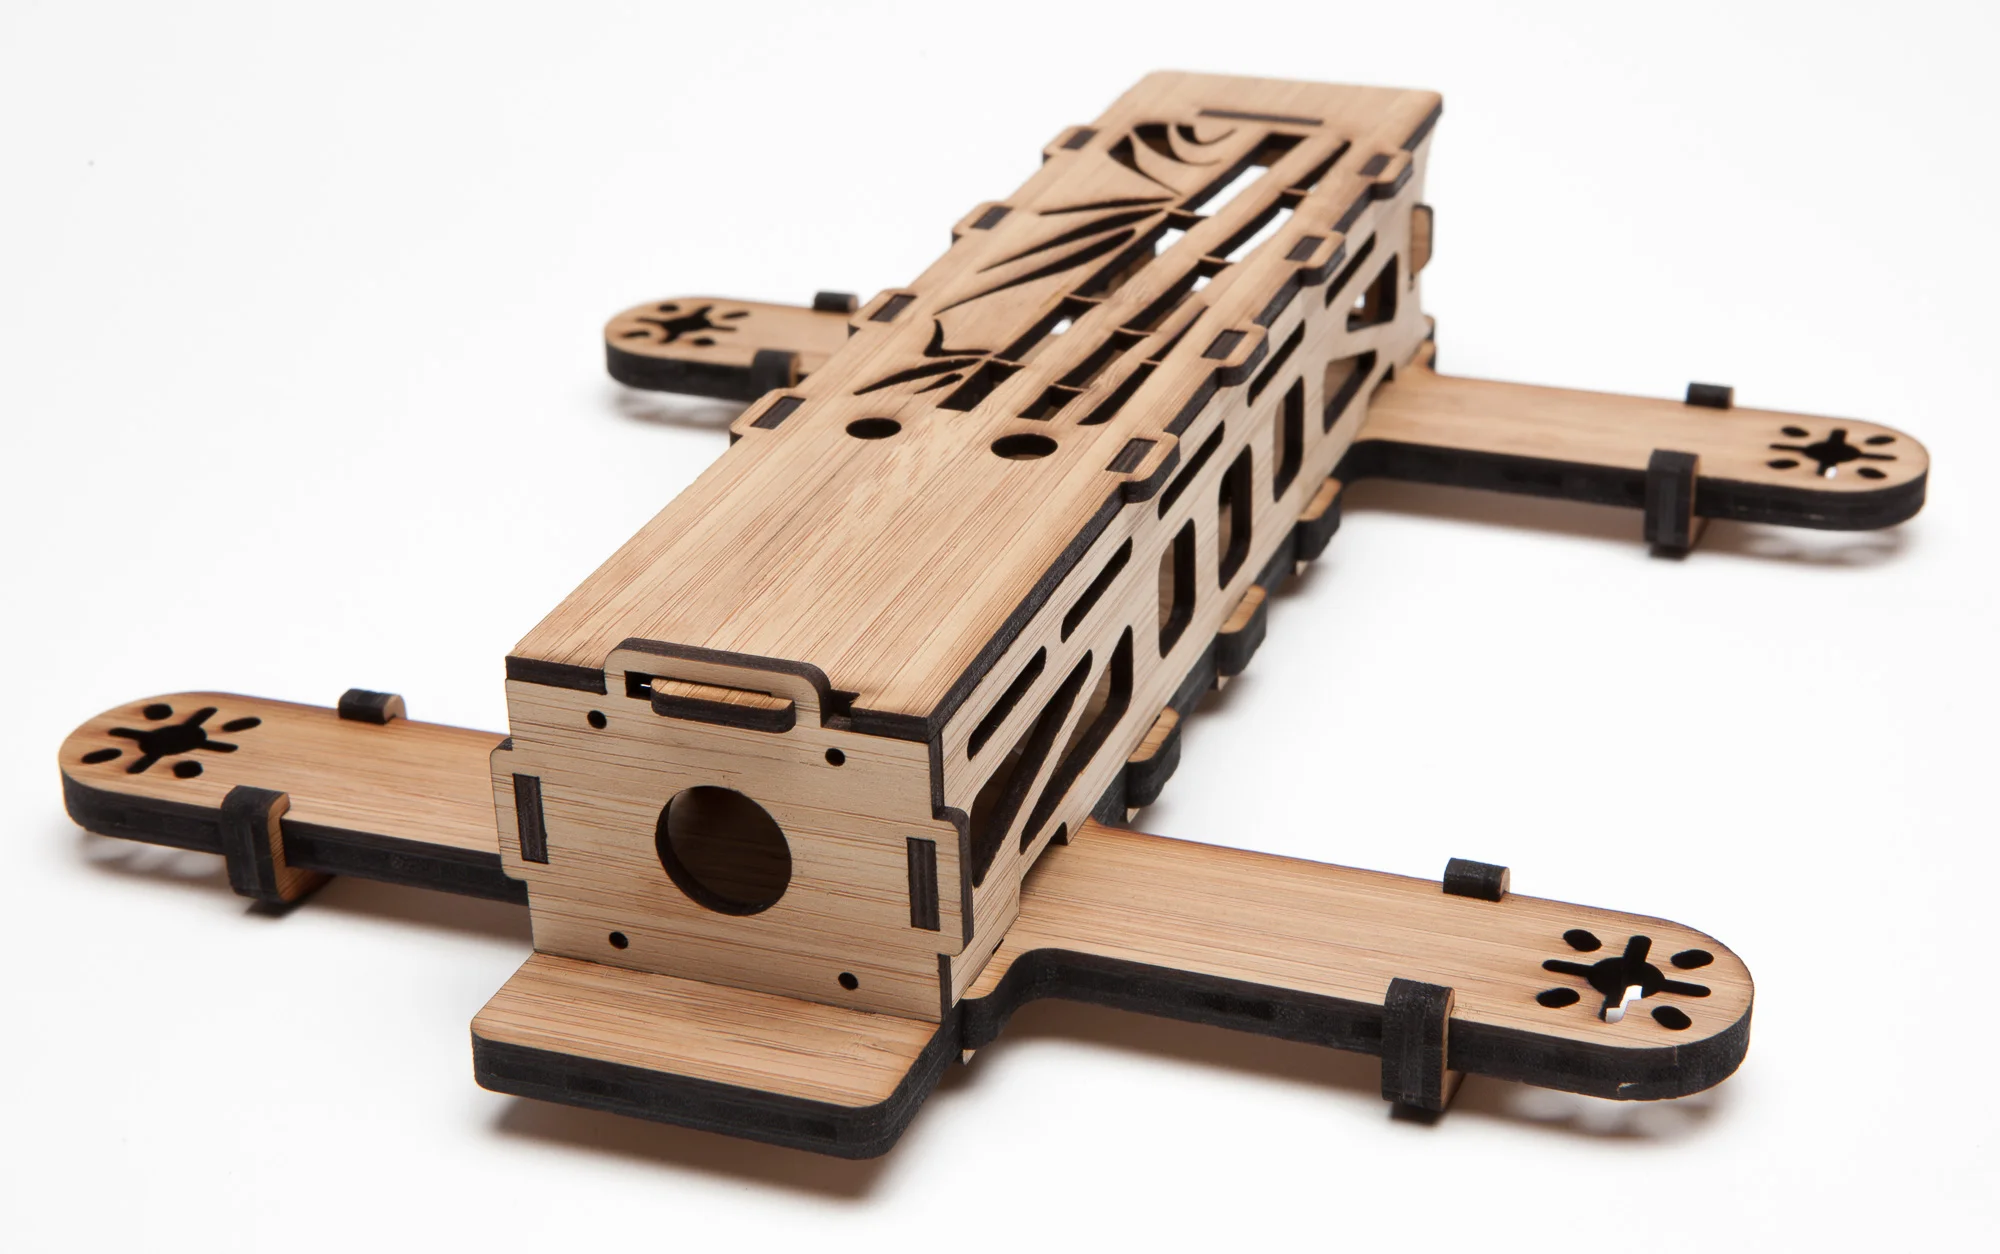
Mistakes aside the test turned out quite well, with most pieces fitting perfectly. The cam mount is way more solid as a simple drop in instead of a twist and lock. The best part was that once the parts started meshing together all the slop disappeared and the final assembly became rock solid.

With laser cutting the joints are almost perfect. The laser takes away .1mm of material, so you have to account for that to make things mesh just right. Some joints have one laser cut plane butting up against an uncut plane, others have a cut plane against a cut plane (so there's double the material loss in the interface), and keeping track of all that gives me a massive headache.
Here's the decorative top plate, a little Illustrator drawing I made.
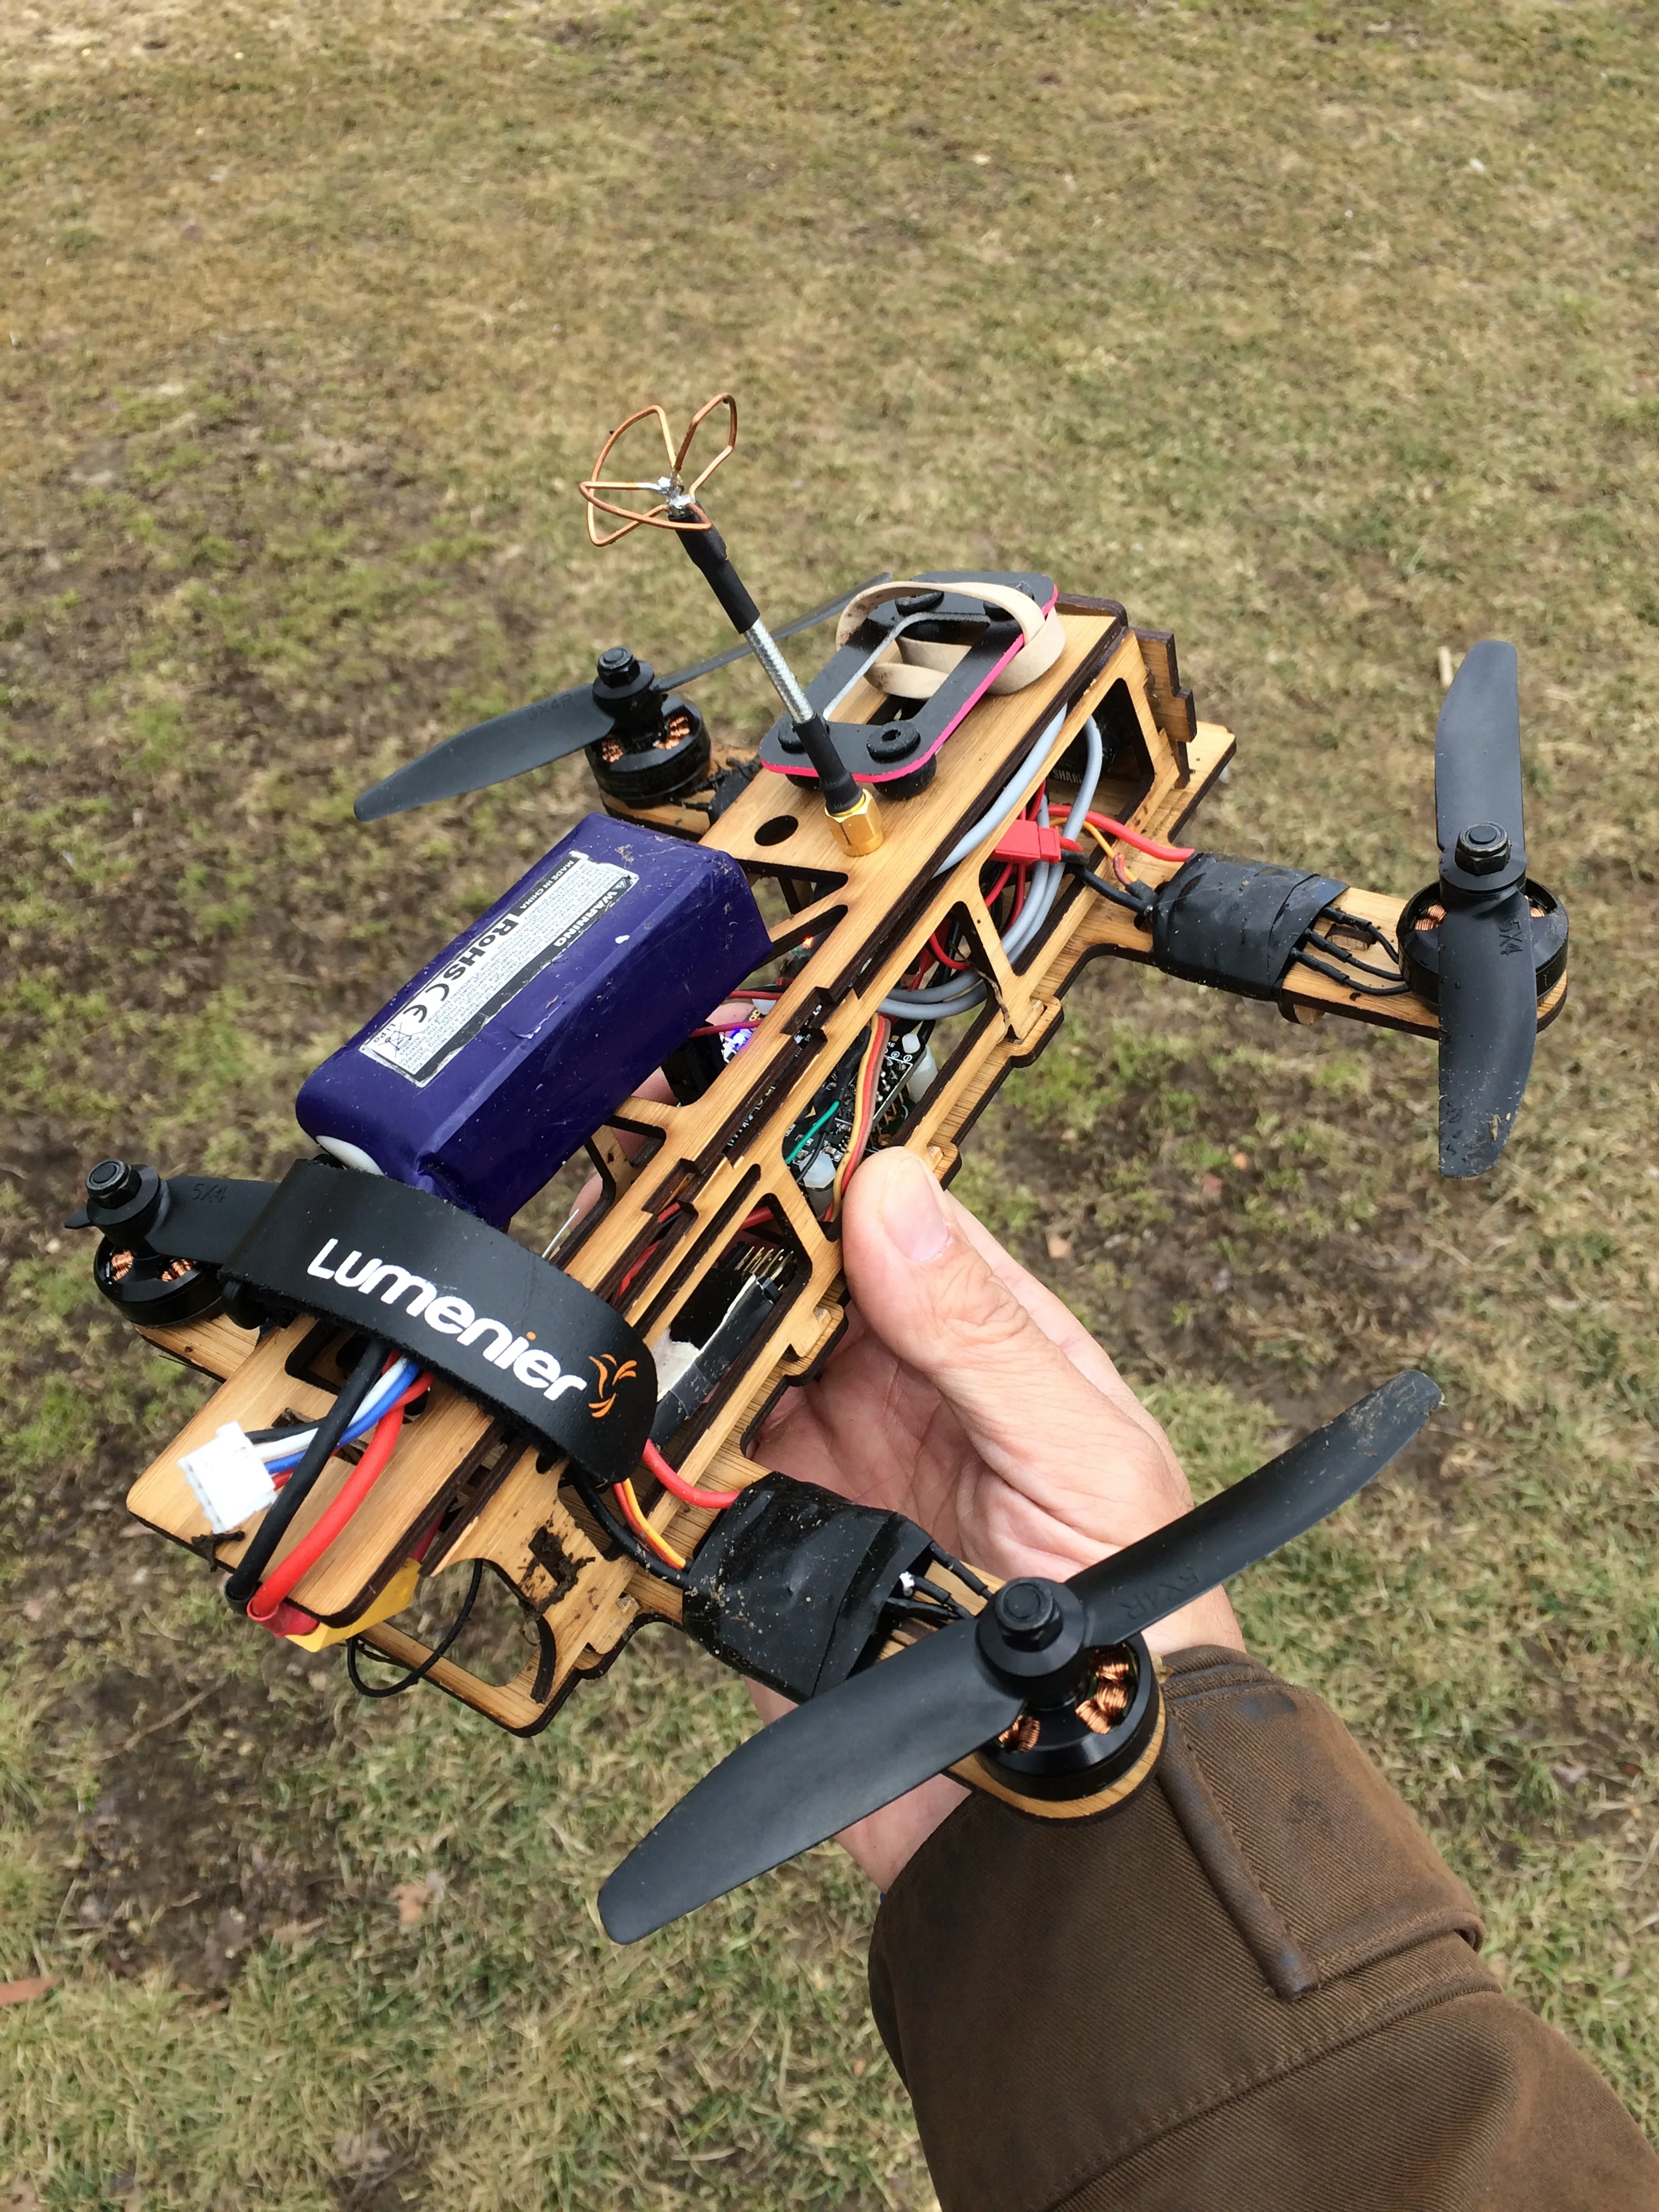
Finally, I found the side plates too flimsy. The tabs fit so tightly now that the force of assembly flexes it, so I beefed them up with more material overall, especially under the tabs. Aesthetically it's a step back but the tradeoff in strength is worth it. Time to order the first production run.
Here's a quick little video of her maiden on Kiss and 4s, not quite tuned and with chipped props, 'cause I'm down to my last few! She flies great!
And here she is, finally with a good tune, flying beautifully. Nothing like a well tuned quad, so relaxing. Video quality is quite nice, too, I went all ghetto and slapped some weatherstripping to the top, and that was enough to get jello free video.

Production
The first batch is in! Looking back, I got the original idea in early March, and received the first prototype March 13. With the first production pieces arriving on May 11th, this is my fastest production cycle yet (the Blast took a year!), but somehow it still felt like an eternity. If you'd like to own your own Booboo (and who doesn't want to have a Boo to call their own?) check out the store listing and build instructions.
Finally, here's proof that she's no different than any other mini in the air. Racing a Dronekraft Mach with 4s and 5x4 HQ's.
Thanks to Ty Darby for these videos.