
Ichabod
I have a terrible memory for names and faces, so it wasn't all that surprising that when I introduced myself to Gab707 at this year's NYCDFF Day of Drones, he had to remind me that we met at that very spot last year. In my defense, he wasn't THE Gab707 at that time. In the intervening year he'd become famous, landing a spot on DRL as well as creating a beautiful video that went viral in the real world, not just our little drone world.
We had a real nice chat, during which the physics major schooled me on some quad flight misconceptions. It may be bruising for the ego to be proven wrong, but it's great to learn new things.
And so it was that much more rewarding when Gab wrote to tell me how much he liked the Odonata, and would like to have one to shoot smooth but gimbal-less videos. I sent him the last remaining prototype and eagerly waited to see what he'd do with it – there literally wasn't a better person for it.
When Gab wrote back a month or two later he had a huge list of suggestions (he'd also hacked up my beautiful baby). I initially declined since the mods were too much work for a frame that I didn't think anyone else would want, but as we discussed it more I got increasingly intrigued by the challenge. His wish list was as follows:
Fpv cam has to have a unobstructed view even at 0 degrees of tilt. Both cams need a huge range of angles, all unobstructed. It's a video rig, not a freestyle rig like Odonata.
Flaco style arms for max efficiency, attached with just two bolts.
No pdb: either use an aio fc or 4 in 1 esc.
Little or no camera protection. As a video rig it should almost never be crashed, so lose the cage.
The Frame
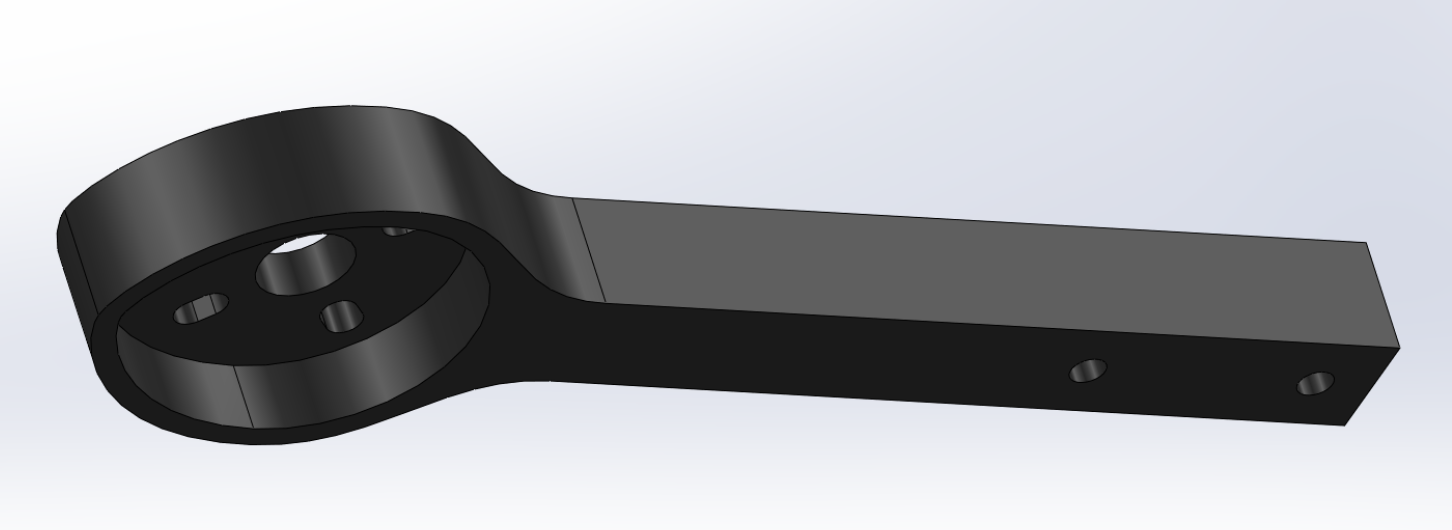
My first thought was to put the fpv cam next to the GoPro, a la the TBS Discovery. But unlike the Discovery, the cam would be in the same mount as the GoPro so that it could match its angle to give the pilot the best sense of what the GoPro was shooting. This would also center the GoPro lens on the frame. Additionally, the fpv cam would be allowed to pivot within the mount in case you wanted to fly with a different angle than the GoPro. And of course, both are unobstructed.

Two extra tabs on the GoPro style mount should keep it from wobbling side to side. The entire mount pivots on the frame, and the fpv cam can pivot within the mount.
6x6mm Flaco arms are really strong when you build the frame stock. Add a Session with the Zoompod and the arms break more often. My guess is that with the weight of this frame and greater length for 6" props, the arms would have to be at least 8x8. The three pronged GoPro mount is 15mm tall, so with a 2mm mid plate and a 3mm bottom plate, a 10x10 arm would fill that space perfectly. It might be overkill but I think it's a good tradeoff for strength and vibration resistance. The motor mount area will be milled out to 4mm to save weight.
With no cam protection, the nose of the frame would simply taper down to the GoPro mount, a sandwich of the mid and bottom plates with a 3d printed piece in the middle.

With such unusual proportions the frame was a bit tricky to draw up, and the result is just plain weird, but with a peculiar charm. The reason for its name should be obvious...


The very first flight was taken with the fpv cam at 0 tilt and the GoPro pointed slightly down, what I assumed would be a typical filming setup. As soon as it took off I freaked out. I'd been flying for so long with 45 degree tilt that 0 just felt wrong now. With the quad level throttle was way jumpier, and with roll and yaw reverted to their natural axes things just felt weird. I quickly landed it and gave the fpv cam some tilt, after which it flew like a normal quad. I'd been messing with filters and the quad flipped out on a flip, going into a death roll and a hard crash. The cam mount broke, as did the two main body plates, the consequence of using super strong 10mm arms, I guess.
I was using the GoPro tabs for the mount, but in reality you'd never use a GoPro accessory. I changed the three flanges to a solid tab, which should be much stronger.
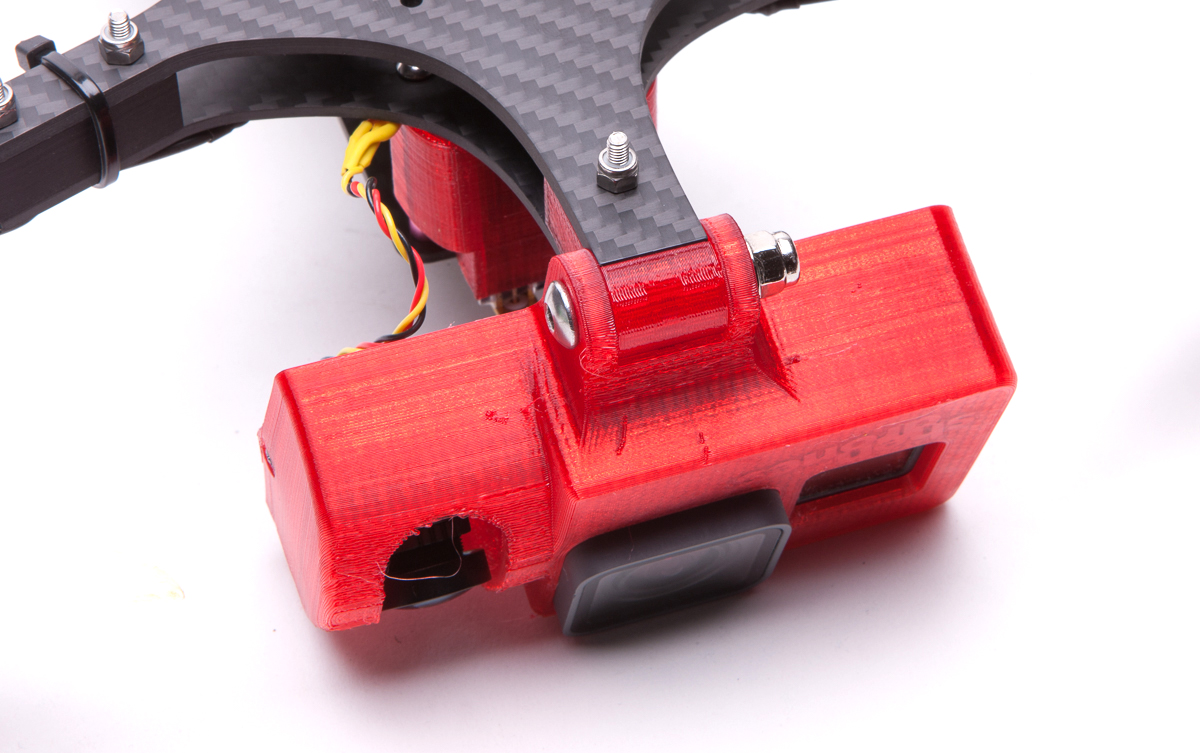
And here it is built up.


I gotta get some non-white props.
Then racing season kicked in, and this guy got pushed to the back burner, where it languished 'til Randy Slavin asked for one. I've got way too many builds so I offered to sell him mine built up, and he accepted but I had to murder it out in all black to minimize reflections.
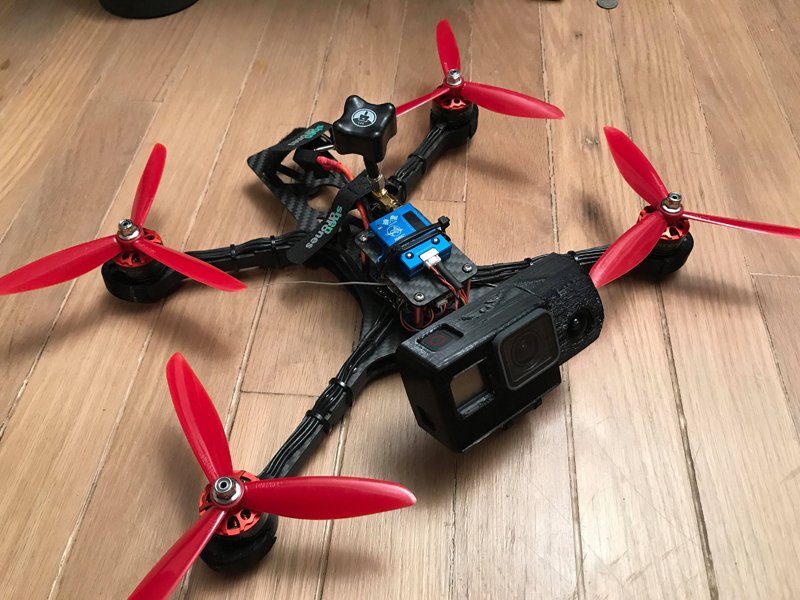
Randy requested a fixed angle fpv mount, since he always wants to see what the GoPro sees.
He maidened it with a Hero5 and had a little jello in the footage. I gave him some two bladed props, thinking he'd balance them and try again. But the next day he flew it with a Hero6 and triblades, and because he's a director, he made a cut. Keep in mind this isn't graded, but look how nice and clean it is. It was a little unnerving to have a 6" rig circling me for sure.
The Hero6's amazing jello reduction fixed the last little nitpick with the frame, so it's ready to go now. Gab requested more cam tilt, but other than that it needed no more changes. You can pick one up here. 3d files are here.
Nurk got wind of Ichabod before its release from Gab, so of course I got one out to him asap. Then he won another Ichabod by winning at the LADFF. This is the first video he made with it:
And check out Paul's overview of the frame:
But Wait There's More
I thought I was done, but by popular request I drew up a Session mount as well. No biggie.

Then one day Ryan Gury sent me this link, an article speculating on a DJI 360 drone. This got me to thinking about making a frame that would embed a GoPro Fusion in the middle. I can't make the entire frame disappear, but maybe it can be minimized by embedding the Fusion and having most of the frame in line with the seam.
Then I thought about it more, and it occurred to me that I can achieve nearly the same thing with the Ichabod and a mount laid out horizontally. I ordered a Fusion and started designing.
Now, I could use the standard GoPro mount on the Fusion, but it doesn't seem real impact resistant, and it leaves the Fusion completely unprotected. You can't add any thickness to the Fusion, so a mount has to wrap around its edges and grab it by wrapping around its filleted edges.
A micro fpv cam is small enough to hide along the side of the Fusion. A round slip-in tab can keep it in place while allowing full 360 degrees of tilt adjustment.


The micro cam press fits into its mount. That mount slides down through a slot into place, and the Fusion presses against it to secure it. There's a slot on the side for routing the cam's wiring, to keep it out of view. I got the fit to be very tightly after a couple tweaks. I originally envisioned I'd tape the Fusion in for some extra security, but it's so hard to install and remove I flew it as is, sans tape. Don't blame me if you lose a camera, though, you've been warned.
This mount came into being during the 'polar bomb' that hit the East Coast, so initial testing consisted of some hovering indoors. The frame was indeed minimized when the camera was mounted horizontally in-line with the frame, but that put the frame right on the seam. With the frame so close to the camera where parallax is greater, the frame ends up ruining the seam and calling attention to it, which is a shame since the Fusion is so good at stitching the two images cleanly.

You can make some of the frame disappear by lining it up with the seam, but the combination of near and far elements in the image makes for a bad stitch job.

I think the optimal angle for the Fusion is as pictured above, angled down slightly to get a little distance between the rear lens and the stack, resulting in no copter parts (except some of the front props) in the seam. This makes for a clean stitch and a clear view of the ground, where presumably the subject matter would be.
The quad flew nice and smooth with a 1800 4s, though without the pep of the power/weight ratio we've grown accustomed to on race rigs. Here's a quick first attempt at using the GoPro reframe plugin in Premiere.
I spent more time with the setup and learned a few things. The front arms are awfully close to the seam, and they're too close at some angles to make a clean stitch. So I extended the mount by about 1 cm, which put the seam clearly ahead of the arms.

See how the front of the motor messes up the stitch?
Then we finally got a sunny day and I got to see the full potential of the Fusion. It really does perform better with more light. Look at that picture!

It's hard to judge the picture quality with compressed video, so here's a screengrab.
So, this thing is kinda amazing. It's essentially a digital gimbal like the Parrot Bebop, but with full 360 coverage. With its built-in stabilization and the powerful reframe plug-in for Adobe Premiere, the possibilities are truly mind boggling. For example, a hawk dive bombed me one day, and with reframe I could do a fast and violent pan to keep it in frame after the fact. It truly is shoot first aim later.
Meanwhile, I like my micro cam solution so much I adapted it to the Hero and Session mount as well, so now I can easily switch between the three HD cams using the same rig.

But Wait There's Still More
I thought it'd be cool to use the Fusion to track another quad, so Randy and I flew a big loop together. We had a midair over concrete, and miraculously the Fusion, with its protruding lenses, survived without a scratch. Knowing that I'd be able to turn the pov to catch the impact meant that I was actually ecstatic that we had a midair. I dropped the song into the clip and the impact landed right on a beat! So lucky.
Then I had Control.fpv freestyle around it.