Mifune
A full aero racing frame
This post comes a little out of sequence, because this project began long before the Aeropods and Mako, but will finish long after they're launched. This project was the original reason I hunkered down and learned Solidworks, and was the very first thing I created with it.
The vision of a perfect aero miniquad is, to me, perfectly obvious. It's a teardrop shaped pod and airfoil arms aligned to the direction of flight. I sketched it out long ago but could never figure out how it could be produced without a massive budget. Aside from the fact that it'll require two expensive molds, its shape is the very antithesis of the simplest frame, four motors bolted to a flat sheet of something.

Then I started thinking about Kamm tails, where the rear of an airfoil is chopped off, but the shape still retains low drag values. Now, I know I can't make a proper Kamm tail shape, where the airfoil is cut off at 50% of its maximum width, but I can approximate it for some drag reduction. So the flat sheet can be the trailing edge of the airfoil, eliminating the other half of the shape and half the molding expenses, while providing a flat platform for mounting those four motors. Let's chop that original drawing in half.
My first thought was to vacuum form the top shell, and attach it to a 4mm bottom plate with...tape? It would work, but it would be super ghetto too. However, vacuum forming is relatively cheap and fast, and a mold could be inexpensively 3d printed. Pretty tempting, but a lot of effort to get something that won't scream 'quality'.
The next thought was to make the top shell structural, and find some way to attach it to the bottom plate securely. A 3d shape is inherently stiffer, so why waste that strength. And now maybe the bottom plate could be as thin as 2mm. I thought about arms that would extend just beyond the motors, and the two sides would bolt together there for maximum rigidity.
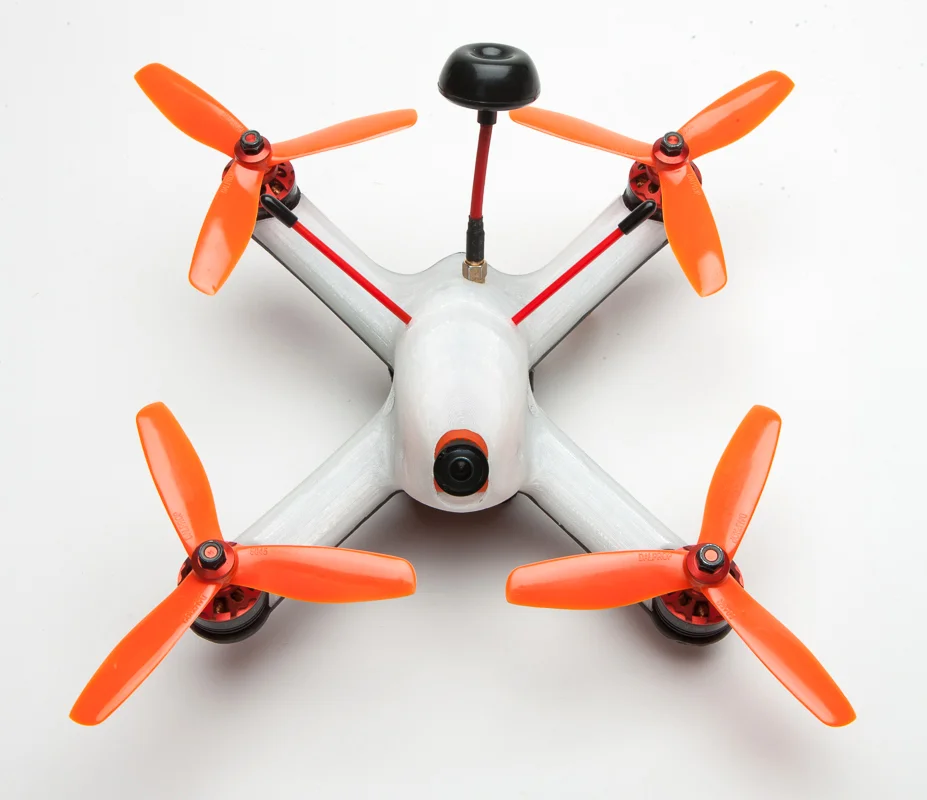
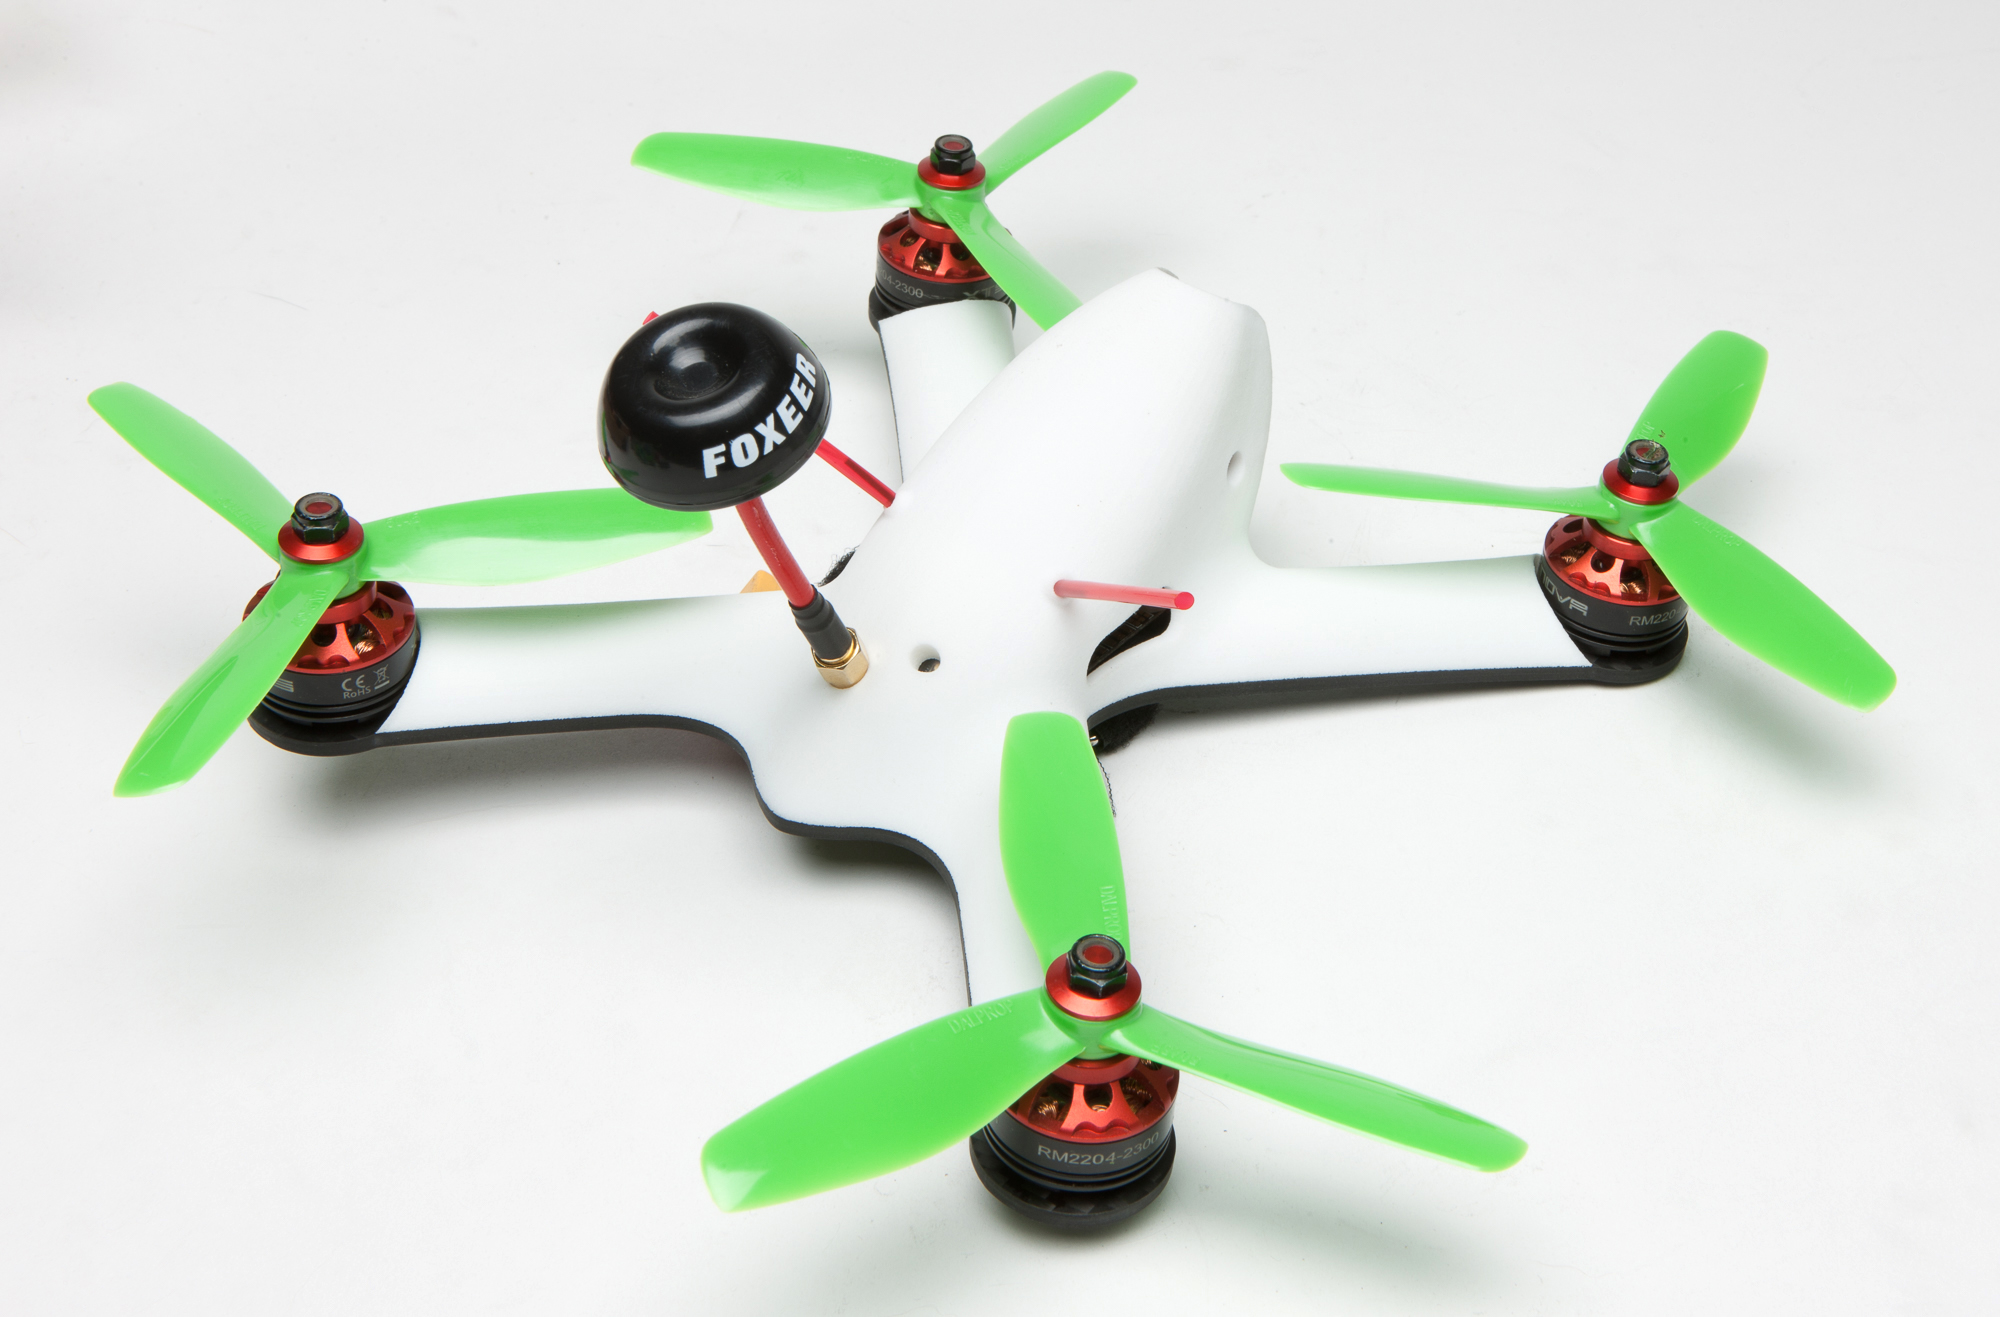
I started sketching and eventually arrived at a 220mm X quad with a slightly elongated fuselage, sized to shield a 1300 battery from the wind (Mako is the same size). The pod and arms were aligned to a 45 degree flight angle.

Anyone seen a missing leg anywhere?
Then I cut out holes for the motors, and worked out a way to have screw holes at the ends of the arms so that the shell would sit flat against the bottom plate where the screws attach.

Found it, no thanks to you.
This is looking real pretty and all, but savvy readers have probably spotted a major problem already. I sent out my drawing to be quoted and learned what I did wrong. See, I'm so ignorant of the molding process that I designed both the pod and arms with overhang, so that the piece couldn't be pulled off the mold. I tried to convince the factory that it could be pulled off at a 45 degree angle but they weren't having it, so it was back to the drawing board.
I redrew the whole thing with the leading edge at 90 degrees instead of 45. The silver lining here is that as a total Solidworks noob each drawing was a vast improvement on the one before. Here's the next one, shelled, with two additional mounting points at the fuselage, a flat mounting spot for the vtx antenna, and a couple of holes for the rx antennae. I opened up the motor cutouts a bit on the inboard side to get some airflow into the arms for the esc's.
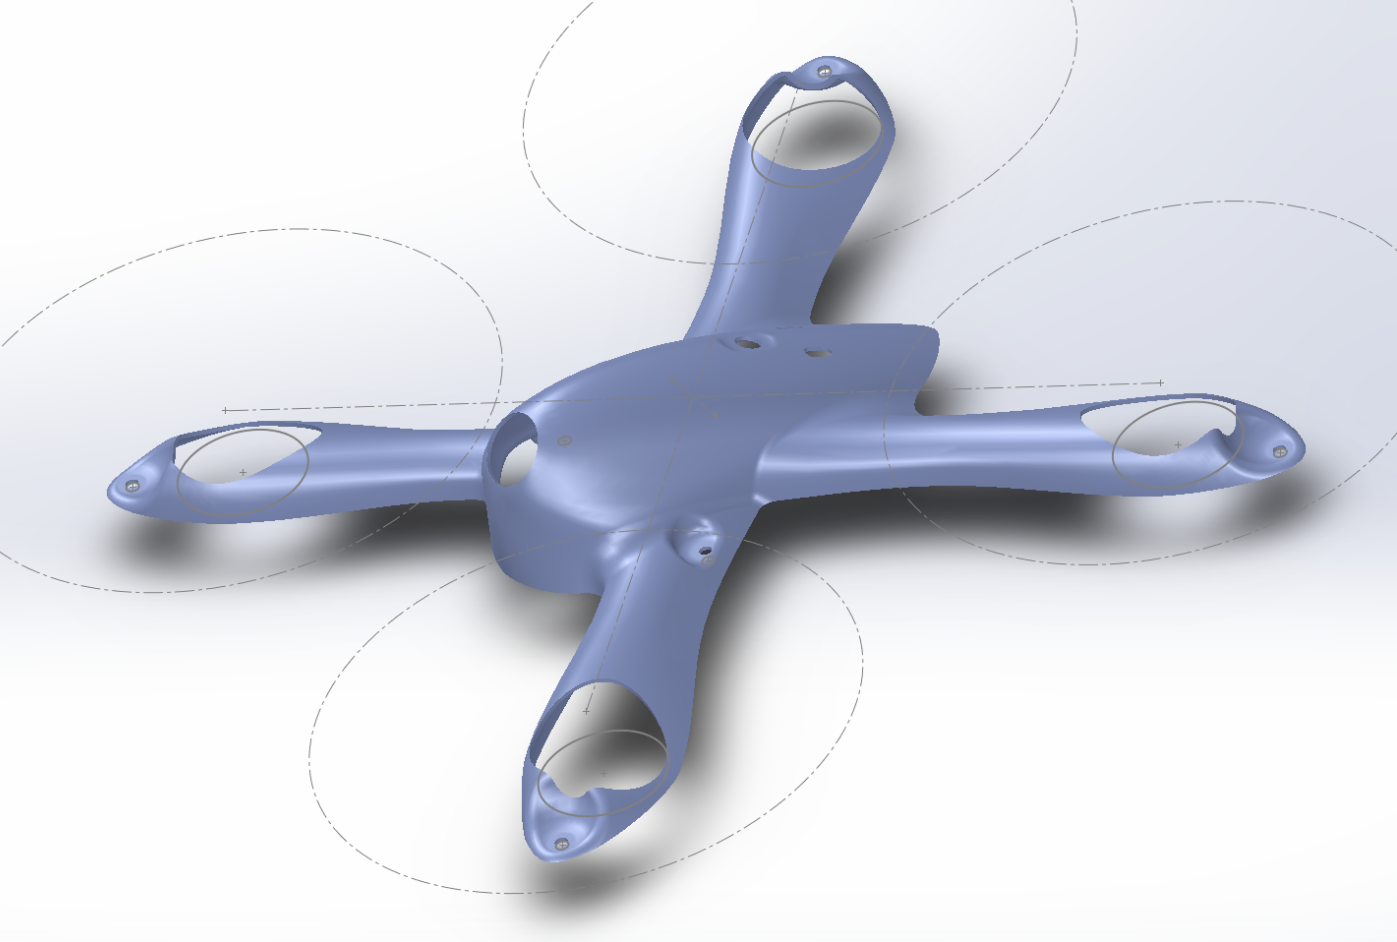
This was, um, a bit of a challenge for one's first Solidworks project.
Now I had a moldable part, and I submitted it on mfg.com for quotes. The range of prices was just ridiculous, literally from $2-150 per unit, with the mold priced from free to 10k. I selected the vendor with the most realistic pricing, who also happened to be the one who seemed to have the best grasp of how it was to be produced. Still, it was a lot of money and a huge leap of faith.
I was in such a rush to get the top made I didn't think much about how the components would go into the shell. My thought was that I could always mount the fpv cam with a hunk of fun-tak, and mount a Cricket or similar vtx on the bottom plate and run an SMA extenstion to the top. I had 2 and 3mm bottom plates cut and waited for the top to come in.
And waited. It took six weeks just to get the first blurry picture of the mold. In the meantime I released the Corgi and created the Krieger, Mixuko, Mitsuko, and Kriegerpus pods, followed by Mako and big Tweaker. I learned more about 3d printing and got my own printer, and got more and more sophisticated with my 3d modeling. Since the pods and Mako are 3d printed, I was able to design them with overhang. And I was able to have real camera mounting solutions, complete with adjustable angle tilt.
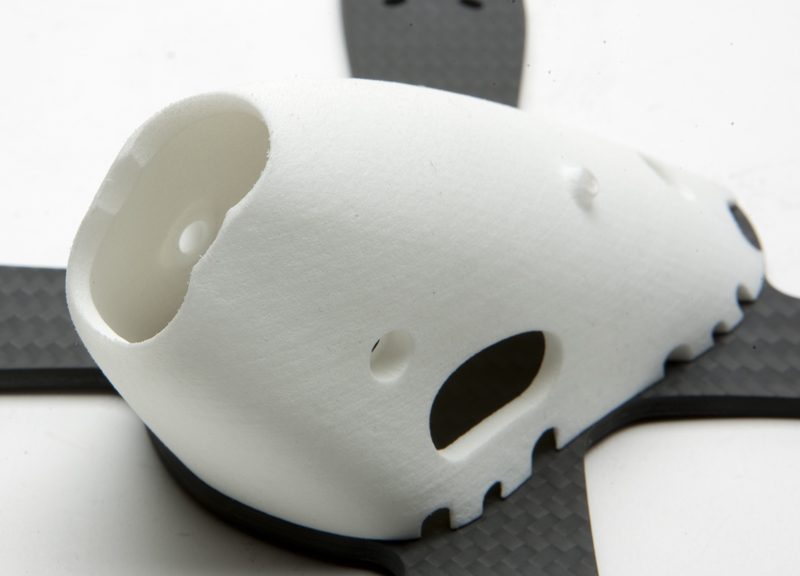
Then finally, after seven weeks, the first samples came. Now, this is the embarrassing part. I was so ignorant of the manufacturing process that I assumed that the factory was going to lay carbon fiber sheets over the mold and compress them as they cured in an oven, much like how bike frames are made. I had spec'd carbon fiber for the shells after all. What I had in my hands instead were injection molded carbon reinforced nylon pieces. They were light, seemingly impact resistant, but way flexier than carbon. I was disappointed at first, but once I bolted it to a 2mm bottom plate everything stiffened up.
The cool thing about this structure is that once bolted together, it's less about how each part resists flex, but more about how each part resists compression and elongation, and even a thin sheet of carbon can do that with ease. The 2mm version was plenty stiff once bolted up, so I ordered up some in 1.6mm. And at 97 grams for the 2mm version, it somewhat defies the conventional wisdom of aero being a weight penalty by making its aero elements structural.
But enough about you...
Let's talk about ME for a second. I've always admired great product design, and even though I put lots of time and love into my previous frames, they never felt like proper design. I mean, the Tweaker is adorable but you can't compare it to a Cervelo P3 or a Fender Strat or this Selle Italia bike saddle, or any other example of great industrial design. 2 1/2d flat plate design just doesn't hold a candle to true 3d design.
Now, to actually hold my first molded piece in my hands, I feel like I'm one step closer to true design. This is something DJI, TBS, or Horizon Hobby would make, not a little one man shop like me. I carried it around in my pocket and pet it Lenny style.
Building
I knew fpv gear would be hard to fit, so I assembled the quad quickly without it just to hover it. The build wasn't especially challenging, just the usual low stack. When I fired it up I was shocked: it sounded like nothing I've heard before, just the high pitched whine of the motors, without the low rumble of turbulent propwash smacking flat arms. I made this video a couple days later just to confirm that I wasn't imagining it.
It takes energy to make sound, and if you're making sound you're not making thrust. Could I be on to something?
I drew up a 3d printed cam mount that pivots the camera at the lens, so that there could be multiple cam angles but only a small hole in the canopy. Sadly it didn't fit against the fc, so at about 3am I gave up and shoved the lens in there with a hunk of fun tak. I had a vtx with a pigtail from FPV Ninja, and that worked pretty well. Finally the canopy closed down over everything and it was ready to maiden the next day.

I'm not necessarily a mean girl but I'm prettier than your quad. I just am.
Flo of FloRotoRs was in town for a convention at the Javits Center and was looking to fly in the morning. I met him at my usual spot, and after a few warmup batteries with Mako and Tweaker 5 it was maiden time. I had loaded pids from Mako and they turned out to be quite good (which is fortunate since I had no usb access!). It flew amazing right off the bat, smoother than anything I've flown and way more quiet. It even seemed to have less propwash shakes on hard turns.
After a few batteries Flo gave it a ride and felt the same way. Here's some LOS footage of him flying it.
So now I'm pretty frikkin excited, as you might imagine. Then a ninja branch reached out and took it down, and this happened.

Not so pretty now, are ya!?
Sooooo, concept half proven, execution needs help. Now here's something freaky, another in a series of crazy coincidences in my fpv life. I've flown with Flo a couple times at events, but this is the first time we've arranged to fly together. And it just happens to be the day I maiden Super Mako, the molded quad. And Flo just happens to work at a place that...wait for it...MOLDS MEDICAL EQUIPMENT. He was able to give me lots of advice on molding, and found a polymer used in medical applications that he thought would be ideal.
Later that night I was messaging with Ken Loo and I told him about the day's events. He typed this.

I'm constantly amazed by my stupidity. I knew in the back of my mind that Ken was a high level product designer, but it never occurred to me to seek his advice before starting on this process. I told him about the polymer Flo suggested and Ken offered to look into its specs. Turns out it's as stiff as ABS, but elongates more than twice as much before breaking. Great! I had the factory order some to make a few samples.
More Testing
I resumed testing while waiting for the new shells. I redrew the cutouts on the bottom plate and had some made in 2mm and 1.5mm. I rebuilt mine with Xnova 2204 2300's to see what the hype was all about. I also sent a frame to Alex to test. I built mine on a 1.5mm bottom, Alex on 2mm.
Alex's build turned out to be one of those cursed builds, as he went through 3 flight controllers, 2 sets of esc's, and 2 sets of motors. Turns out he was caught in a BLHeli issue with death rolls. I finished my rebuild at 3 in the morning before one of our Sunday meets and attempted to maiden it at our club field later that day. Strangely, the once whisper quiet quad now flew with a low roar from a mystery vibration. It also shook with more throttle. Alex was still trying different settings and he planted his into the ground a few times with death rolls.
Finally it dawned on me. Even though the frame is reasonably rigid with a 1.5mm base plate (thanks to its 2 piece design), that thin base plate transmits way more vibrations, . I rebuilt mine on 2mm and it flew well once again, but just to be safe I ordered some 2.5 and 3mm plates.
In the meantime the new shells came in. I took it out for some testing and promptly cracked one at the thin part by the motor, as well as the middle mount point. I redrew the shell to add some more material by the motors, and added a cylinder under the middle mount point so it bottomed out against the carbon.

Before the carnage.
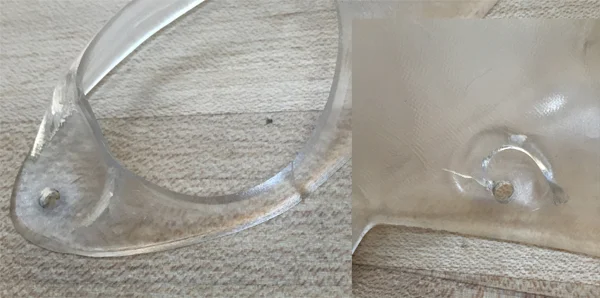
Still, it seems that my hope of having a structural canopy was slowly fading away. A thin carbon base plate just puts too much stress on the canopy, and it's not strong enough by the motor to hold up. The arrival of the 2.5 and 3mm base plates confirmed that suspicion, as they were both much more solid feeling, with the canopy now more of a fairing than a structural element.
I'd also been struggling with the camera mount, and as you can see in the photo above, I gave up and just shoved it in there with some Funtak (sticky putty). Then I discovered the Runcam Owl (thanks to the Raceflight guys), which is smaller than the typical 1177 form factor cam. I drew up a 3d printed mount and now she's so much less ghetto looking.

In my pro photog days I'd never have disappearing white props, but now that I'm my own art director I can tell myself to fuck off.
Meanwhile, Shapeways got in touch and gave me a credit for some free printing, 'cause every pusher knows the first hit is free. I used it to make a SLS Mako pod, and good god was it gorgeous. SLS is super clean and hi res, and the process automatically generates supports in the form of a solid block of powder so every surface is just perfect. There's almost no limits to what you want to design. Unfortunately it's far too expensive for Mako so I kept the idea in the back of my mind for a future project.
Jumping back to the injection molded shell, I spoke with the factory and attempted to make some changes. This would involve CNC'ing the mold some more, with more added expense. I wanted to make the outer parts of the arms solid, but the factory wasn't having it so I had to settle for just a little more thickness. I also made the middle bolt holes bottom out against the bottom plate to reduce stress on the shell. Then it was another 2-3 weeks of waiting while the mold got reworked.
These delays and frustrations got me thinking. This frame is supposed to be my flagship, but my design skills have improved so much during its production process that much of it is primitive in comparison to Mako. I mean, there's no cam mount, no antenna mount, no usb access...the whole thing is just somewhat haphazard, no matter how strong I could make it. So one day I sat down to draw an SLS version that incorporates everything I've learned to date, and at around 3am (everything happens at 3am) I got this.

I abandoned the mounting point outboard of the motors, since that thin area creates two weak points. The arms are sized to hold Aikon 30's, the hot esc of the moment, which just also happen to be tiny. The only other deviation from the original concept is now the airfoil on the arms are now facing more up than forward, in the direction of the propwash instead of forward flight. I ordered the parts and it was back to the waiting game.
Meanwhile, the new molded shells came in with my changes. I bolted one on, flew it, and snapped it by the motor. This was unbelievably frustrating: I can bash the center of the pod with a hammer as hard as I can with no ill effects, but the thin area by the motors just could not be fixed. I'm starting to think it's finally time to abandon this direction, despite the massive expense incurred so far. (Note to self: don't just dive whole hog into a new manufacturing process with no experience or knowledge.)

No, don't turn around, just keep looking at the water while I tell you about the rabbits.
The first Shapeways canopy arrived, whereupon I discovered the the fpv cam didn't fit. Maybe 3am isn't the best time for designing. I made the necessary fixes and re-ordered, and got this.


Notice how the lens protrudes? Yet another screwup.
So...I fixed the drawing and printed another one.

And then I flew it straight into a tree.

Meanwhile, I came to the conclusion that a 2.5mm bottom plate was a little too thin – the frame sounded buzz-y in the air, and it seemed like the FC was receiving more vibrations – so it was on to 3mm bottom plates only. Things looked pretty good so I ordered more to distribute to the crew for testing.
Testing
So the test samples went out, and everyone loved it, saying it was fast and quiet. Then just about everyone cracked the canopy. Flo hit a PVC gate, Dane had a failsafe from altitude, Malte hit a gate then a tree, Chris hit a chainlink fence. All were big hits on hard surfaces, but it was becoming clear that this material, despite its beauty and stiffness, was just a tad too brittle.
Meanwhile, a customer, Josua Benner, told me about a nylon filament, Taulman 645, that's conventionally printed, almost as stiff, but with far greater elongation. I soon found out that a local flyer, Pixelrotor, prints Taulman 619 all the time, so I asked him for a couple samples.
The samples were just as advertised, slightly flexier than sintered nylon, way stiffer than TPU, and strong beyond belief. I bashed them with a hammer and didn't even leave a mark. Looks like this is the material.
Taulman 645 is tricky to print. It absorbs moisture so you have to dry it out before printing, and it runs just a tad too hot for the ptfc tubes in my Flexion extruders. I sent some to Chris Griffin of Phoenix 3d to test, and he was able to progress quite quickly from a tumbleweed-like blob to a nice Mako pod quite quickly. The bad news, however, is that Chris' fleet of perfectly tuned printers can't handle the size of the Mifune canopy, so the saga continues.
Printing
Now the ball was in Chris' court. He got a few different printers to test, and built a feeding system that kept the filament dry. He also had to work out a way to keep the arms from curling up while printing. He even got Taulman's owner involved, so now we're sure we've chosen the right material for this application. Chris also made some suggestions for design changes that improved the print.
After much tuning on Chris' part I finally had this in my hand.


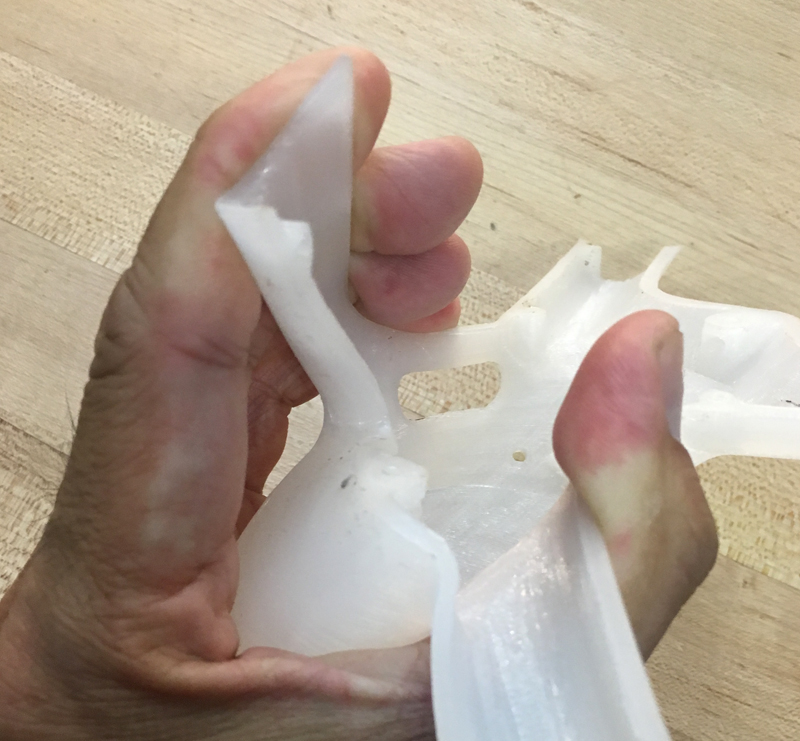
The material is exactly what I hoped for, rigid enough to strengthen the frame, flexible enough to resist cracking. You can bend the hell out of it and it just snaps back.
And check out the inside of the print. It's almost as smooth as the outside.
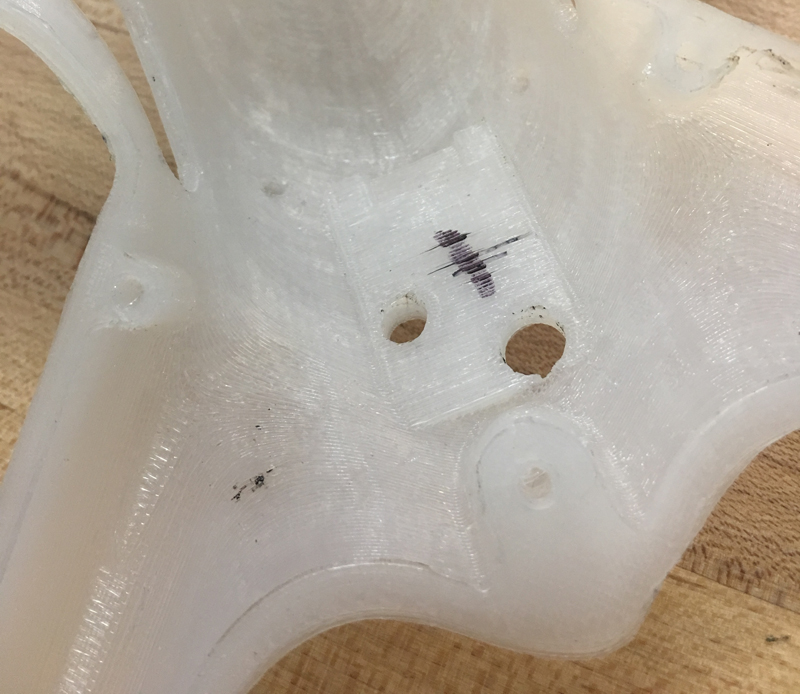
Griffin is the Print Whisperer.
And here's the obligatory hammer test.
The newest version flies like a dream, thanks in no small part to the spot-on default settings in Betaflight 3 (is it because Boris is flying a Mixuko now?). It's fast, quiet, smooth, just a pleasure to fly. The canopy is a great holder for the fpv cam, very secure with some dampening properties.
I'm told nylon doesn't take paint well, but it can be dyed. I remembered that Alex is so obsessive that he'll dye nylon hardware to match his builds (yes he's nuts), so I send him that test Mako pod and he did this:

Naming
I used to worry more about naming, and would bounce ideas off the crew before settling on one. But lately I've been thinking that this is MY operation and I should name things what I want, even if it might be obscure or hard to pronounce or not 'cool'. So I'm naming this baby after Toshiro Mifune (me-FOO-nay), who was to Kurosawa as DeNiro was to Scorsese. I sent Pam some pictures of Mifune from Seven Samurai, without any other direction, and she came up with this. What a pleasure it is to work with talented people!

So, is it finally over? Please? Chris picked out a printer and scaled up for production. I ordered the carbon. The store listing is here, I'm hoping to start shipping October 20th. I'm going to take a nap.