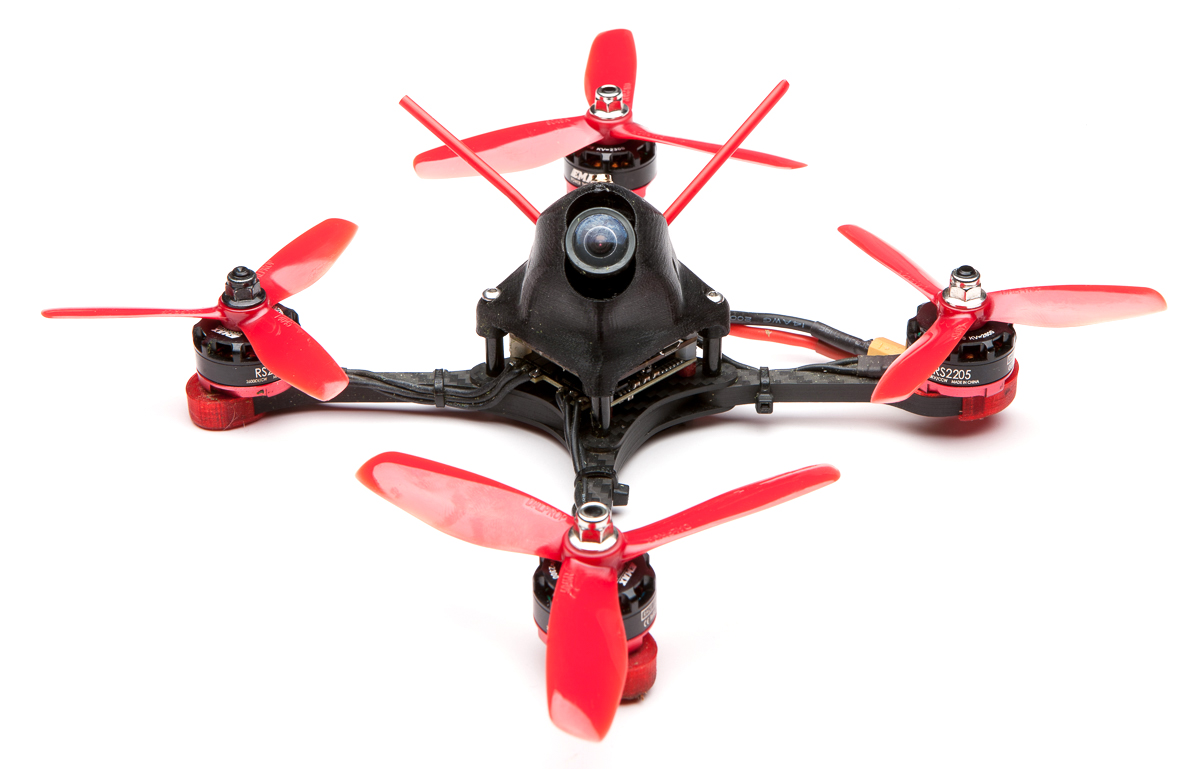
Arkangel
Arknabbit (Manny) flew Mitsuko as his primary rig long before we got to know each other, and he maintained a soft spot for the 4" plus frame even as frame advancements left it behind. Then he became a team pilot, and found the Rapture's flight characteristics to be a perfect fit for him – it was surprising for me to hear no complaints from Manny, since he's such an analytical pilot. So when he suggested making a long plus Flaco by mixing 5" and 4" arms to create either a 4" or a mixed 4/5" frame, my interest was piqued.
First of all, lazy me liked the fact that the carbon base was already designed – just mix the arms and turn 45 degrees. Enterprising me, on the other hand, relished the challenge of designing yet another tiny pod.
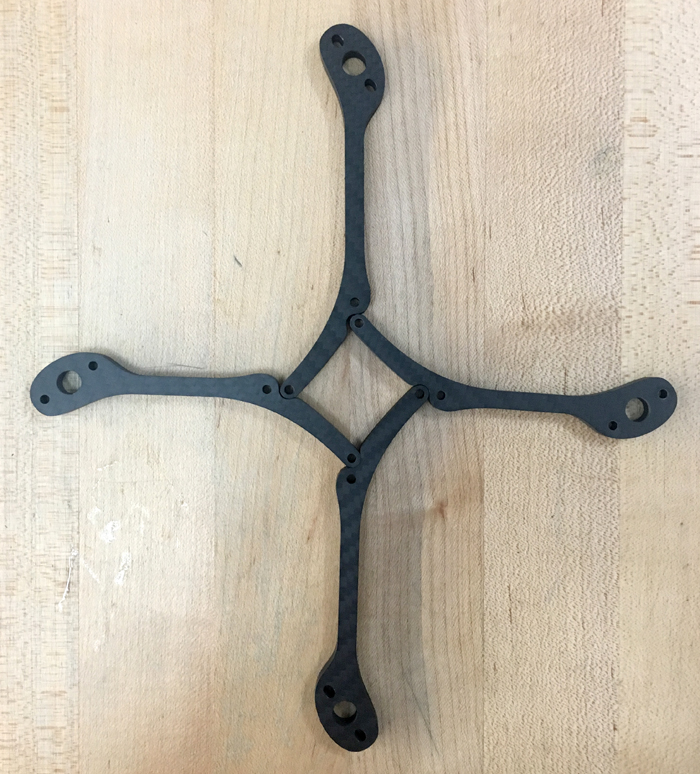
Lazy man's plus frame.
Pods like the Facegrabber and Wingsuit are the biggest Solidworks challenge for me. They go through so many twists and turns in a small space that it's very difficult for Solidworks to generate a good shell that doesn't fold in on itself. The delicate geometry also makes subsequent actions more tenuous, and often the part just collapses in on itself. My Solidworks game is miles ahead of where it was when I designed the Facegrabber, so I really wanted to see how well I could do now.
One of my first decisions was to raise the cam inside the pod. The cam extended below the bottom of the Facegrabber, which meant that 30mm standoffs were needed for the stack. Raising the cam within the pod makes it possible to use shorter standoffs, which should resist bending in crashes better.
The first crack was surprisingly quick and even decent looking. I printed it up and quickly realized that I had totally forgotten to make room for the back of the fpv cam. No wonder the lines flowed so easily.

Ooops.
Making room for the cam swept the middle way out, and now it looked like a sunfish.

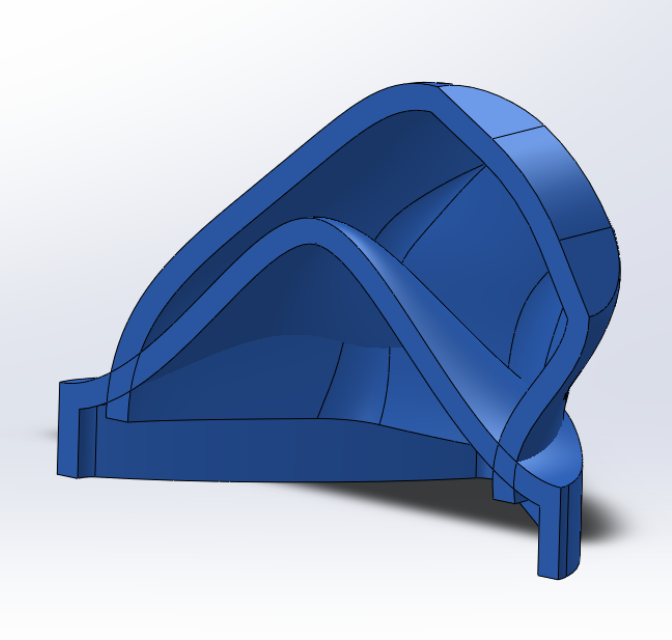
I hated how the sides were so much wider than the cam, but the compound curve it takes to bend it in is exactly the geometry that Solidworks can't shell. So instead I filled in that area to make it solid, and then cut a scoop out of it.

The result was a bit sportier even if it wasn't a terribly elegant solution to the problem. As I stared at the part I began to see it as two components, a teardrop upper and a diamond lower. Now it was becoming more logical to me. The teardrop shape makes more sense aerodynamically and it housed the fpv cam better, while the diamond lower is purely driven by the location of the standoffs. Maybe I could create two simpler shapes, shell them separately, then merge them. This way SW won't have to shell tight compound curves and I might have my robust file after all.

So that's a simple teardrop merged with a diamond shaped skirt, with fillets between to disguise the transition. It was pretty much what I set out to do, but the boys referred to it as the 'bulbous' pod and Alex asked for the old file instead, deeming it 'more aggressive'.
Now, as a rule, I try to design purely for function alone, with the rationale that when you perfectly fulfill function the part will be beautiful on its own. For example, I think the Rapture is the most beautiful thing I've designed, but there were no choices made along the way for looks. This part, however, wasn't cutting it, and the sad reality is if it doesn't look cool people won't want it.
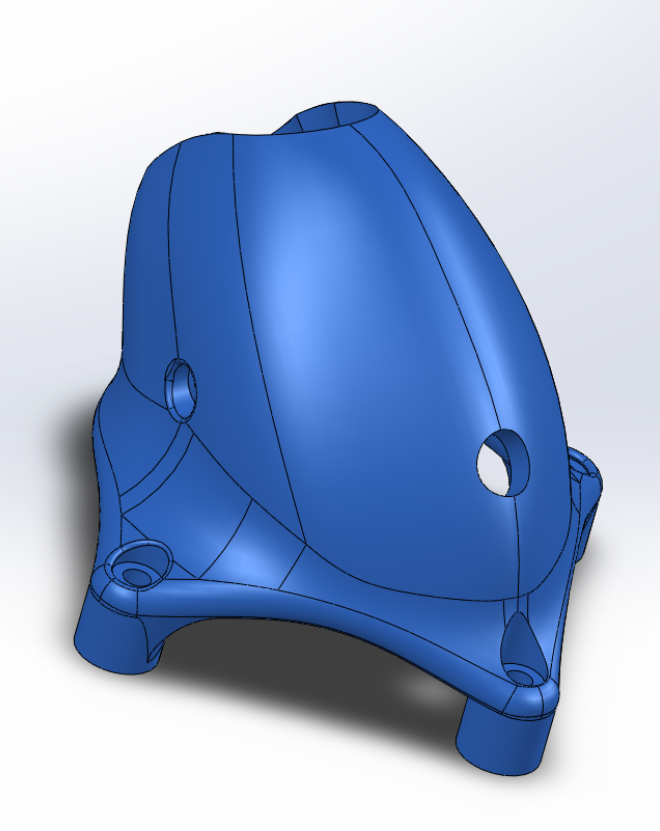
I began anew by making the sides of the upper pod concave, with sharp transitions that would be eased with variable radius fillets. I also didn't like how the standoff pegs butt-joined to the diamond, so I added a skirt to the diamond with arches cut out. Here's a rough step by step on the pod:

First I revolved a simple curve 180 degrees to form a surface, then thickened it.

Then I extruded the skirt shape, which is more concave in the rear than the front since the fpv cam is to the front.

The two are intersected and filleted.

Here's the pod started, note the concave sides.
The pod's filleted and shelled.
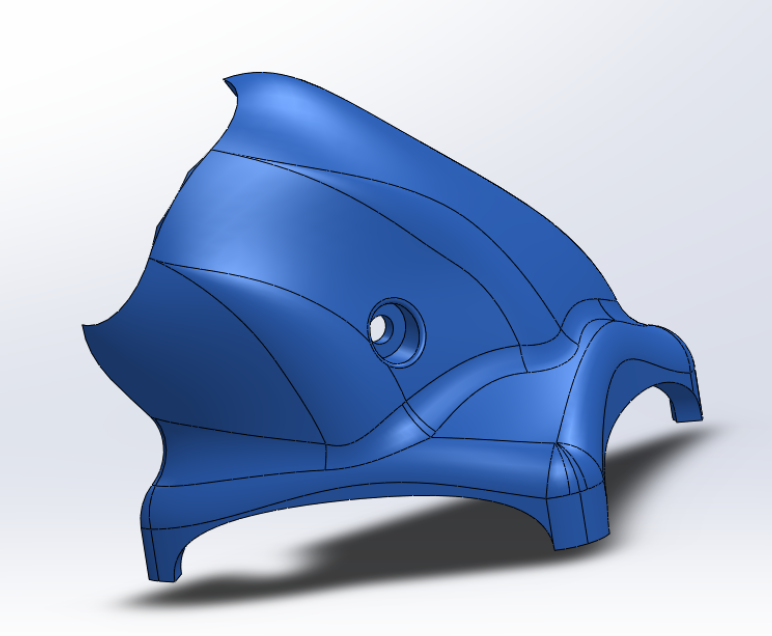

The two are intersected and the transition filleted. Arches are cut out of the skirt, lens holes cut, and cam mount added to the sides.

Pegs are added for standoffs.

Antenna tube holes and SMA hole added.

Mirror it and yer done! Piece of cake, riiiight?

Just a few iterations. Orange was the first, red the last. I thought it was going to be a nylon part but tpu is perfect with 20mm standoffs.
Back to the Frame
Manny had just recently reviewed the Emax Magnum AIO stack, and it seemed like the perfect setup for this. The build requires just 18 solder joints, and the whole thing fits in 20mm of stack. With the cam a little high inside the pod, Manny was able to use 15mm standoffs in his build.
One thing I liked about my build was that I was able to use leftover Red Bottoms – I didn't have four of any motor but I had two 2205/2300's and two 2205/2600's, perfect for a 4/5" hybrid build. The only problem was that just one of the four motors had a reverse thread, giving me one black nut and three silver nuts, a circumstance that will slowly drive me insane.


Downright spacious in there with the Magnum stack.
There's no spot for a battery strap, unless you want to mount it at 45 degrees (square battery?). I used two rubber bands wrapped around the side arms. With some velcro this should be fairly ejection-proof.

Yeah it's ghetto but it works...
My maiden went just fine, and it tuned a lot like the Rapture – pids had to be raised quite a bit 'til it felt locked in. Flight characteristics were a lot like the Rapture, which meant I loved it. I really think this layout gives each prop the cleanest air, which means it flies really quietly in the sense that the props sound quieter and the fc is having to do less work and so the craft feels very calm in the air. For me, this meant that I could slow this frame down for some tight flying (even with 45 degrees of cam tilt), something that I find most frames too nervous for.
Manny built his all 4", and he loved it.
He then rebuilt it as a 4/5 hybrid, and liked it even more. The hybrid setup gave him the top speed to match 5" rigs, with a little gain in flight time. I know I've done well when Manny tells me he's converting his fleet over to the new format. This is his new go-to setup.
Meanwhile, enjoy some Patient 0 quad porn:


The Last Piece of the Puzzle
We continued to debate the strap issue. Alex suggested an additional carbon plate to hold a strap, someone else suggested a 3d printed part. I kept insisting on the rubber bands. Then Chris (Patient 0) posted this pic:

Two straps?!?!? Mind. Blown.
So there you go, a pretty simple update for me, but a pretty fun and different frame. Preorder is here.